Lessons
Day 1
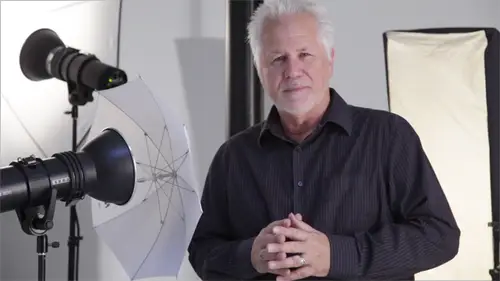
1Class Introduction
10:08 2Why Light Matters
35:34 3What Makes Good Light?
18:32 4Equipment Q&A
13:04 5Subject Centric Lighting: Bowling Balls
10:51 6Wizwow's Rope Meter
17:44 7Softbox vs. Shower Curtain (Claudine)
26:05Technical Q&A
33:07 9Light Modifiers
13:37 10Light Modifiers Shoot: Alyssa & Claudine
47:40 11Light Modifiers Q&A
23:25 12Subject Centric Lighting
25:14 13Subject Centric Lighting Q&A
03:35 14Shoot: What We've Covered
22:45Day 2
15Lesson 16 - 29 Introduction
08:41 16Reviewing Previous Images
20:21 17Placing Exposure
31:22 18Placing Exposure Q&A
11:43 19Emotional Lighting
17:58 20Shoot: Window Light (Brie and Alyssa)
42:11 21Working with Models
09:41 22Shoot: Window Light with Reflectors
06:20 23Shoot: Headshot with Hot Lights (Brie)
22:51 24Shoot: Headshot with Hot Lights (Alyssa)
13:09 25Shoot Q&A
11:15 26Shoot: Beach Lighting
27:47 27Shoot: Clam Shell Lighting
26:15 28Shoot: Beauty Dish
20:23 29Reviewing Today's Images
31:23Day 3
30Owning Your Own Light
13:57 31Telling Stories
09:43 32Shoot: Dramatic Single Light (John)
20:08 33Shoot: Beauty Setup (Natalie)
28:50 34Student Shoot: Tracy
13:18 35Student Shoot: Kimberly
15:18 36Student Shoot: Ian
16:53 37Student Shoot: Lori
16:13 38Student Shoot: Moe
05:54 39Shoot: Building the Ambient (Isabel)
53:48 40Shoot: Two Subjects (Briana and Natalie)
16:23 41Student Image Review
13:46 42Life as a Photographer
51:09Lesson Info
Shoot: Beauty Setup (Natalie)
have a seat right there this isn't a replacement you've been replaced sorry john all right we're going to twist you this way just a little bit and I'm going to change this up I hadn't thought about changing it but change it up just a little bit okay instead of having this slit here for a light I'm going to pull this a little bit wider like this and brett you're going to come right over here I got her to the back of that little opening no hot light on this yet let's bring that can you get it grab enough of that light I think you can and natalie and twist you this way right there good just like that and look at this internet we got a blonde all right there we go that's beautiful lots of complexity on the face of what you looking right out looking right out through that little slip of keep going keep going right there yes now we went from lots of complexity on the face on the left side of face we moved her into the light and a lot less okay how can we change this up to make it more natali...
e I'm gonna move this over to this side just changed one position bring that forward a little bit thanks actually bring it right into here folks I know we've just hidden it over there if you want to get up and come over and see what we've done here and john john take it just about about yeah and just about a half uh six inches up we kind of changed it up so now we're using the black too to give some negative on that side we've got this white card here going to come down through here try another test bread against fingers thank sir there we go way talked about earlier about um shoot through umbrellas spreading the light out well in this particular case that becomes a a good thing for us we've spread the light out this part of the umbrella that's storing like this way away from my my subject is actually lighting up my card so we've used it to advantage okay and that's just like just like that and when they're back to may come back and I want to thank you so two different told different looks right one on john the one on that like two totally different looks achieved with the same two pieces of equipment or three pieces I guess shoot through umbrella two pieces of card using the card's potential to create something large for her to to uh reflect has has the power now we don't have any uh um separation going on here but she's fully separated from the back there's no los why because she's blonde right the light just simply lights her up on brett where you were holding that card above her so you can see what he's doing I'm gonna do one shot with this above her and in one shot without so you can say let's twist it so we get us much of that umbrella light on it is possible we're not bouncing we're making it shiny one with and brett you could bring it down down down down down down up right there and then take it out and write there so you're going to see what that car does this a little bit of something with I believe and without should come up just second here you go with him without say difference easy to do okay so it's called owning your own light just understanding where we go two side by side memories were getting enough you know what we're doing we're getting enough probably off these video lights here at my exposure we are getting some nice edge to it says nice knows how pretty the for the for looks around her as well because we've added two things right we've added a light through a shoot through and we've added all this nice bounce toe one side to fill it in one light you don't have to buy another light by another one of these these air what's really important probably as important as any other lighting tool you have our sheets of foam core sheets of white board okay uh natalie uh let's put the uh got about fifteen minutes to break we have questions from the internet by the way while we're thinking about a set up here we always have questions right on questions from you guys here r v ol kurtz as asking uh wouldn't I get the same effect donna's getting now by using a strip box on my life or what I have to go use goebbels to get this no strip lights will work on you can you strip lights with go bosa's well absolutely depending on the strip light you know I've got three strip lights that I use one's about this wide ones about this wide and one's like a little speed light little westcott one that's about this wide that that may work I kind of like using the shoot through a brother of the soft box back there because it has a different a different kind of feeling and I do like the gobo is because I couldn't move him in and tweak that view now when you're doing a shot like that john if the position is paramount you could build this thing so john can't really lean forward or back more than an inch or two because any changes up the light right so you could be very deliberate and how you set it up and how you move through it yes all right um what we're gonna do after the break is we're going to work with each one of you to make a photograph you'll be tethered up I'll be working with you to help you make your shot okay um we're going to start right here and your subject will be natalie in the firm okay so start thinking about what you might want to do we're gonna have to shoot base and we're gonna go back and threw it one of the things I like to do it my workshops is I work with my students to make their shot I do not set up lights for um I've never done that at my workshops on a few ever been a workshop where they the target's heads up the light and then you stand there and shoot you don't learn you don't learn you've just got to get out there and do it so I want you to really really work with with may so I'll be your like first assistant and you a little a person sitting on your shoulder and we're gonna make shots so those of you at home internet you'll be able to understand how it is that I'm asking you to make the shots and how you can walk through it too so uh set up a shot at home and I'll be your little little bird sitting on your shoulder helping you as well so nothing else I think you guys know I'm done if I was a set up the sole is a type of thing with just one board up against a white wall nice and close when I get the same effect absolutely yes you can use white walls absolutely as the a main field card yes in my studio I've got a full code which means it's this way and this way curved up and back over so I can shoot up and I never go off the back there's a psych and a cove this is a cove sometimes I will it's funny because when I do this always think I'm being lazy really not it's just the lighting choice but I can take a light just hit the side of the cove and put my subject out here and now I have a light source that's about you know ten feet tall by ten feet wide coming in its most beautiful light you've ever seen and you you know you kind of go all is this cheating on then set up anything I just took a light against the wall but it works absolutely well yes yes another question uh was um it is from sue and uh s u m a can of black umbrella be used the same way as a white umbrella you talked about that the black backed umbrellas okay let's smash a myth or to the black on the back of umbrella does not make the umbrella more powerful I've heard people say oh yeah the black keeps the light from going through it and it bounces it back well like doesn't work that way first of all it doesn't bounce it back it's black if it did anything it would soak it up if you take the back off of black back umbrella and use it you get the same exposure as if the black is on it why do we put the black on it for two reasons we use the black on it to keep the light from over spraying and around and many times what you're saying I would go to this camera here what you're saying is you're shooting is this if this is not a black back umbrella you're actually shooting right into your light source and so you flare like crazy so the black back is a flag so the answer is absolutely makes no difference at all however if the black back is on it it really makes a lousy shoot through terrible just terrible question from from em pinto don is how how do you lose the shadow under her mouth the shadow under her mouth in which shot now that's a great question and I don't know if it's just in general how would I move oh that is the card from under that is a card from under neath her and it has to be angled so that that card gets very bright now in this shot over here I'm not seeing much of it but you would put it under her chin muchas I'm putting it under ian's chin this way because what are we doing the curve of the chin comes up and so underneath you're the lead my maid comes up so you're limp is actually reflecting what's down here we have to give it something white to reflect something bright to reflect makes sense okay all right wait just set up a real simple a beauty shot here and we're just gonna close out this segment by taking a few questions but just doing a real simple beauty shot and what I want to show you the difference between having the light and close than having the light and far away so we'll start with this where we got this on eighth power and its back that far let's take our string meter here and figure out uh there were questions on do you need to use a red string leader only if you're cool now you don't you can use white stream me meters and red string leaders and uh little bit closer john and we'll have her in f for she's at this particular not go over it again this knot which is the f ate not at one eighth power zoomed at fifty she's bounced into the umbrella I just got one rule right there it goes from the back of the umbrella yep yep back of umbrellas actually the light source so let's bring it in about another foot and a half thank you very much e move this back way yes goes back the umbrella there okay let's bring it down a little bit more okay um when you're doing a bounced umbrella I don't know if you're just going to grab me that umbrella quick spare one yeah when you're using a bounced umbrella with your spring meter it's the only tool that you use it for but when you're using a bounced umbrella you don't take it from the stroke you take it from the back of the umbrella because that's your doubt that's your new light source okay still kills two stops but you take the meter from the back of the umbrella that's where your loop goes doesn't go on the strobe everything else goes in front of this trail right soft boxes screams so we have to go from the source okay and we're just a little off from f four someone stay with three five we're going do one without thank you without the card below and then we're going to show how the card below adds the light really like working with wand here against black all right thank you tilted back right there good chin up just a little bit right there thank you eyes to me eyes to me right there take it out brett thank you last two will put side by side you'll see with the white card and without okay and you can see how simple this is we are using a bounce umbrella you saw how we got the exposure right we did the exposure of the piece of string one on the left is with the white card below you on the right is without the white card below do you see the difference under the lip under the nose to see right into the eyes you know you can make a big difference with a very small amount of change that's really pretty light for a speed light into an umbrella I'm not I'm not here to teach you how to do you know great lighting with cheap tools I'm here to teach you to think about light it's doesn't matter what tools you use ok questions all right let's talk about why you make some of these decisions why did I choose to light her with this umbrella on this for well part of it was I loved the fur and I love the texture of the fur and you can see what an umbrella light does you can see how it wraps and comes underneath and presents a really pretty light to the face if you want to try different sources what my suggestion would be to get us a subject get a model get someone with dark skin gets some with lights can get a brunette redhead harder to find these days uh and get a blonde and do shots with soft box and shoot through umbrella no bounce umbrella on a big umbrella in a small umbrella and do it spend a day a day doing these shots so that you can get an understanding of how they present put it in close pull it out far guys I wanna pull it way out here okay pull it in close put out far and you can make those decisions and you create a little like a little flip book that you have the review it it's not something that I want you to be methodical about okay don't do this and not get good photographs do this with intention of getting good photographs just sitting there and doing shots of somebody to see what the light looks that would be boring really boring really quick and you'll never go back and look at the shots so do it with something some subject that you're really wanting to get a shot of okay yep on dh where we about its five six so we're about about five five so five would go down to what for um two two point four were how do you know where we were before so where we're at so one two three four four and a half knots so this was this is this would be five by six so it would go down to forty two two point eight right and then I got to kill two stops you're one point eight one point for one point four yeah yeah wide open on this one point for ok doctor I asked you a question sure can um I didn't think about this when you first had the rope meeting uh the one eight power on a spiel is gonna be the equivalent of one eight on the stroke is that correct yes the reason I do it a one and at one eighth is you now have the power on your strobe to go up by going toe one quarter and one half and one without moving the strobe going up stop f stops at going down by going to a sixteenth and thirty seconds in a sixty fourth power so without moving your strobe you can go through all your f stops you pretty much go from sixteen all the way down toe you know two point eight without touching it okay the next time the next thing that you do is now you have the ability to move it in one string when not and start over again with those those settings so the knots are the inverse square law has the placement and they're not sir placed there by the power and distance of the light from the subject nothing to do with exposure were just measuring the power of the stroke yeah meaning for you looking like the einstein's the babies they have a slider on the back that ago eighth power thirty seconds sixty fourth but on this here like on these power packs here we just have these settings off full quarter and half and then we could run down and I think these air quarter stops between them so I don't always think in terms of a thor like on here but just find one setting somewhere in the middle yes you could start young somewhere in the middle I guess that's the best way to say it somewhere in the middle so that you can go up on my compacts I started that where the my little twister knob is right up at the top they say that's one on my three hundred's that's one stop down um and they're pretty they're pretty darn accurate most accurate I think I've ever seen are those einstein's you go down with my neman ultimate er you go down one click one tenth and power and you you see it right on the meter we were doing up there I was like I can't believe it's we go down to tix it went down two ticks on the meter is they're pretty amazing so you can control everything well you can see pull the light back a little bit with light gets a little flatter doesn't it notice the top of her head and her face are much more the same luminous that they were before the reason is she's farther back in the the distance so the light is falling off slower she's one point four from the front of her jacket all the way through the top of her head she's not changing an f stop when the light was closer she was probably dropping off about a half stop just because the distance of her face that's control that's your shot your way how do you want it to look it's not right or wrong is just is what it is okay so you have so much more control and and power over your life then you think you have just by how far away it is now this one far away with the bigger light's going to even be different questions saul you're nodding back there yes cushion from just our photog how would you separate blonde hair from a white background oh good idea let's clear that through that back there the way I do it is distance way I do it is distance so she is that's a white background back there let's just going to use that guys will just put it right where pretty much where brett is good and then we're gonna have you move it up close okay so the distance of this thing at f one point for is thank you doing beautiful shop is wow uh hold on no I will back this up just a little bit I think it's a little bit right but right about here way go here we go now we're gonna have white uh white background and blond hair and you're going to notice that the white background is pretty white why because our lights pretty far back from her and so this the slights actually lighting that up so we have almost a pure white background guys if you bring that in just about about a foot and a half that should do it should give us their weight beautiful blonde hair abuse that's nice the way I separate blonde here from back from a white background is I don't give her a hair light I don't put anything on the back of her head I don't want to speculate on top of the head because what color speculators they're white the last thing I want to do is put a speculum on the top of her head so I keep her a distance from the background so that I don't get a reflection from it so how far back is that it by feedback nice white background I always separate my subject from my background I have the luxury of doing that because I have a big studio so I can put my subject here and I put my background six feet behind her and put an umbrella on it major that let's talk a little bit about white backgrounds before we go to break what is the perfect exposure of white white so if your exposure of a white wall the meter says f eleven what would you shoot it at your ambient meter set f eleven that's an ambien meter it's this one it's over on the chair student is this meter here if this meter said f eleven he would shoot it at eleven because this meter says whatever is in the picture will remain right now I have read where people say well how do you get a white background well you take like ninety lights mount and just blow it out no you don't that's insane what happens if the backgrounds to stops brighter than the foreground what's that called has called back light he's called flare you're actually shooting into a light source and it's two stops brighter than the light here if I took we have pretty blond hair here if that background was two stops brighter than she is all those hairs right at the top of her head and the curls coming down would be gone they'd flare out they'd be missing in action so what I do is I take my reading of my subject or many cases I'll set my background first f eleven or f ate if my backgrounds f ate I know that I want my subject to be f ate so I'll light him separately to be the same thing then I'll go back to my background and I'll kick it up about a third of a stop a third of a stopover over just cleans up that white backgrounds makes it a little bit cleaner but it doesn't affect the edge every blonde hair wispy hair that she would have coming out in front of that white background would be visible if I go to a stop over that wispy hair is gone if I go to two stops over it flares back around the edges just for some light into it yeah you want to blow it out we have ah optical on that what's that this just yes we have a slave yeah yeah they want to see what it looks like blown out we can blow it out we've got a pro photo waken set it on killer man and we'll just have the show like be glowing and uh all right that's probably going to really blow it out alright good oh my god yeah we'll go ahead and put that up so you can see the dangers of making the background too bright I think we might want to bring it down a little guys okay I'm one way for so all right here we go all right this is this is the dangers of blowing it out this is probably too stops over you some saying maybe two and a half three stops over look at that we lost all of her curls and everything else to have a white background sure we do we absolutely do look at the past so when I talk about deliberate photography I'm saying be delivered with your background get it to be a half stopover or a third stopover or two thirds stops over or two stops over if that's the look here wanting there's knows no reason why I can't say if you're doing a portrait and you want that light to flare around maybe that would be really pretty with someone wearing all white maybe with blond hair and white you wanted that flare to come around it could look great so maybe you want to put it two stops or three stops over but you're doing it for your shot you're not doing it because you read something on the internet or you have no control over it you want to make light your happy uh butler you're happy servant is light you don't want to be a servant to light there's a hipper way of saying it but I'm not going to say it on tv but you want to make light your anyway here we go take it down just a little more okay good yeah can we go down one more we'll put these last two up next to each other just pull back yeah right there good all right there we go so now you can see these last two where we brought it down a little more and then we brought it down just a little bit more and you can see how the hair starts revealing itself but she's still seeing what's um burn out on the edges of the fur you control your life for every situation that you do and you'll have a much better opportunity of figuring out what to do when you don't know what to do if you don't know what to do how about this shoot it against white shooted against black try a light from the side try a light from the top try a light right from over camera instantly it doesn't matter about anything else if you don't know what to do start somewhere I think that's the key to getting over creative block is to not let it own you but you only and you say okay I don't know what to do so I'm going to do this better than doing nothing better than agonizing never share with your model your talent that you don't know what to do never do that just do something because the moment you start doing something anything I don't know what I was going to really do with john I kind of knew he wanted that sidelight didn't know what I wasn't due we did it we modified it we did another one that was kind of cool then we brought natalie out we said I will do this and we'll bounce it over here and let's bring the light back and we just did just improvising just having fun with it because I didn't know what I was going to do I didn't even see natalie in what she was wearing right now
Class Materials
bonus material with purchase
bonus material with enrollment
Ratings and Reviews
Cheryl
I just finished watching this course, and with teary eyes can say, without reserve, this class has been fantastic! Don's last session would be great to watch in the beginning and the end because it helps to understand his thoughts on being a photographer. The rest of the class is full of great information on lighting and Don is able to explain his thoughts and his processes with ease. I hope I will always think ahead and plan how I want my final results and how I want my subject to reflect light. Learning this was one of my "aha" moments during this class. I own over 30 Creative Live photography courses and this class is one of the top classes I own. I already plan on rewatching the whole class. Well worth the investment! I feel it is not a beginner course, but a intermediate to advanced one. Don has set a high standard in lighting...a goal to reach for...a goal that is possible for each person willing to take the time to learn and practice. Thanks Don and thanks CreativeLive!
Ryan Redmond
I am so glad I took this course. I'll be honest, it took a few lessons for me to warm up to this series but I'm glad I stuck with it. I have had a couple cheap speedlights, softboxes/umbrellas, and reflectors for many months now and was too intimidated to start using them. After going through this I am not only downright excited to use them, and confident that I can have spectacular outcomes, I'm also confident about shooting in natural light indoors and outdoors. It's also given me the tools and confidence to start shooting in manual vs aperture priority and to nail the general calculations in my head. I appreciate that Don used mostly budget or unorthodox equipment like speedlights, foam core, work lights, curtains, etc. because that's what I can afford and have been using to try to replicate expensive gear. Other classes use thousands of dollars in lighting and Don proves you don't need that for excellent shots. I also appreciate his advice for directing your "models" and insights into his overall process. This class was invaluable to me as a novice. Thank you!
Joanna
I thank very much CL that I could see the wonderful material on the light in photography, in fact everything became clearer, Don you are the great teacher, great stuff, very interesting and fantastic lecture, very helpful ! Thank you one more time !!!
Student Work
Related Classes
Lighting