Lessons
Day 1
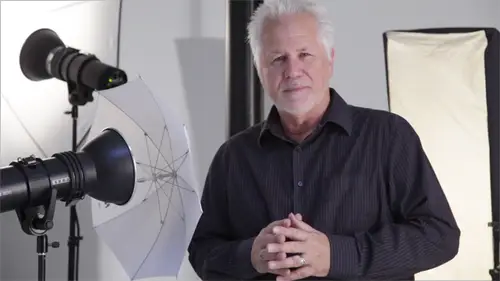
1Class Introduction
10:08 2Why Light Matters
35:34 3What Makes Good Light?
18:32 4Equipment Q&A
13:04 5Subject Centric Lighting: Bowling Balls
10:51 6Wizwow's Rope Meter
17:44 7Softbox vs. Shower Curtain (Claudine)
26:05Technical Q&A
33:07 9Light Modifiers
13:37 10Light Modifiers Shoot: Alyssa & Claudine
47:40 11Light Modifiers Q&A
23:25 12Subject Centric Lighting
25:14 13Subject Centric Lighting Q&A
03:35 14Shoot: What We've Covered
22:45Day 2
15Lesson 16 - 29 Introduction
08:41 16Reviewing Previous Images
20:21 17Placing Exposure
31:22 18Placing Exposure Q&A
11:43 19Emotional Lighting
17:58 20Shoot: Window Light (Brie and Alyssa)
42:11 21Working with Models
09:41 22Shoot: Window Light with Reflectors
06:20 23Shoot: Headshot with Hot Lights (Brie)
22:51 24Shoot: Headshot with Hot Lights (Alyssa)
13:09 25Shoot Q&A
11:15 26Shoot: Beach Lighting
27:47 27Shoot: Clam Shell Lighting
26:15 28Shoot: Beauty Dish
20:23 29Reviewing Today's Images
31:23Day 3
30Owning Your Own Light
13:57 31Telling Stories
09:43 32Shoot: Dramatic Single Light (John)
20:08 33Shoot: Beauty Setup (Natalie)
28:50 34Student Shoot: Tracy
13:18 35Student Shoot: Kimberly
15:18 36Student Shoot: Ian
16:53 37Student Shoot: Lori
16:13 38Student Shoot: Moe
05:54 39Shoot: Building the Ambient (Isabel)
53:48 40Shoot: Two Subjects (Briana and Natalie)
16:23 41Student Image Review
13:46 42Life as a Photographer
51:09Lesson Info
Subject Centric Lighting
the heart of it is of course again everything reflects everything these are some leaves out in the forest and if you'll notice there's hot leaves and not heart leaves it's because the leaves are wet and their reflecting the sun so even leaves in the bed of a forest reflect once we understand that they reflect you understand that this shot taken from the other side without the highlights on it not so pretty what makes it pretty are the highlights there's speculators of the sun reflecting back on the the water and the wetness of the of the things um this's ah simple shot in the studio we have two speculators in the shot the large speculator of the light above and small speculum in the eight ball when we have a speaker in the eight ball but we don't have any speculators in the wood because they don't give speculators to matt they're not there we don't even really have a ha hard highlight on the tops of the wood there so we see instantly when we see this we see texture and we see the true ...
value of this we know by looking at this photograph that this background is semi shiny that the ball is semi shiny and that these air not that we know but if we were to touch them they would feel just like we think they feel right kind of matt would the angle is where's the light behind the set and right above it so it's coming right down and bouncing back to me that is the light if this is the eight ball on the camera is here the light is here angle of incidence angle of reflection we did that this is what we did again with the bowling ball earlier I want to show you with color and added notice we see the purest speculator on the black ball and we see no detail same speculator on the orange ball but we see some true value of the orange the true value of the black cue ball are eight ball the true values black so we see what it isthe question I asked on the all the workshops and always get funny stairs what's the perfect exposure of white in your photograph what color would white be if was perfectly exposed in your photograph it's not a trick question eighteen percent white be white a perfectly exposed white something in your picture would be white right kind of like who's buried in grant's tomb if you've seen the picture of the video of the woman where the husband's asking her how far they could how far they would go if they're going eighty miles an hour she can't figure it out from the life of um and of course the white ball we see the speculator but it fades right into the true value of the white all have dark front circles but look how they deal with the light differently so subject centric lighting means understanding the color and the texture of the light we use certain terms we use a speculator I call it true tone or true value and the shadow areas I call it the true tone of true value this is the subject itself that's a speculator it's not this styrofoam head isn't that bright that's the life source making it that bright it's also not that dark that's the shadow this is the true value of that styrofoam head so I have these three different areas but we all also have transitions between them here's the same light with a very shiny black plexiglass head same light as this one with this one the way we see depth is what shadow weii we see dimension is shadow on the way we see dimension here his highlights so we do is we take the the shiny black head and we surround it with cards so that what we're seeing here are all reflections of white cars I'll show you this set this is what we call inefficient surfaces we should stop your efficiency on your surfaces how smooth and how much light will reflect from the surface of your subject ah glass bottle is very efficient sand not efficient sandpaper not efficient odd old wood table top not efficient until you get it wet very efficient so here's the the head with light panels all around it so that it would reflect that that's why I say you can't bounce light because if I get bounced light I should be able to bounce light into a black plexiglass face right but I can't I've shot with clients and I'll say wow that dark felt hat is too dark can you put some more light on it well yeah I could put another stop of light on it they wouldn't change the look of that black felt hat one bit because it's a black felt hat now I could overexpose it put three stops of light on it but then what happens to all the stuff that's around that black felt hat there now the three stops brighter doesn't work that way you have to think about your subject and back in a matter of fact they used the black felt hat that's a real story it's a real job how did we solve that give it something to reflect back she brought a big white car down from the top of the set right into the top of that where the camera was very bright and it was just about as big as the hat and it gave that black felt rim just on the curvature something to reflect and that's all we needed toe do for the client speckle ir spec color we got that speaker and we got there reflected light the speculum er is the reason is the reflection of the light source that's this guy right here it's a soft box that's a fil card noticed that the card cannot be brighter than the source you're really only gonna have one speculum and everything else is going to be a a highlight or a reflected highlight or what I uh I'm not coining this term and I'm not using this term or trying to invent it but I call it a secondary speculum okay and that is a reflection of a very bright surface outside the main light secondary speculator or highlight whatever you wanna call it but you can see this can never be brighter than that and if we look at the setup we see the strip light providing this that provides this and then I got a white card can just barely make out that white card right up here you can't see it because it's tilted away from us that white card is there for what where this turned up it had nothing to reflect so what it did was it just went black there was nothing between the soft box and the ceiling there was nothing up there so it just went totally black so I had to fill that space in with that white card it's just sitting right on top of the soft box so that there's no break just fill it in otherwise it doesn't happen now this is product photography that's fine still works with people still works with people if you're shooting folks you've got to know where that light's going to be coming from and that's why I keep saying think subject out look at your subjects say what do they what do they say what's happening around them this is ah glass of the fake ice and this is what typically happens with glass shots we've lost the sides we don't have anything for the sides to reflect so the glass just fades off into the background is very un interesting if we to put two cards to the back of the ice because I'm shooting from here they're back behind it they light up get those to be bright they light up and now we have edges to the glass we don't need to make these things you know two inches deep wide we just needed to make something happened so that the glass didn't fall off and become invisible the front car doing down there was a card of front right okay go back here see this israel dead in here thank you so much brighter is yeah we're just opening up this part of the glass curves a little bit of crystal so just providing something for the front of this glass to reflect doing it a little bit here is some of what you're seeing here is the light actually coming in from the top and bouncing around inside that glass itself the facets of it and here we're giving it some highlights of the exposure hasn't changed my way it's the same explosion all the way through no f stop or apple changeable now doing one shot headline uh one shot headlights one like headshots wow okay I'm not a reboot here awhile with me corona in this town I'm sorry reboot juice here we go we're gonna notice the board over the top we're using a single light out front right that light is coming out to our subject our subject has very dark black he's got a little gel in his hair kind of jelled hair and it's reflecting the top of the studio back there so I got nothing but if I had bring this white card down and notice that's flat what am I doing I'm not trying to bounce any light anywhere am I I'm just trying to make something really bright behind his head so that his head will reflect it that's a cloud in the sky for instance or that's if you're in the shade and you got beautiful highlights because the open sky that's what that is that's what that is right there is just something bright to give me a little bit of hair light not glamour shots type a headline here leiter where there's what's called what's it called you know where they put the hair light behind the person and blow it out kind of thing I'm not really much interested in doing that it's not a look that I like but I like this because I didn't want that to go totally black up there with no detail it would be terrible yes yes we see the texture of his his spiky hair yeah exactly I used one light on him because I wanted that that soft box to give me the texture of this this jacket right in here and also because of his features to kind of sculpt him a little bit with that shadow remember I was saying earlier with men you can do so many more things you could give him shadows and you khun sidelight him and stuff that you really wouldn't necessarily do with with women the lights also a little bit higher than I normally would shoot a woman so we're dropping some light down under his eyes okay here we have a shot that shows us kind of all of it together have a strip light right above the bottle which you can see perfectly reflected here absolutely excellent and with the front of bottle the true value of the bottle full of noodles is too dark that's not gonna work we're gonna have to fix that the way we fixed it as we brought a phil card up from in front so sticking up in front of a bottle here is nice bright phil card the overall exposure is a little bit too dark but I do like the way the cap looks in here I like all this remember I told you like the little detail and speculative itself really is fairly right we're just eating up the whole shots just being eaten up by the darkness of this bottle so why adding the card to the front that's all one white card leaning up this way we now opened up the true value of the noodles opened up all of the front of this and that speculum and that speculum are the same exposure folks that's the same picture with a white card applied in front subject centric says I can open these up without changing this because that is a that is a result off the shiny bottle and the soft box coming down on the top all I've done is opened up the shadow area and of course all this wonderful texture that we get in here is kind of fun um this is uh this is a uh what is it six foot seventy two inches seventy two inch octomom deep octa um convention brands is it this is a a uh photo die ox seventy two inch deep octa absolutely fantastic lighting tool they're inexpensive I in fact they're ridiculous I don't have a clue how they can sell them for that cheap but this is one of the pretty slice of every used I love it it's also one of the heaviest lights effect used so even though you don't fly this on a boom unless you've got a really big one I love this but you could see how big it is you know michelle's five foot six this is six feet it's literally bigger than she is she's to the back of it just like I placed clinging to the back of the soft box that's where michelle is and look how this light wraps around okay this big like a lt's all the way around her so we've taken this beautiful shiny leather jacket and her powdered skin she's she's she has a bit of a tan so she's a little bit shiny you know when you get tan you get shiny right you know that when you get tan you get a bit of a shine to your skin um so she's got a little bit of tan your skin a little bit shiny so we powdered her up we get a nice matt feeling to the skin a bright liquid highlight on the jacket and bright spark lease on the gold how does it end up it ends up like that brought a card in from the back just to keep her hair from falling off into the darkness and that way we see all this beautiful texture and detail in the in the shirt she's wearing and the jacket and her face is beautifully mat and look how soft the lightest and she's literally standing while you saw she's about twelve inches maybe away from that giant box when we bring a light source to his right is creating a slight cs I'm sorry we have a soft box over here but back over here we have a light a soft box in against the wall do you see how it's lighter back over here than it is over here I've taken a soft box and bounce it into the wall so I could group create a backwards grady int putting the darker side of the wall against the lit side of his face and the lit side of the wall against the shadow side of his face so I've got light coming this way from the back this way on the subject and that creates depth you know where I goes to a photograph where I seeks r I seeks the point of the brightest object next to the darkest object wherever that is is where we go and where that is on this picture right there right to that side of his face the light and if you had a photograph of a very dark forest and a little white cabin over here you're going to see it I guarantee you especially if it's in the darkest part of the forest because it's the lightest part of the image against the darkest part of the image so when you're photographing and you you start to think about these things you start to think wait a minute I don't want to have that very bright thing over there in the background because it's going to pull away from my subject might move your camera a little bit and we talked about your w jane smith if you get a chance to go up and look online and you'll find a lot of his photographs you'll see a master at driving your eye to the point of the photograph just with light just with light and shadow and you can see what we've got here true value of this skin the shadow transition tells us that it's a softly lit photograph bright to true value right in here he's not terribly shiny got a nice smooth transition and a really smooth transition from the true value to the shadow is what well it looks like it's about a half an inch that's a pretty much of a good fall off if you have bad skin on a model r us like you shooting seniors and you have bad skin where you're going to have a problem with your image even even let's say you didn't even side light it you're going to have a problem with your image in the transition because as the face goes from the highlight to the shadow true value to the shadow you're going to have some little bumps that stick up in to the highlight even though they're in the shadow would be like a late evening over the sierras and all the tops of the mountains there perfectly lit up right I hate to really get that much what but yeah that's what you do if you're gonna have problems you're gonna have it in here so how do you get rid of of bad skin problems bring your light toe access if you're person that your photograph things really got a problem suing your light right over the camera so that you can put the light right into every nook and cranny and straight back to the camera angle of incidents angle of reflection the top of that little anomaly on his skin is the same color or reflection as the side of it only when you start moving the light to the side you start changing the dimension not only of his face but of every tiny bump on the face as well so yeah isn't that what you do the same thing if you're photographing an older woman with you know when you're trying to cut down on her blemishes like her wrinkles and stuff you old enough to remember a great tv show called moonlighting the civil shepherd and some other guy that I think made a movie or two afterwards if you remember the running joke if you ever get a chance to go back now that your photographers you will you'll see the joke civil shepherd did not like the way she looked in the pilot and was going to pull the plug she looked too old I mean she was thirty anyway so the director photographer had an idea he took a little one k and taped it literally to the top of the lens so whenever the lens turned to civil that turned that on so what that did was take a light right from lens and bring it straight onto civil measured one house stop over everything else the house stop so simple kind of glowed I think they were on four seasons right it became a running joke then they started putting silk stockings over the screen and then to silk stockings and in rubbing the side of the screen with with with vastly so if you watch the last couple episodes bruce willis in one one saying he's standing in the door he's just sharp he just lit right in the camera flicks over to her she's glowing everything the flowers air glowing the bookcases glowing it became a running joke and if you remember the show everything on it was a running joke they even did a sess above not uh what's the cat in a hat guy dr david did a dr seuss episode for everyone talked like dr seuss bizarre show one wonderful shop so yes bring it right over the top of the camera as a matter of fact I've actually done that with a grid spot for a talent in arizona on on air talent tv show news anchor and she had terrible bags some blondes will get bags when they get thirty thirty five and there's nothing it's just a hereditary and she was hated have a picture taken I put that thing right over the top of the camera poked in a third of a third of a stop or half a stop brighter than the rest of it and I was her photographer for life I shot her up until the day she retired she didn't have a circle of bag wrinkle nothing wiped it out two lights either side even in this particular case and look at how our face works now he is he took a little bit of aftershave and kind of got himself not wet but damn stuff so we could get some texture off the skin but I really like this but this is what happens now in front of him right here is to split white boards this way like a v card facing him this way just to light up the jacket it doesn't even appear in his eyes because it's just down here I just I didn't want to lose this jacket it was important to make not to lose the jacket he look great this is a nadie he's a they rich a rich playboy girls great guy the sean again and you can see how we sculpt the muscle tone with the highlights way looked at this shot before you can see I've just basically you know bree is shiny she got the boots and the skin and the face is all shiny this isn't so by dangling the light little bit straight at her I was able to pull highlights off of her and the boots in here so that the boots lit up a little bit I do use a technique and post called highlight painting and if you're familiar with highlight painting um I create a layer clear layer change it to overlay and then using a brush soft brush at ten percent black or white I'll just on white ten percent in overlay I'll just brush these black boots here and it'll pull up the texture of the boats I do it on almost every photograph I do I'll do a little highlight or shadow painting might bring it down a little bit here here and there but it's just a very little bit I'm not an hd our kind of guy um and no that's not hdr even though it looks like hdr that's an old fashioned neutral grady in't filter that's all it isthe it's old I can't oyo whatever it is I I kept them for years it's half dark at the top it has a split thing and in the middle and it's clear at the bottom and these clouds were there and they look pretty threatening right and I was about forty miles from sacramento up in the middle of the mountains not another soul in another car for three hours and thinking oh this is terrible but the most fun you can have in america for fifty bucks is a rented car how would have taken my car down that road and no I'm not going to tell you the brand either so thiss shot is all about isolation I knew that I was going to get this reflection back from the lake I needed to create something out of the photograph this picture is really about the sky in the lake and this little strip right in the middle sort of divides it it's about light
Class Materials
bonus material with purchase
bonus material with enrollment
Ratings and Reviews
Cheryl
I just finished watching this course, and with teary eyes can say, without reserve, this class has been fantastic! Don's last session would be great to watch in the beginning and the end because it helps to understand his thoughts on being a photographer. The rest of the class is full of great information on lighting and Don is able to explain his thoughts and his processes with ease. I hope I will always think ahead and plan how I want my final results and how I want my subject to reflect light. Learning this was one of my "aha" moments during this class. I own over 30 Creative Live photography courses and this class is one of the top classes I own. I already plan on rewatching the whole class. Well worth the investment! I feel it is not a beginner course, but a intermediate to advanced one. Don has set a high standard in lighting...a goal to reach for...a goal that is possible for each person willing to take the time to learn and practice. Thanks Don and thanks CreativeLive!
Ryan Redmond
I am so glad I took this course. I'll be honest, it took a few lessons for me to warm up to this series but I'm glad I stuck with it. I have had a couple cheap speedlights, softboxes/umbrellas, and reflectors for many months now and was too intimidated to start using them. After going through this I am not only downright excited to use them, and confident that I can have spectacular outcomes, I'm also confident about shooting in natural light indoors and outdoors. It's also given me the tools and confidence to start shooting in manual vs aperture priority and to nail the general calculations in my head. I appreciate that Don used mostly budget or unorthodox equipment like speedlights, foam core, work lights, curtains, etc. because that's what I can afford and have been using to try to replicate expensive gear. Other classes use thousands of dollars in lighting and Don proves you don't need that for excellent shots. I also appreciate his advice for directing your "models" and insights into his overall process. This class was invaluable to me as a novice. Thank you!
Joanna
I thank very much CL that I could see the wonderful material on the light in photography, in fact everything became clearer, Don you are the great teacher, great stuff, very interesting and fantastic lecture, very helpful ! Thank you one more time !!!
Student Work
Related Classes
Lighting