Lessons
Day 1
1Importing and Organizing Part One
55:47 2Importing and Organizing Part Two
38:08 3Tonal Adjustments
16:01 4Exposure and the Histogram
46:02 5Color Adjustments
35:06 6Fine-Tuning Individual Colors
43:15 7Maps
25:50Exporting
38:09Day 2
9Intermediate Organization
44:41 10Morning Q&A
38:53 11Localized Adjustments
1:00:57 12Image Enhancement
1:23:57 13Slideshows and Printing
1:13:47Day 3
14Shooting Tethered
30:52 15DNG Conversion and Keywording
50:15 16Keywords Q&A and Publishing Services
29:24 17Publishing to the Web
18:16 18Quick Collections, Dual Displays
13:12 19More Publishing Services
12:44 20HDR in Lightroom
23:18 21Advanced Adjustments
44:03 22Lightroom Preferences
30:02 23Sharpening Photos in Lightroom
31:02 24Book Module
15:02Lesson Info
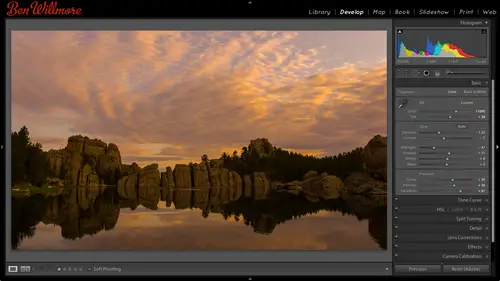
Color Adjustments
Do we have any other questions that would be good to answer relating to total adjustment before I get into color adjustment total adjustment specifically their work there's quite a few questions I'm seeing talking about noise teo do we want to deal with that right now we're gonna deal with noise mainly tomorrow. Okay? Yeah, tomorrow we'll get into a lot of the other choices that air there so if you see anything about noise chromatic aberrations sharpening just so you know, some of the stuff we might cover tomorrow the tone curve uh lens corrections that kind of stuff camera calibration on that's more the next day. Okay, all right. So if a question here from mary from costa rica who would like to know as faras the history a man when you were moving the blacks and whites when you're dealing with loki and high key photos and that have intentional spikes on one end how do you how do you deal with that? Well it's similar to when I have the noonday sun in the image? If there's ah high key in...
vention I expect to have white within it then the white slider is going to control how large of an area is white so if I move the white slider towards the right he's going to brighten the picture I can force more of the image to become solid white so if you want the brightest areas to become even more blown out a larger area of it you could do that but I wouldn't usually necessarily decrease it because decreasing it would try to bring, uh detail into those areas that are solid white and it wouldn't look like the look she described so with those images I could still adjust the white slider and just see how it effects the brightest part of the picture if I want to see how much of the image has blown out toe white I can still hold on that option key ultima windows when I move in it but it's not like it's an essential adjustment it's just a matter of if you want to control how much is white? Okay, one more follow history damn question this is from marion who is in bucharest, romania is there a way to automatically make the history of touch the white and black ends well hitting the auto button which is found just above the exposure? In contrast sliders I don't know if it's going to make it always hit the ends but let me grab an image that I have yet to adjust and see if it has any gaps yeah, it has a large gap on the right it has a spike on the left if I had the auto button, you're going to find its going to distribute those tones across most of the the area and so you could start with otto. So in this image, if I choose auto and then I glance at the picture I think the highlights are way too bright. You see, the base of the temple looks white to me. If I see if I were to see a large gap spike, I'm sorry. On the right side, it would tell me it's solid white and ida just whites otherwise, in this case, I bring highlights down to tone that down. So but the auto but anything else, I'm a question from janet, how do you decide when to adjust highlights or whites when the tones targeted would be addressed by either, um, most of the time I choose highlights and I only choose white uh either when I'm done with making the image look good overall, um, or there is a obvious area that solid white noonday sun, that kind of thing. I know that if I wantto only affect that area, I go for whites, but most of the time blacks and whites I do at the end and everything else is what I used to optimize the image and then blacks and whites is kind of find two needed at the end with a few exceptions, but not many cool. I think we can go move on, okay, cool so what I'd like to do is go through some of the images that we've adjusted in show you some before and after, so we could just take a look at what we've done now, unfortunately, the way I work with these images, it's not going to be as easy to show you before and after because when I initially imported these images in the light room, they were already adjusted, and after I imported them, I went into light room and there's a choice called reset reset means act as if I've never used these images and light room, and it takes away all your adjustments so it's far as light room is concerned, my before image, which is the image I originally imported is actually one that's already been adjusted, and so it'll make it a little different than it would be if you were at home just trying to follow along kind of thing. Anyway, I'm in the developed module right now I'm looking at one of our images in and lower, uh, left. There are two icons the icon, the left is what we're in right now and that's, where is noticed loop view and it will be your image filling the screen if I click on the icon to the right of that, we're gonna be able to see a before and after of the image right now they looked the same and that's because when I imported these pictures they were already adjusted and on lee after I imported them I chose reset which got rid of the adjustments and then we proceeded to adjust them so it thinks of the before is whatever it looked like when I first imported it and after is my end result I just so anyway I can still do it though all I'm going to do is I'm going to take our after version here there's a button on the lower right called reset and that's going to throw away all the adjustments so at least the one on the right can look like what we have you see kind of before and after that way just so you know with this icon here you have a couple different ways you can do this if you just click this icon more than once you can split your image in half vertically to sea before or after you can show it above and below split it horizontally were showed side by side the other way so you click it multiple times to cycle through those what I'm going to do those is not used this feature because it thinks of my before is one that's already been adjusted just because of how I did things and what I'm going to do instead is I'm just going to be hitting the reset button to get back teo the rich that's going to strip off all settings that air there in showing what theme which would look like if it had never been adjusted uh so here's when we adjusted earlier there's the original this one we just played with we barely did anything to it though so not necessarily gonna be exactly what I would uh have done and then I'm just typing command zito undo that when we didn't adjust when we did but it just gives you some sense for what kind of changes were making uh let's see if there are any they'll be rather dramatic I think this one would be in the developed module if I just hit the reset button recently to the defaults that's not adjusted she's undo and you see what we have now if you hadn't important your images the way I did in that they were already adjusted you could have just hit those to kind of double wise in the lower left to do the same. All right, well what I'd also like to talk about then is adjusting color and so let's get a little bit into that um just gotta find the right folder here take me mother it is ok just um some of these images have been adjusted I wanted that so that I could get back to them if I needed to on I'm just going to get rid of any adjustments that have been applied to get rid of adjustments and act as if you've never worked with things in light room, you could select the images and if you right, click on them, you'll get a menu that appears in one of the choices within that menu will be called developed settings that means your adjustment settings things you've done in the developed module and at the top of that sign menu find reset that means just act as if it just came out of the camera he and so I'll do that so we start with just normal files here and let's see what we can end up doing these first off she liked one image go to develop this image was taken at cadillac ranch cadillac ranch is in amarillo, texas in its where there's ten cadillacs from the nineteen fifties and their nose first uh into the ground in the middle of a cow pasture that's what you're looking at and with this I lit the cars because they would usually show up in silhouette it's just a black shape but I'm standing just outside the frame on the left side and I have a huge flashlight it's big enough that it comes with a shoulder strap I mean it's usually it's literally huge and I just got it at a costco store for about fifty bucks they sell ridiculous stuff and this is what I want to adjust now the color of light coming out of that flashlight is not white light and so it caused these cars look kind of a yellowish color and I want to see if I can correct for that any time you want to get rid of a color, cast your image if you're images to yellow to blue to orange to whatever the color happens to be its white balance that you want to adjust and there are three general ways of adjusting white balance. In the end, all three methods will come down to moving these two sliders right here temperature intent because that's what white balance is and there just happens to be three methods to figure out where to put those sliders. The first one is there's a pop up menu right above the sliders right now minus set toe as shot ashot means used the date of my camera supplied to use the same white balance setting. The camera thought it needed other choices and that menu would be auto. Auto is gonna have photoshopped try to guess at what setting to use similar to being in your camera with the white balance set to auto white balance uh this is just photoshopped version of it you could try that not that big of a difference in this particular image then here we have all different kinds of light sources if you know that the image was shot under daylight or you know it was shot under fluorescent or tungsten light. Then you could choose it here because those have very specific colors to their light sources and it can compensate for them. Some people ask, why is there a difference between things like daylight in shade? Well, daylight, you have the light of the sun, the light is coming from the sun falling on your object and it's going to be a warmer color when you're in the shade, the light is coming usually not directly from the sun and said it's coming from the blue sky that's surrounding that son and so it's going to be more bluish, more cool in color, so the colors are different depending on what kind of light source you have. So anyway, I could go through here if I knew the exact kind of lighting this wass, but I don't know what was in that flashlight. I'm assuming it might have been tungsten. Yeah, that improved it quite a bit, but I'm only guessing the choice called custom is going to appear any time you've moved these sliders manually or you've adjusted them using anything except for this menu in all custom means, is it's not conforming to one of these choices, it just means you're off from one of these. So I use that if I knew that I had a large number of shots shot under fluorescent light, why not just choose it real quick here and be done with it? But in this particular case, I'm not sure exactly what kind of ball was in that flashlight, and so we're going to use something else. What I'm gonna do is zoom in on this image. I'm just gonna click on the image in drag to try to get over here where I can see one of the cars and I can see some white paint on the cars. If I can find any white or gray on those cars, I can use it to white balance the image right near those two slaughters for white balance there's also a tool right here. But click on that that's, the white balance tool, and I want to come in here and get the tip of that tool onto something that should be white or gray in here. I see some paint that I think is gray. Click there in italy, use that to try to set the white balance. What it's really doing is anything that is a shade of gray, and the brightness is not critical. Anything from white to black in the brightness range, it's a shade of gray. Isn't supposed to have any color in it it's not supposed to be blue issue yellowish or anything else and so when I come in here and I click on it photoshopped just measures to see if there's any color in there if it finds color, it assumes that's the color of the light source and it shifts the color of the picture away from that color and tell thea area you click on is truly a shade of grey so I could pick any area that's painted with white or gray click on it and it should be able to figure out what color the light sources from them. The third way of setting white balance is to adjust the two sliders called temperature intent you might start off from a preset where you choose fluorescent or something else to guess or you might start off using that eye dropper. But in the end, if you want to find tune it, you'll find senate with with these two slaughters, I can grab one of the slaughters and you make the image more yellow or blue with top slider warm or magenta or green with the bottom slider. And if I would have one of those y belle cards that we give away as a prize, this is where I could grab the eyedropper tool in his long as I included the y belle card in one of my photos in the same light that is falling on my subject in here is falling on the card so is the same color of light then I could just grab the white balance eyedropper and click on the great part of the y val card and it would help me color correct the image so if you ever end up shooting people or anything else where skin tones might be important that kind of thing you're uncertain what the light sources as faras exactly what color it is you might want to get a y belle card put it in your first shot make sure the light falling on your subject is falling on it and then you could use it to do the white balance so that's why balance now white balance can be used to try teo color correct a picture to get rid of a color caste but it can also be used to try to push color into your picture and so let's look it doing both of those so here's an image that I think has a bad color cast here I was at a winery were down in the cellars in the basement and I happened to see this little area with old bottles and things took a picture my camera was set to auto white balance and it might even be been my iphone I don't remember what I used to shoot it but when I got it back it looked extremely yellow so I could manually adjust it using the temperature intent and to do that I would look at the image and say, what is there too much of in this case? I would say yellow to begin with so if I look a temperature intent, you can see the color yellow in there it's right here and if you want to make it less yellow, just move this slider away from yellow so I just move it that way further now to me it looks if anything, a hint of green and still hit the yellow. I've moved this to the extreme so I can't move it any further that direction I'm eyes will move the other slider away from green and if I look too far gets to be too magenta but somewhere in there at least according to the screen I'm looking at about there is starting to look okay or if I could find anything white or gray and there I could grab my eye dropper in there our wine bottles they usually have labels on them and some labels should be white. I also see I just hit space bar to zoom up here um scroll around over on the right side there's a picture frame and there's a mat on it some mats or white although some of them are cream colored so you might get to be off a little bit there otherwise I go over to this side we have the actual labels on the wine balls so I'm gonna grab that eyedropper come over here and see if I click on the wine ball see if that helps and click on the mat that is around the the frame see if that helps and got me close to the same position I was outlined it manually but it might have been a little faster to do it now tomorrow we'll talk about working with mixed light sources what if you had a little wall sconces that were on the walls here giving you a certain color of light coming off of that and then there's daylight coming in the room and see if a mixture of two different colored light sources we have that actually here in this room everything is lit by the same color of light but in the distance through this archway is another room see it through there this overly noisy looking picture and in there it has a different kind of light source it looks kind of purplish in there, doesn't it? And if all I know about how to use is white balance in using it through this area I'm going to be able to compensate for one of those light sources or the other not both but tomorrow when we start talking about isolating small areas of an image will be able to go right into that area and um, get rid of the color cast its in there, make it look less purple just so you're aware of that. Also, you can experiment just go around clicking in different areas when you get the white balance eyedropper up, you get that zoomed in version of it that just tried to give you an idea of are you clicking on some odd pixel that might be a little pixel of noise or some other weird color? Or what do you really getting onto there? You can try different areas any area that should be a shade of gray khun b used the brightness level doesn't matter so much, but if you get to the extreme of white or black, it won't work. You have to be a little bit brighter than black or a little bit darker than white. It will actually complain to you if you click on a solid white area so that's correcting some color cast now let's, look at a few instances when I might want to instead introduce some color casts here's an image, a shot where I just missed uh, I think it was sunrise and, you know, it's just driving I couldn't get to this location fast enough and was bumped when I got there in the sun had already done it's uh, it's magic, so before we end up adjusting this image earlier, we had cropped a picture and there's one thing I'd like to talk to about related to cropping cause I just noticed it here. Then I'll end up messing with color gonna goto my crop tool when you're in the crop tool below it are some choices in one of those is this thing here called angle? If your picture is crooked, if you weren't on a tripod with a level going, it could be at an angle and there's a little thing here that's supposed to look like a spirit level, you know, the kind with a little bubble of air in it, and if I click on that, then I could go out to my picture and click on the horizon and then drag across the horizon, get this little line tow line up with that horizon when I let go, it should make it straight nice and straight, and I noticed that was off a little bit and I remembered I hadn't talked about that feature yet, so I just want to make sure I got into into that. I might also crop this down a little bit just to concentrate on that area click the crop to again to get out of it and now let's try to make it look a little bit more like this was sunrise or sunset, so it sunrise or sunset you get this oranges, yellow light and to force it into this image, I'm just going to push the temperature slider towards the right see if I can get it in there don't want to go too far because it might look or bad. I can also experience what tent, see what direction I think it's going to help, but then its just not colorful enough and so let's look at some other sliders that have to do a color down here. We have vibrance in saturation in with both vibrance and saturation, they're going to make your image more colorful or less colorful, and the difference between the two is that saturation treats all colors equally so all colors will get unequal boost, so I could bring that up to make things more colorful. But do you notice what happens near the horizon line there's, a yellow that's in there that could becomes way overdone looks artificial that's because saturation treats everything equally in some things were already relatively colorful, and if you push him too far, you start losing detail in those areas and they start looking artificial vibrance. On the other hand, if I bring it up, is going to concentrate on the mellow colors within the image areas that are not all that colorful to begin with. And then it'll affect the image less and less and less as it gets into more and more colorful areas. In that way, those areas you saw become overly yellow in there might not become quite as yellow. Let's find out I'll bring up my vibrance now I've maxed it out as high as I can go tomorrow you'd see how to push it past a hundred looks like a cool thing to have in a volume knob that goes to eleven instead of ten uh but that's tomorrow, not today, so right now we're limited to going up to a hundred percent, and if I need to get in any more colorful, I have to come down here to saturation to do it, but then those yellows will become overdone tomorrow we could make this image look a lot better because we'll know about other features where you'll be able to move a lot of these sliders further than usual. I might find tune the temperature intent to see if I can get away with going further or not all depends on your screens faras what yours is looking like compared to mine is what it looks like. It looks pretty ridiculous on that screen. I don't know if you guys are seeing what I see on this screen or what you're seeing back there so it's uh hard for me to judge but we can use it for that I might want to bring in some additional highlight detail up in here so I could bring my highlights down to say give me more detail there and I could darken the image overall with exposure if I wanted thank you feel a little bit more like it was early where not quite as much light had come from the sun may be like that now let's see if I'd get away with a little bit more saturation they're going to hit the reset button sing see the difference between before and I'll choose undo after so you can see I can force it in and I use that on some other images like this one here let me see if I can show you what the end result looked like yeah do you see this end result where it has this warm feeling to the sky where's this is what the original look like and that's to any similar thing which is faking it out by pushing a color into the image a yellowish color usually by moving the temperature slaughter towards the right it becomes a lot more useful once you learn how to affect isolated areas within your image in we haven't gotten to that yet so we're we'll have to uh hold off on some of that before we get too deep now with history grams there's a weird thing in light room that I actually don't like and makes using the combination of bridge and adobe camera better in one way it's not something that would actually convince me into using bridge and camera but it's an important different to know about in case you're used to working with bridge and camera, which comes with photo shop in that is, uh, the history gram that's here I've mentioned that I look mainly at the ends, and I look for gaps or spikes and that's true in that I usually ignore the color part of the history. Graham I don't always ignore the color part, though the color part is supposed to be able to tell you if you're making colors too colorful and it will tell you when you're starting to lose detail by pushing it too far. But the way that light rooms hissed, a gram is calculated, it can't quite show that to you. And so I mainly want to mention this for people that work with camera and bridge because some people do that in the adjustment sliders are identical, and so there is a useful thing in there I find it very useful and I just want to mention it here, not going to apply quite directly the light room now unfortunately, let's go back to that one image where I started seeing the yellow happening on the horizon, where it seemed to be getting really saturated if you are working in here and you ever see the ends of your history, graham have colorful spikes on the ends colorful spikes, colorful spikes means you have something happening called saturation clipping it means you've moved the saturation up so high that you're losing detail in the most colorful areas of your picture and that's generically noticed saturation clipping. The only problem is it's not going to show up as easily here in light room as it would in camera. The reason for it is a technical reason and for those of you in the technical stuff, I'll describe that for you those who are not in the technical shop turn your brain off for a second come back to me in a second you're images have something called a color space attached to them you've probably heard of a few of them one is called s rgb another is called adobe rgb and another is called pro photo rgb and there are others. Those choices determine what the range of colors you can have. They determine what is the most saturated colors you can make in your photograph. Srg b is the smallest meaning the most limited the dhobi our gbs medium pro photo rgb is huge, meaning you can create colors so vivid that you can't print them or see them with your eyes but theoretically that are more colorful than the other spaces um and this bar chart would need to reflect what color space you end up in in order to accurately show you if you're losing detail in the highlights and shadows in camera, it does show you based on the color space you're going to end up with but this history ram to the best of my knowledge does not it shows you in the color space that is used internally and light room and it makes it so it's less useful so turn your technical brain your non technical brain back on mention I never said any of that and now let me describe how this could be useful if when you've adjusted an image you glance of the history ground in on either side you see a tall colorful spike not a great spike but a colorful one it means that you're losing detail most likely in the most colorful part of your picture and possibly because of how high you've moved the saturation slaughter if you bring the saturation slider down when you have those spikes, you'll probably find the spike to go away. Eventually you can see where it's happening within your picture to see if it's an important area so you can evaluate it and c is that critical that I'm losing detail and if so you might decide to not make your image quite is colorful because you wouldn't lose this much detail here's how you can see where it's happening if the spike is on the left side, you want to go to the black slider. If the spike is on the right side, you want to go to the whites slider. So in this case, I don't have a spike on the right, so I don't need to go to the white slider it's on the left, and so that means I want to go to the black slider and we're going to use the exact same filled, uh, sorry is exact same feature that we use previously that shows us where things have turned black in this time. Instead of looking in areas that are black, we're gonna look for colors, and in this case, I'm actually not seen much. Let me bring up my saturation further to make it really happen and see if I can get it to happen. It's still not showing me, and this is where light room is less than ideal than camera in bridge. If I was doing this adjustment in camera, I would start seeing large areas of color showing up, and I would be able to back off on the saturation to try to avoid it. But here in light room, I can for most, uh, images, so how does that affect you? Well, if you see spikes on the ends of your history and their colorful you might want to look closely at the most saturated areas of your image and see if they actually have detail where have instead they look like a flat color if they look like a flat solid color that has no detail, consider moving your saturation down and see if any detail comes back but you're going to see it more after you open the image in another program because that's when it gets converted into your final and result and that's when it would really show up if you're using though camera uh you can see it and that's what I want thing I really wish they would change in light room is make it so we can see it when we've oversaturated so that was semi useful information that depends on a fuse all light room or also came around no let's see what else um let's see if I can get it to happen I don't know if I will on camera I would okay do you see the tip of his nose tip of his nose? Can you see texture within that tip? I can I don't know if you guys can when the compression of the video kicks in and all that but I can see detail in here if I bring saturation up too high eventually it becomes detail us mega of colorful so watch out for that in know that when you open the image in another program you might want to double check that because that's when it gets converted into the destination color space and if that color space is small like s rgb it could happen at the time you open the image you could see a little bit of that only an overly colorful images when you push the saturation quite a bit and then you can see the detail on my screen here you can't okay, good thes two screens look quite different to me. So what color space too usually work in uh what color space I usually work in? Uh I don't know if you want to ask what color space I work in or with color space you should work in because they could be different answers. So what the question is what color space should you or do I work in uh the cupboard space I work in various uh first off the color space and light room is only applied when you export your pictures internally ous faras I remember it uses a special color space called melissa rgb which you probably never heard of. But when you export your images that will be one of the choices you have is what color space you want to end up in and generically what I would say is if the destination for your image is the internet a newspaper or, um a program that's not smart about color, which means ah, database program is not usually designed for a professional color. Where? Ah, word processor that's. Not a high end one, it's. Just a normal word processor. That kind of stuff. It's not a professional page layout program, that kind of thing. Then I would usually go with s rgb because any time there's a program, that is what I would call dumb about color and that it doesn't have a lot of settings related to color or sophistication there it will make an assumption about your picture that it's s rgb. And if that's not true, the colors might not look right. So the internet, uh, newspaper, the main reason I say newspaper is because thie, you can't create all that saturated of colors in a newspaper. So it's not really important that you use one that lets you make really saturate colors. You can't put him anyway, and then those other things would be done. Programs that you need, teo, give the mass rgb. Also, if you end up sending out your photographs to be printed somewhere else, you need to talk with whoever is going to be printing them the company and ask what they want because some of those companies, in fact a good number of them, will want s rgb having said that s our gbs a smallest color space meaning it limits the saturation your colors the most and so I wouldn't use it if you're going to print on a printer on your desk, put it on your desk and print things much more colorful than what you could have in an s r g b file and so you'd be limiting your color range for no real reason, no benefit uh, adobe rgb is a pretty good color space to be in if what you do is send things out to be printed in magazines, brochures, high quality paper kind of things and you print on your own printer on your desk, that kind of stuff if you're going to become a color nerd and really figure out all these things and look at history rams of color spikes and know what they mean and all that kind of stuff, then you might consider pro photo, but I would not casually send you there. It's easy to mess up your files and pro photo it's easy to give a file of somebody else where it doesn't look right and other things if they're not knowledge a lot of so I wouldn't try to talk you into pro photo, but those people that are knowledgeable about color in our opinionated about that I wouldn't try to talk him out of it if they know what they're doing so I mainly use adobe rgb for a lot of things. On occasion, I use pro photo, and if I need to send it off to the internet or other things? S rgb. So I'm more versatile than some when it comes to usage. But if your picture doesn't include really vivid colors, if it doesn't look like this guy with this really colorful knows, uh, then the color space that you're in it's. Not going to matter much. If you have it's. When you have vivid colors, that would matter.
Class Materials
bonus material
Ratings and Reviews
Gordon
Since most photographers give classes on PS, it's just great having such a great teacher teaching LR. I don't have the time or money for PS and teachers like Aaron Nates work only with PS like most others. They all are great teachers and I watch even though I can't use what they teach, I don't consider it all a waste of time. Bill Willmore is one of those great teachers and goes into great detail. I would love to have the money to purchase this class as it's impossible to retain all the detail that he goes into.
a Creativelive Student
This presentation was awesome. After going through two versions of Light Room, I still learned more in three days than I learned in 3 years doing self study with hundreds of dollars worth of books. Ben Willmore works magic in Light Room and shares his expertise with all. This is a great course and a real bargain. Not only is the course valuable, but so is the PDF as a bonus with this course. Thanks, so much. See you tomorrow for Photoshop masking.
Rico
Ben Willmore is a fantastic teacher. The PDF download is superb and worth the price of admission. If there was a way for me to do the techniques that Ben is teaching, with him, while he is teaching the technique, then that would be a perfect learning experience.