Lessons
Day 1
1Importing and Organizing Part One
55:47 2Importing and Organizing Part Two
38:08 3Tonal Adjustments
16:01 4Exposure and the Histogram
46:02 5Color Adjustments
35:06 6Fine-Tuning Individual Colors
43:15 7Maps
25:50Exporting
38:09Day 2
9Intermediate Organization
44:41 10Morning Q&A
38:53 11Localized Adjustments
1:00:57 12Image Enhancement
1:23:57 13Slideshows and Printing
1:13:47Day 3
14Shooting Tethered
30:52 15DNG Conversion and Keywording
50:15 16Keywords Q&A and Publishing Services
29:24 17Publishing to the Web
18:16 18Quick Collections, Dual Displays
13:12 19More Publishing Services
12:44 20HDR in Lightroom
23:18 21Advanced Adjustments
44:03 22Lightroom Preferences
30:02 23Sharpening Photos in Lightroom
31:02 24Book Module
15:02Lesson Info
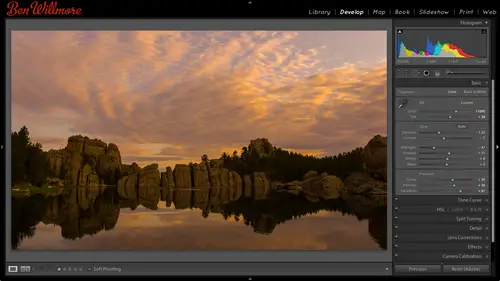
Image Enhancement
There's much more that we could do and many other things that we need to learn how to correct so one of those things would be lens corrections. There are a lot of different artifacts that we can get due to either the just the lens that we use with our camera or how we use that lens to capture the image hands let's look at some of those. The simplest thing would be if you take your camera and in order to include the top of a structure you might, uh, come in and till your camera up if you tell your camera up, then the top of the building is going to appear smaller than the bottom in if it's a short building that could make it feel like it's about to fall over. And so here I have a building in iceland and I tilted my camera up so I wouldn't cut off this little item at the top of the image and I wanted to include a little bit of sky. But any time I tell my camera up, the top of the building will be farther away from the camera than the bottom will be, and that makes it smaller. So in order...
to correct for that, one of the things I could do is go to the develop module and if I scroll down there's, this area called lens corrections and there's different areas within this that khun try to automatically correct for different things with my lenses, but in this case, if it has to do with me tilting the camera up, I want to go toe lens corrections in the developed module and then click on the part called manual, and with that, there are various sliders here and let's see what they do if I grabbed the slider called vertical it's either going to make the problem worse where the top the building it's even smaller or if I go the opposite direction, it will try to compensate for it and what I'm doing when I'm moving. This is the moment I click the mouse button or even just mouse over these sliders. A grid appears on top of my image, and I'm looking at the verticals on the building and I'm seeing how vertical they look compared to the grid, and so I'll end up dragging this two left until the verticals on the building seemed to align with that grid around there. Then the only problem is, since we have distorted the image to try to correct for that now we no longer have a rectangular image down here at the bottom, and you can see the rest of the image if you'd like there is a choice called scale, and if I bring scale down, you can see what it's done to that image and now what we need to do is crop it. Sometimes you can crop it by just bringing up the scale slider like this until the image fills the screen, but that's cutting off an area near the top of the building. So what I might do is bring it down until I can see all of the image and then simply click over to the crop tool remember the crop tools up just below the history graham, and then I'll just pull it in and crop this image. Now, if I think about it ahead of time, when I'm out shooting any time I shoot an image and I realize I'm gonna have to tell my camera up to capture the whole thing, I usually zoom out on my lens a little bit to leave extra padding on the sides because otherwise, when I'm cropping the image like this to get it to be a rectangular image, often times I end up getting way too close to the subject matter that's in there, if I didn't think about it when I was in the field, so any time you're in the field, you're telling your camera up to capture a short building consider zooming out to have a little extra space because you will be throwing away a little bit of your image when you correct for it. So then if I get out of my crop tool now, uh, we have a more straight verticals on that building but that's not the only kind of thing that can happen due to the lens that you have on your camera. Here's an image that I took in burma using a fish since he and that's what's causing the horizon there to be bowed in the fish eye lens gives me about one hundred eighty degree view of the scene, which is an amazing amount of space, but sometimes I don't want us much distortion. And so another way that I could work with lens corrections is if I click on the choice called profile under lens corrections uh, adobe has created a database of different lenses that it's tested and if the lens that you shot with us within that database, then it's aware of how it distorts your image. A fisheye lens makes it obvious where you can see the curvature of the horizon or anything that gets near the edge of the frame. But other lenses do the same kind of distortion just a lesser extent, and in order to have it look up my lens and cameras set up, all I need to do is be in the lens corrections area under the choice called profile and there's little check box here called enable profile corrections I'm going to turn that on and when I d'oh you notice it looked up my lens by looking at the metadata attached to my picture and it found out that he is the cannon and it was a fifteen millimeter and it was shot in a cannon five demark too in that is a lens that they've tested all they do is they take a black and white grid like a checkerboard and they point the lends out that take a photograph and then they analyzed the end result and by looking at what how the grid has been distorted, they can figure out how the lens would distort any bench and they include that in this database so that's one thing I could do but I'm not stuck with the end result that I get if I just checked clicked on that check box and it's not on ly correcting for distortion where it bends the image. Another thing that can happen with your images are often times less light gets to the corners of your image than it does in the middle and that's known as vignette ing where the corners end up being darker that's another thing that it's correcting for when you turn on that check box. Sometimes I actually like that the corners of my image or darker than the middle because it keeps my tension near the middle of the image instead of out on the edges where I'm exploring all that detail so you can control if it corrects for that stuff we're not, and the way you do is down here with these two sliders, the distortion slider I could turn down to say don't completely correct for the fish eye if you bring it all the way down, it'll leave the fisheye effect intact, but it'll do the other kind of corrections like making sure the corners aren't overly dark. I can also move the distortion up higher than the middle and kind of get a reverse effect, which could look kind of crazy with images like this one. If I go over to the manual tab where we were earlier to remember that's where I found a choice called scale, which just made the image smaller so I could see all of it, we bring it down, you can see it just did a reverse fish eye in this uh, you could do it for creative effect if you wanted to just get a really weird looking picture, but by the time it distorts it that much, you're going to get a really soft image out on the edges it's only going to be near the middle where it's at all sharp could be kind of interesting, though if you want your attention to be drawn to the middle if you, um, would like the corners of your image to remain dark if they were dark to begin with, you don't want it to correct for it. You could take the vignette ing slider and turned all the way down to say, don't compensate for it in this particular image. I don't think he would notice that because you're not seeing what used to be the corners of the image right now when it corrects for a fish eye lens. If I turn off both corrections, then you might see watch the corners of the image, probably mainly this one here, if I bring the vignette ng up to the middle, you'll see it try to correct for it. Do you see how it brightened up the corners? Where is now didn't so anyway? One thing you could do is correct for fish eye, so let's, see how we can combine the two ideas we've talked about correcting for distortion in the image based on strictly the lens and then correcting for distortion based on tilting the camera here's an image that I shot in abu dhabi at the grand mosque and I used to fish eye lens in order to be able to get enough of the scene in here. Otherwise, I just couldn't get this entire archway in there, and I also had to tell my camera up in order to capture the top edge so let's see how this works out. I'm just going to come in here first thing I'm going to do is under lens corrections, I'll go to the profile aylor area and I'll turn on the profile corrections I should mention when it comes to that check box. If you're using older versions of light room, I think, but I could be wrong when it comes to the version number x I don't always remember, uh, this feature was introduced win light room believe it might have been light room three. They came up with an update for it, so if you have a version of light room that's, one version old, consider going to the help menu and choosing check for updates. If you don't find that check box available, it was available first, introduced in an update, the light room, not in a major release of it. So anyway, that tried to correct for my fisheye lens. If I turn it back off, turn back on, you see that that's making so things aren't is curved, but I can see that these, which used to be, uh, straight vertical lines when I'm actually standing in this area, are still messed up, so I'm going to now click on the manual tab and on the manual tab it's, the vertical slider that will help me be able to tilt this. I don't know if I'll be able to completely correct for it don't know that I actually want to completely correct for it. I just don't want it to be overly distorted, but that's about as far as it'll let me go. I could always save this image as a tip for a j peg or some other file format imported back in the light room. It won't know that it's ever been adjusted before, and then I can go back to the manual choice in lower it even more because it would start off it zero again. So just you can cheat problem right now is at the top of the images being cut off so that's why I'm going to go over here to the choice called scale and scale it down until I can see either the whole image, which looks kind of weird, or at least just the part I want to use me from there. But now, if I look at this when the grid is on there, if you look at the base of the wall that's here, this line that goes across this area here and the opposite side, when the grid was showing up, it looks like it's at an angle. Doesn't look like the right side of the photograph is higher on the left side, and if you can see that or not, but the space between this area in this area and the grid lines I see you're different, so I want to fix that, but we fixed that on an image before the place where he did it was in the crop tool, so let's go to the crop tool again in the crop tool, there is a choice that is an angle which would rotate the picture, and right next to that is this little icon, which represents a spirit level or bubble level. I'm going to click on that, and then I'm just gonna click on that edge dragged over here to get it to a line with what the contents of the photo, when I let go, should rotate it to get that nice and straight, then I could, you see, is the crop tool in general to bring this out, crop it until I've got full image, and then I might decide to get rid of a little bit of stuff on the side just because it's more of a distraction than helping the image bring this down a little bit, keep it nice and tight and there's click on the crop told sam dunn, so we done quite a bit to that image when it comes to corrections and I think it looks much better. The other thing that I did with this particular images, I did a bunch of adjustments to it, not when you guys were looking, but using the same techniques we talked about on the first day, so I'm going to hit the reset button and just see what the image looked like originally, just so you get a comparison and get a sense for how much light room is capable of so there's the original, does it really even look anything like the end result? S a lot of people will say all he used was light room it's, like I didn't make a big change to my picture. They're trying to claim you could make huge changes in light room. You just need to know about enough features, um, to get what you need done now in here, we've worked with the manual tab, which allows us to have that vertical correction there's also a horizontal correction, which in some ways could have used to try to fix the angle of this. But it would be if you shot something, if you think about the vertical one it's, if you tilted your camera vertically to include the top of the building and you got distortion, well, imagine instead that you had a building in instead of lining straight up with the front of the building, you tilted horizontally so instead of shooting straight on you shot at an angle so the part of the building that is closer to you is, um larger taller in the part that's further away is different you can also try to correct for that and I haven't tried this ahead of time anything to know if it will work right with this image or not but I have, um a couple images here I could possibly try it on and that would be if I go to my lens corrections in try horizontal I don't think I'll be able to completely correct for it though, but it tries when he went uh I don't use that very often to try to fix things but it's useful teo know about just in case you're a little less bit off uh other things we might need to correct for relating the lens corrections would be if you zoom up really close on an image, sometimes you're going to find weird colored halos around the edges of things and in this particular case when I zoom up can you see it kind of a green residue right here looks almost like the building's dirty and then over here there's one that's kind of magenta or pinkish same thing right over here that's what's known as a chromatic aberration and as far as I understand it, but I'm no expert on the topic that's caused by white light going through the lens of your camera and the elements the glass elements that make up your lens are not straight, they're curved and bent and it's not dissimilar to sending white light through a prism if you've ever seen white light go through president comes out like a rainbow of colors on the other side and this is just doing the same thing to a lesser extent so that doesn't separate it out completely just starts to a little bit and that's something else that it will be measured when they ended up coming up with lens profile correction so let's go to the develop module going teo lends corrections and over there when the choice called profile if I just have that turned on, uh, we try one other thing. Actually, they moved it in an older version of photo shop under the profile tab in light room turn on that check box would get rid of it. In the newest version, they moved it over to the color section, so it's a separate adjustment cause they added some additional features I'm gonna click on the image to zoom up so you can see that issue and I'm just going to turn on a check box under this choice called color called remove chromatic aberration and watch what happens to those green and magenta halos see how corrected for it now in some images though you might still find some problems let me see if I can find one that would have some ish is, uh here isn't it shot from burma and this is that same area I mentioned yesterday where there's something like twenty two hundred temples in sixteen square miles. These are just a few of the small temples and this was shot with a fish eye lens. If I zoom up on this image, take a look at what's going on in this area with a fish eye lens it's really exaggerated and I can see this dramatic kind of pinkish purple over here there's a slight green on the other side when I turn on remove chromatic aberration doesn't always get rid of everything and there I turned on, but if you could see it or not there's, I don't feel see it in the video as well right about here I can still see a hint of kind of pinkish purple uh, same with just a hint up in here in just a few hints and they're not sure if you can see that on the video or not, but if you d'oh still see a purplish fringe around the edges of things after train on this check box, we have some additional choices and it actually works for two different colors, one is purple and the others green, those are the two kinds of french is he might still see. So if you look at the settings in here, there are sliders and we have two of them, they're kind of group together amount in purple hue amount means how much? How aggressively do I have to get? Try to get rid of the purple stuff, and so I'll try to bring that up and see if the image changes and I saw it change right away. I don't know if you guys can easily see it or not, but I'm just looking at the edge of this and looking right there, and when I brought this up, even a very small amount that edges clean itself up, if it didn't, I could try to define what range of purple it should work on, because if I had other purple objects within this photograph, I might notice the edges of getting less colorful, and I could drag these little sliders to define exactly what range of purple where I like get to work on. But there's another easier, simpler method of doing all this, where you don't have to think about sliders and stuff, all you need to dio is he turned on that check box called removed chromatic aberration. And then there's a little eyedropper click on the eyedropper and move your mouse onto the area where you can see the purple uh stuff and now when I mouse over that you can probably see the purple in that zoomed up part if you couldn't see it on the video uh all I need to do is click here and if I do, I try to get into the most purple area it's going to figure out how high oven amount would be needed to get rid of that and it's going to change the purple hue sliders to try to isolate that shade of purple. So if you watch the sliders on the right side when I click, did you see three sliders change in position to try to compensate for that? If I still have any purple left, I'll go to the most purple area and click on it, but in this case it got rid of all the purple fringing you could do the same general thing with green if your mouth was over a green area, it would instead be moving these sliders for you uh don't have an image handy that happens to have a green french uh being left when you have that now the main problem you can run into with doing that is if you ever have an image that has a purple aura green object within it on the edge of that object you might see that it becomes less colorful because photo shop assumes that it's a problem with the image, and it tries to compensate for it if that ends up being the case. What you could do is go to the adjustment brush and in the light room, for they have a choice in here called de fringe, and by using that, you could paint it on your image on lee where you need it and this difference doesn't just work with purple and green. It works with any general color of color fringing around the edge of of things, so if you had it, you could come in here, bring up different and paint on it, or you could try to bring it down to try to remove any different jing it's applied from the edge of a purple object. It doesn't need it, but I just want to make sure you knew it was there. So there are all sorts of images you can correct with lens corrections in it. It's oftentimes pretty wild how big of a difference you could make um mean, reset this image to see what it looked like hey, this image I corrected in a previous version of of light room, but if I choose on do you see the difference, I'll just reset, which gets rid of all my adjustments. Was fisheye lens, I believe, and I could reduce the distortion same kind of technique we used on the image that was from abu dhabi, and so I find lens corrections to be great, and even if I don't notice anything in my picture, uh, I will frequently turn on the little check box that gives you the color different. So what that means is going in here under lens corrections clicking on the color area in just turning on removed chromatic aberration because the vast majority of images I have, the lenses that I use produces those little halos, even if they're small. Sometimes I don't notice it until later, when I'm about to make a prince or do something else and, uh, usually have that on all right, then. Another thing we can do in light room that I find to be useful is to convert images to black and white if the color and an image just isn't doing it for you, if you adjust the image a lot and the color doesn't contribute that much to the image, you might as well convert to black and white and so let's, take a look at some different methods for doing this out here's an image that I took in antelope canyon. I like that I have a person in there so you can actually get a scale for what the place is like because if you just see the undulating sand stone you have no idea if it's the size of ah skyscraper of it's the size of your hand so that's going to be a sense for it what I didn't like about this image for some reason as a color photo is the way the sky was blown out toe white I really want to see the blue sky in there but I don't believe I bracketed my exposure's I could have done hdr where you capture more than one shot where they get progressively darker until I got so dark that I had the blue sky and uh done that but instead I'm gonna make this image go black and white oppress letter d to go to develop and there's a couple different ways we can go to black and white when it comes to the overall look the main thing is when you're in the basic tab where you have your basic adjustments right here you have the choice of color or black and white and so when I click on black and white it's going to strip all the color out of the image but that's not all the control we have we can do a lot more than that if you scroll down and you go to the area called h s l we were in that area yesterday I think it wass where we could adjust the individual colors all the reds, all the greens remember when I just a green grass, that kind of stuff but that also works with black and white where you can adjust areas that used to be red that used to be green and so on and it starts you off with an automatic mix like this trying to make some colors brighter in some colors darker so they look more different from each other in this particular image if I bring it back to color which I could do under the basic tab there's not that many much variation in color there's um yellowish up here and there's some even warmer areas down below but that's only two colors so let's look at an image that has a bit more color so we can learn what we can do. This image has got a lot of color so let's turn it to black and white and actually before I do remember where some of the colors were that we had yellow up here blew in here and kind of orange in there maybe some bread in there so those are the areas that varied in color I'm going to come in here go to black and white go down to my hse cell area and there's that little adjustment doughnut this little guy if I click on it then I could move my mouth on top of my image. And if I mouse over here on the left edge of the picture it's going to highlight what color that used to be over where the hs l sliders are. If you look, do you notice that the color yellow it's, texas and white where's the other choices or slightly darker grey? And the number the setting for yellow is highlighted in a little gray box that tells me it knows this area used to be yellow? If I click there, I could drag up to brighton or down to darken to control everything in the image that used to be yellow. Then I could move my mouse in a different area like this one. This area used to be blue, even without looking at the image, I can tell you that because it highlighted the blue, uh, setting under h s l I can click there, dragged down or up to brighten her dark and everything. It was blue in the picture think this area in here maybe used to be red and there's. An arian here used to be orange, which it will think of us being similar to read so many. Why confined to my end result if it's normal landscape shot, this could be great because you can take a blue sky starting it up if you're green grass is too dark, you can brighten it up that kind of thing you just need to remember to click on that little donut if I turn off the little light switch next to the hs l area, you could see what it looked like before I customize those settings turn that back on and you can see it afterwards, so I'm gonna make a few other images uh, black and white now so far, when I've switched between images, I've usually hit the letter g to go back to the grid of images, and then I switched to another image and I had the letter d to go to develop module but that's not as pleasant as it could be we could do it in a faster way that we just haven't talked about yet and that is if I moved to the bottom of my screen and click on the arrow that's here or just mouse over it, I can make it so it automatically shows up this is a convenient way of navigating to the other images in this folder and its notice the filmstrip you can click on the triangle it's found at the bottom enter your screen to make it stay there or you can click again to make it collapsed and you khun I haven't in a mode where you khun mouse over it and it just shows up so in here, this is a clean way of switching between images here I'm going to be working on multiple pictures and I see that here's some shots from africa, I want to make all those shots black and white, so so far we've made adjustments we've always worked on one picture in time. I want to be able to adjust all three of these images at once and make them all black and white so with one of the images active, ah, hold on the shift key and click on the last of that siri's to get all three of them selected and then let's see what we can do to be able to adjust all three at once whenever you have three images selected, you don't have to select them from the filmstrip. You could have done it back in the library doesn't matter just whenever you have multiple images selected and you go to the develop module, there is a button in lower right, right next to the reset button mind currently says sink but yours if you look at it might save something more like auto sync. What that button was labeled is dependent on the setting in the little bitty light switch that's next to it that thing, if I click that it would turn on auto sync if I click it again, it just says sync, dot, dot, dot so I want that in the opposition right now when it says auto sync, that means that any change I make to this image will also affect all the other images that are currently selected. And so therefore, I have three images selected. We can affect all three of them. This image I can see was worked on an older version of light room because it has an exclamation point in the lower right gonna click on that toe, update it to the newer, uh, kind of controls let's come in here and convert this to black and white. I'll go down to h s l where I have that little donut to use, what did I do? Black and white like I could have just clicked on the word black and white. Um I I grabbed a little donut and now I can adjust this used to be yellow wish I could brighten her dark, innit to get that that area look good. I don't know if there was much color in the elephants or not. If there is and it's different than the yellow, I could adjust them separately. But I think it's too similar to the little more orange and red it looks like, but it is affecting the bottom as well. If I had a blue sky, I can click there and adjust it in this case, I'm not going to be able to get much of a change because that sky was pretty great to begin with. There is not much of a hint of color, so I got the image to be black and white, but I find pure black and white can often be boring and resolve it doesn't have enough personality to it, and so usually after I convert things too black and white all end up adding color back to the image just a hint of color to accomplish that, I go to the next area down it's called split toning, and in split toning, I can add color to either the bright portion of the image or add it to the dark portion or both, and so let's see what it looks like if we put some color in this image. If you move the hugh slider that's where you choose the color you're going to apply to, you wanted to be reddish, you wanted to be bluish yellowish so on, but just moving that slider is not enough to get the image to change that tells you what color you're going to get, but then the slider below tells you how strong it will be home, how red or orange in this case, is it going to be in right now? It's set to zero so you get zero color I need to bring up the saturation in order to see that color if I leave it in zero I won't see it now if tip here if you have your saturation at zero and you still want to see what these colors would do here's a little hidden feature if you hold down the option key alton windows that's what I'm holding out right now and click on the huse slider it will preview this is if you had the saturation turned way up and that could just make it easier to see exactly what color it is your choosing and I want to go for kind of a brownish yellow on this particular one maybe somewhere about there remember I have the option key held down alton windows and that's what gives me this preview if I didn't have the option key held down moving hugh I wouldn't even notice anything happening to my picture because saturation is down to zero and that means how much of the color should we have so that's just a little trick you don't have to remember it but if you happen to use this a lot and you're already used to it it's coming into notes hidden in there so now I'll bring up my saturation and we'll get some color in my highlights then I can put either the same color or a different color in the dark portion of my image by adjusting the two sliders under shadows and so maybe in my shadows I want a slightly different color maybe I'm either going to go more reddish or more yellowish in my color and then bring up saturation because we have slightly different look you don't have to put color in the shadows or you could leave the highlights neutral uh that kind of stuff once you've done that you have a control called balance in balance controls how wide of a range are considered to be highlights and how wide a range we're considered to be shadows so if I move this it's going to change the look of the image because now if I move it all the way to the right, the highlights are going to dominate we get more that orange ish brown look, if I move in the opposite direction, the color from the shadows will go into more and more the image we see more of a yellowish green and so I could do that to kind of try to isolate almost one object from another based on brightness. Now when it comes to these split tony, what I'd suggest you do is make a lot of presets because I don't enjoy going in here in fine team that's trying to find a useful color just off the top of my head what I usually do is I actually browse the web, I'll just go on to google and I'll do a quick search that's either say black and white or toned black and white and you can search for images and I looked through hundreds of images until I find one that has really nice color to it maybe it's blue ish and it's just I got a great amount of blue that looks just right in that photo I'll leave my web browser open I'll grab the corner of light room in drag it so that I can get the light room window to be smaller and I can see the web browser at the same time and I will try to find the same color by going through the hugh here figuring out how much saturation has in that other photo and I'm just trying to get my photo to match the general tonality and color of the one that I might find in a web browser so in essence you can steal somebody's color tony that they applied to an image and once I found it really like what I have uh then I could end up going to the left side of my screen where we have presets and I will create a brand new preset put it in a folder I'd usually have a folder for black and white settings and then I can come in here and give this one a name this one to me just looks like a um that's what I'm gonna call it in this I'm going to say check none and then let's see which one we gonna need to use we could use black and white mix if we like how he converted to black and white but I'll assume that have already applied this to a image that's been converted to black and white because usually those settings air customized you know I might need a dark in a blue sky maurin one image than in another but all I want right there split toning saved in there create and now I don't have to remember what settings I used to get to that if I spend the time to get about a dozen good pre sets of that then uh it will take very little time for me to just come in and apply those and I believe we have some other people's presets in here from previous teaching so I could come in here I see black and white presets tone presets let's just see what other people had in all I'm going to do is once I have pre sets I mouse over them in this preview up here which is the navigator if you don't see it on your screen is just a little triangle next to the word navigator that would expand it once I have a set of pre sets and they're all got to do is mouse over him like this and I'll see it in that little area and if I find one that I like on this click and now it's applied in my picture, I can always find tune it by moving these sliders to fine tune it a bit, or go back to any of the other sliders like in this case for this one, I might want a little more shadow detail don't bring up my shadows. So I find the combination of split toning with black and white gives were much more pleasant end result. And if I were to spend the time to create a good set of pre sets for them, then it only takes a few seconds to get to the end result that I might like. Now. Remember, though, I had three images selected, and so if I go back to the grid by typing g, I should, after moment once it updates, we now have three black and white pictures. They all have split tony and applied to them, and the reason why all three of them changed is when I was in the developed module, this little area near the bottom of my adjustment sliders where it can either say sink or auto sync was turned on the little light switch next to it was in the up position, and that means affect more than one picture. If I want to adjust images individually let's say I was viewing this image over here which I think is a little on the dark side but I still had three image is selected and for some reason I didn't want to d select them so I'm viewing this image have more of them selected then if I wantto on ly affect this picture I just turn off that light switch next to auto sync and now any changes I make will only affect this particular image even though I had more than one image selected so maybe I come in here and bring my shadow slider up even higher uh maybe I bring even up blacks or exposure or bring down contrast remember contrast means how big of a difference between dark and bright so if you want less of a difference between dark and bright you could bring it down a little I'll bring it down quite a bit and then just make sure I have some black of my picture or near black out there I want to go back to adjusting all the images again I just turn on that little light switch next to the word sink and now would be adjusting all the images any additional changes I made to the image maybe I want to bring up clarity and now it's gonna affect them all because auto sync is turned on so then the question becomes what does this word sink mean it's got sync with three dots after it anytime you see three dots after something that usually means if you click on that thing, it will show you some options to choose from and so let's try to figure out what that would do. I'll go back to my great and just grab some other images, I'm going to select these files and this file on dh. So all these files and I'm going to make one of the ones that have tinted black and white, the active one, just by clicking to make sure it's the lightest, remember, I have four images in here, I'm going to go hit letter d to go to develop in what sink means is let's copy settings from the image I'm currently viewing in apply those settings to all the other images that are currently selected, so copy from this one, apply it to all the others, so when I click the word sink, it'll ask me, which settings would you like to apply? Because it might only be the black and white conversion. It might be that every image needs to have a different brightness or something else. So in here, I'll say, I want to apply split tony, and maybe I want to apply the black and white mix, and I'll hit synchronize when I do it's gonna steal the settings off of these and applied to the others if I go back to the grid view by typing g it'll take a moment for them update but now you see they're black and white as well the same tony so you could think of that is being if you forget if you have more than one image selected urine develop and you forgot to turn on auto sync, he forgot to turn in that little light switch that makes this a auto sync and you didn't realize you were adjusting just one image you meant to be adjusting more than one so then when you're done adjusting that image auto sync would have been off you click the sync button and say ok, fine let's copy settings from this picture and apply it to the others because I forgot or maybe didn't realize that that would be a great treatment for all the other images uh at the time also if you just finished adjusting large uh, number of images with auto sync and now it's on ly this picture the one you're viewing that needs the highlights darker you still have the other selected and you just don't want to affect all those fine turn otto sink off, make a little change, darken up those highlights then feel free to turn auto sync on and now you're affecting all the images again if you make any additional changes so I love the auto sync setting I find it to be a pleasant ah pleasure to use in the combination of auto sync and going down to the filmstrip to switch between pictures. We're selecting groups of pictures with that, so I don't always have to go back and forth between the library and the develop module back and forth uh, makes it so I could be really efficient. Um, I'm sure we have some questions why don't we collect up? So you guys got any by chance know it's a lot of information to think about, but karen is just sitting up in a small room almost like she's chained to a desk, staring at the screen, watching what we're doing, frantically typing and she's very happy that we're taking a break for it questions now so she can try to catch up with all the stuff that we're doing so that in the end will end up with a document. It is not too similar to the one I have in my hands made for yesterday, which was twenty pages long of showing most of the keyboard shortcuts we use most of the features we talk about if there's anything we can get in there, we're capturing it all review what karen comes up with tonight after we're done, and if there's something that is missing that I can think of keyboard charcot or something, I'll have her add it. I'm sure there'll be a couple little things that will miss just because, you know, it's doing it live. But I think this is a pretty nice way to remember what's going on. Okay, well, we have a lot of questions. Can we go back? I'm sure first. Wait here. Ok, pop over. Yeah, sure. So in the manual lens correction, you you did a manual crop rather than using the constrain crop. I'm just wondering if there's any benefit or disadvantage to using the constrain crop. Um, when you make that correction eso I was son like an image like this one went to lens corrections manual ended this what she's talking about? If I zoom out in this picture, there is a choice here called constrain crop and it can be a nice way to do it. I believe what it does is it's going to although won't let me scale down any more. But it is going to, I think, crop it to the largest rectangular image that I could dio and so that wouldn't be a bad thing to do. But oftentimes I find that I need to find tune the the placement I could go over to my crop tool then and try to do this but it's going to you know often gets a little bit weird all you had to do was come down here and say you don't want to constrain the warp or if there's any other restrictions put on it so constrained trump crop isn't a bad quickie way of doing things but uh also sometimes what I'll end up doing is I wouldn't have thought about zooming out to add extra space to make this so it won't be so tight and sometimes I end up going into photoshopped photoshopped has something called content aware phil where it can attempt to invent the content of fill in various areas and while we're probably taking another question I might actually open this image in photo shop and uh and see if it can fill that in so start off with that benefit just you find it's too tight then you can turn off go to the normal crop and you might end up adding a little bit of space uh you can then come in here let's say I use the magic wand and select if I bring the tolerance in the magic wand down to zero I can select these areas I usually make the selection the tiniest bit bigger I can do that by choosing this and photoshopped that select modify expand one or two pixels is usually fine and then go to the edit menu and there's a choice called phil the default setting is usually content aware and you click okay it photo shop is going to try to invent information to fill in those areas and a d select and now I was able to possibly get away with a wider crops would you keep that in mind? The technique I used I know I went through really quick there was after I opened it in photo shop I used the magic wand tool I had to set the tolerance of the top of my screen zero otherwise it will select things similar and color to this gray area uh I clicked over here and if you want another area you can hold shift or you could just do them separately to one side then switch to the other anyway, once I had it selected I made the selection a little less bit larger by going to select, modify, expand and then edit phil default settings content aware in cross your fingers hopefully it does it sometimes it screws up and just doesn't look natural but in this case that I don't think it's all that bad. Okay, what other questions on that same screen I was wondering there's a rotate there in the manual settings okay, is there any difference between that and the and the rotate that you used? I think it's a pse far as I know it's the same okay, it's just a matter of it might be more convenient here because you're you could just move up to get to the other sliders if you need to find tune them but to the best of my knowledge this is just simply rotating. Okay, but general have that cool leveling tool like you do in the other. No, but you just wing up there and get to it most the time I find the leveling tool to be nice. Okay, another crop questions. This is from mary from costa rica in photo shop. You get to choose the exact size of your crop. And is there an option like that in light room? I believe there is. If I grab an image, what say? Well, that one he and I go to the development module click on the crop tool, take me a moment right here what's his aspect there's a little pop up menu and in there you can choose various presets, but these air all, uh, just aspect ratios, you know, with two height ratio. If you choose enter custom, then you can end up typing in on actually, I think it might be in camera then you can actually type it in and engine. Thanks, I guess it's not like it's on export only if you were in camera, which has similar adjustments when you choose that I believe it lets you type in width and height in inches in this particular case it looks like it doesn't in light room so I was assuming that would be the same I don't think it does I was just trying to figure this out the other day and I'm pretty sure that is export only yeah so we could do is just type in the the dimensions you want let's say it's eight by ten something like that in this case would be ten by eight and then in when you export the image you can tell it to scale it to a particular size and now you know at least you have the right aspect ratio for that perfect so yeah ok um sam cox had a question about aromatic aberrations dressed they usually appear in high contrast areas of photos is that where we look for them? Yeah oftentimes I find them in things like telephone poles the edge um like where it touches the sky or if there's a wrought iron fence or something whether it be a really dark fence with light background look right where that the bright and dark areas touch and that's where I usually see it I often times find that it's easier to find them near the edge of the frame than if you're looking in the middle of of the image and so if I noticed anything off on the near the edge of the photo that has is high contrast in that it has a great difference between the subject and background that's when you know like appears that great difference in brightness between these two near the edge of the frame that's where I would zoom up and look for them the most are most frequently in this case you won't see much because it's already been corrected for although I might see the little is him to green there and if so let's see if we get rid of it remember we have that eye dropper and you can either do purple or green well we've already done purple on the other side of the photo in here that looks a little less bit greenish I cannot get purple green from that it wasn't purple or green enough um I think is what it was telling me I can try to do it myself bringing this up to see if it's gonna do it and I'd have to mess with these to see if I can get it to be in the right range but uh so yeah usually looking closer the edge of your frame for high contrast stuff especially if it has a crisp edged instead of out of folk uh it's easier to see it so jackrabbit photo had asked is it possible to make it so the different boxes automatically checked on all images on import? Yes, I'm feeling that you can change your default settings and so if you're in the developed module, start with an image that has never been adjusted before so that it doesn't have its adjustment sliders in any odd, uh, position and as long as you've never done it, you might even want to hit the reset button here to just double check that there's nothing on that picture uh then I can come in here and choose removed chromatic aberration and that's the on ly change I made to all the settings no other changes then that same reset button that stripped any and all changes to my image off of the picture if I hold down the option key alton windows it will change the set default and then I can click there and now the new default will have a turn on that would be a bad thing to do. Okay, mabel seventy seven like no can you copy presets front you made from one computer to another. Can you copy presets? Yes. You should be able to copy them. It's not something that I've done a lot of. So it might take me a second to, uh, discover how otherwise there should be a folder on your hard drive that contains them. It will be under, I believe, uh, like library application support adobe and then you look for light room presets otherwise, let me just see if there's an easy way usually if you right click I can import here, but I don't see the choice for save or export delete rename new folder so it looks to me like you'd have to find the location on your hard drive in order to do that right now, if I right, click on this. There is a choice when I right click on an actual preset called show in finder that means showing my operating system. Um and that might bring me to the exact location where those pre sets are located. So then I could copy that to a different computer. He and then if you right, click on that other computer. There is the choice of import. Well, here's export right there. Important export. So I'm right clicking on them. Okay, we take one more before we move on. Sure. All right. Mr matt says some do digital slr is correct for lens distortion in camera. Does that make light room correction redundant? Is light room better? And therefore we should turn off in camera correction. Uh, my camera doesn't correct for it automatically. Or if it does, what happens is oftentimes the settings that are built into cameras only affect jpeg files. In fact, that's the truth for most of the settings that you find if you find any settings that talk about contrast or sharpness or things similar to that, sometimes those will affect the preview that has attached to your raw file but won't usually affect the raw file itself because the concept of a raw file is that is the raw data the camera captured without manipulation and so that stuff is usually stripped out now if you're shooting j pegs though, then that stuff could easily be applied and it would be hard to say without testing to see what's better your camera or this if you're using a lens made by the same manufacturer as your camera there's a chance that it would do a better job in camera if you're using an off brand lens one not made by the same brand as your camera then I doubt it's either going to work at all or that it's going to be a cz good is this because they wouldn't have tested all the lenses and everything to know exactly how things are done there uh but my assumption is that any of those settings wouldn't affect her raw file and if so then you want to be doing it here all right? So we talked about the filmstrip talked about a lot of those things a couple other things I'd like tio mention ah one of them is in this list we have um choice called a fax in there to different areas within that one is called post crop vignette ing and the other is called grain let's take a look at him go back and see if I can find those images that we converted the black and white it sometimes when I end up converging image to black and white I actually wanted to have a different feeling kind of a grainy feeling it khun look of grainy black and white could be interesting other times I've either done some retouching on an image or some adjustment that has made one portion of the image look um more smooth than another and I want to disguise that fact by adding grain to the photo and so this area here is designed for adding grain if I come over here and bring it up it's best if you ve this at one hundred percent view so I should click on my picture so you can see it a hundred percent I'll bring it all the way down first so there are there is some grain or you might call it noise in the original image in this case fact let me see if one of the others might be a little bit cleaner so it will be a little easier to uh see this one seems to be a little cleaner more noise free to begin with okay so in here under the facts we have grain this little smaller s so I could bring up the amount and you can quickly see that a lot of grain showing up now I know seeing this on video could be difficult because the video feed that's going out is compressed in any very small changes are often not easy to see, so I'm going to make it look ridiculously obvious hoping that the video compression is not going to make it disappear, but if I bring the amount way up up, hopefully start to see it on the video, let me know in the chat rooms or anything if you can't see it, I'll turn this check box off so this would be before without the book's wrong area up here this would be before with before I added any grain this would be after let me know if you're seeing it on the chat room I'm assuming you and what you are when it's this extreme, then we have size, which is kind of how big the grain pieces are and is also going to soften a bit and roughness for the shape. Is it going to be more random in that shape or more uh uniform less rough? And so with that I usually wouldn't have anywhere near this much, so let me turn it down you might not see it as well on the video feed, but sometimes I want just a little bit maybe a little smaller grain in a little less rough on some of those black and white images or on some images where I've made changes where I could tell the difference between a smooth area and a sharper area and I want to make them look more similar than that could be nice. You can also put that in with one if you are black and white presets if that's what you like just make sure you tell it you would like to include the effects as well groups would hit g to go back to grid now let's see if I can find another image that khun benefit from a setting about to talk about here it isthe right there are two different areas within light room where you're going to find settings that are called vignette ing vignette ing is usually an effect caused by your lens we're not us much light is delivered to the camera sensor in the corners of the frame compared to the middle so you end up with slightly darker corners. We had an area under the lens corrections area that was designed to compensate for it let's go look at that area first under lens corrections when I go to profile if I turn on the check box to enable those it's going to compensate for vignette ing and distortion, you notice the image shifted a bit before I could see that this line here bowed down word just a little bit in the image do the distortion of my lens when I turn this on, it becomes a little bit more straight just like a fish eye lens but to a lesser extent it corrected for that. But then if you watch the corners of the frame and I turned the same check box off and back on you see the corners getting brighter that's trying to compensate for any unevenness and brightness and I can control that here with a slider colvin yeti if I turn it down, I can tell it to not compensate as much and I will keep those corners a little bit darker or I could move in the opposite direction and tryto somewhat overcompensate in brighton and even more just in case it didn't do enough uh for my lens there's also a choice under the manual tab where we corrected for tilting our camera up for vignette ing and that's if your lens is not included in the database meaning if you go over here to profile and you turn this on and it can't find out what your lenses where it's never tested it so it doesn't show up you could manually correct for it by going to the manual town and then down here I have amount I bring it up it's gonna brighten if I bring it down it's gonna darken and I could try to compensate for their well don't we put that in originally before they came up with the concept of having profiles for your lenses where it would do it all automatically instead originally they had it where we could manually compensate for it and they noticed that a lot of people instead of turning it up to brighten the corners and compensate for them being a little darker they would do the opposite they would bring it down into a negative range to darken the edges and then there's a setting called mid point which tells it how far it can't encroach into the image towards the center of the frame and that could be an effective way of directing attention towards the middle of the frame because the middle of the frame would then be the brightest part of the picture and as he got away from the middle of we get darker your eyes usually drawn to the brighter areas and therefore you keep your attention near the middle in so a lot of people were doing that when that feature was really designed for compensating for your lens where is this would be making your lens worse, you know, making the corners even darker. The problem though having that and be able to put it into a negative range is what if you crop your photograph if you crop your photograph? These sliders always think about the original cropping because they're designed originally for um correcting for compensating for your lens and your lens would always be the corners of the original framing, so if I cropped this image in the horizontal picture, it would be thinking about that original corners when it darkens it wouldn't think about my new cropping so let's go to the crop tool let's come in here and crop this into horizontal image or square one whatever we decide we want looks like a little bit crooked, so when I'm in that manual area of lens corrections, I can rotate, okay? And then now if I'm going to try to do my lensman yet ing, I'll see if I can leave the cropping there so you can see the original corners of the image if I really want to draw your attention to the middle by darkening the edges. Now this thing called lens that yelling isn't going to be is helpful because you see where it's darkening it's over where the original corners of the earth you were and so it's barely getting into this area at all. So because of that adobe noticed that in a lot of people were using it to darken the edges, but they would crop their pictures and in doing so it would not be darkening the right area, so they added something instead of being on your lens corrections which is literally there to deal with problems caused by your lens, you can go down to effects and that's where you find post crop vignette ing which means don't think about the original framing in the picture think about what we have right now and therefore here we have an amount setting we could bring it down and notice that now it's darkening the edges based on this new cropping not based on the original before I get into the size of this do we have a question and I was, uh just step back half a step too you're the lens correction profiles? Yeah, I was trying to think of exactly the situation I got into I think it I was trying to modify and old some old file either j peg or a psd or something like that I have for gotten or somehow it didn't have the meditate aboutthe lands and I couldn't go and set it manually like it wasn't listed in the in the list even though it works with other images set with that I didn't know if you knew of their away to pop up the full list of profiles let's see, I don't run into that on too many of my images. So it's something I'm not used teo dealing with but let me to go take a quick look if I come in here I mean I can choose a different brand even though I haven't shot with some of these let's see what happens if I try to tell us it's an icon and I can tell it a different lens yeah no, I didn't use one the problem I had was that for some reason in certain circumstances it doesn't present the full list I don't know how it decides what should be in that list, but I knew what the lens should be and I knew that in sure images it would work, but it didn't present that as an option, so I couldn't set it there was no way for me to say sure I'm not certain in that case I haven't run into it myself so it's hard for me to do kind of troubleshoot that uh if you happen to get that on your machine right here in front of us during a break, I can look at it, see if I can figure out how to, um compensate for it. All right? So we're talking. I mentioned that lens corrections is really designed for dealing with things that your lens introduced into the picture not designed for making an effect in effect that would darken the edges to draw attention to the mill so it's under effects that we find post crop than getting now with prescott crop vignette ing let's look at the settings that are available we have the amount which can either brighten the edges make it kind of blow out so he's disappearing into no man's land there or to darken the edges. I mainly darken the edges, and I'm going to do this to more of an extremely unusual. Usually I try to do it subtly where people might not notice that I've done it instead of doing it in an obvious fashion. But it's easier to see what the settings do if I push it to an extreme. So we have our amount. Then let's, look at some of the other settings we have feather feather default set the default setting for it is fifty. If I bring it down, you can tell what it's doing feathers saying how soft should not ej b from chris badge, that zero feathering default, which is fifty? Or you could make it even softer if you go further out. So if you need it more of a subtle transition there you could bring it out. I'm gonna leave that down just for a moment so you can see the shape. Oh, that is using for the darkening and there's a choice here called roundness and if I bring that up versus bring it down, so when you bring roundness down, you get more of a rounded corner rectangle effect, and as you bring it up, it becomes more of a circle and so that's gonna be the shape if you want just the corners, you might want something more like that. And if you want to come in more, so sometimes it's actually useful to turn feather all the way down first, you kind of say, okay? And what kind of general effect I want? Maybe I'll just want that because I don't want to come in and grab in, touch his hand too much there, and then I could come up and bring up feather if I want to to say how, how soft that should be, we'd like that. Then we have midpoint is the one we haven't talked about yet, and that is kind of how far towards the middle can it make it? Well, I want to restrict it to really out near the edge is or why I allow it to come further and further and further in towards the middle, and so I'm gonna see if I can limit that a little bit, maybe something like that. Finally, there's a choice called highlights if you have anything bright like this area up here where the sun is coming through and really hit on something hard, it's going to look unnatural for it too dark in that on the edge, because if, even if my camera, they didn't develop didn't deliver as much light to the corners of my frame that sunlight would have made it so we had a lot more light than what it's currently showing so there's a choice called highlights, and I could bring it up to allow the really bright areas of my photograph to break through the vignette ing that I'm adding to make it look more natural, you only really need that, though, if you have a really bright area near the corners of your frame or near the edge, you might want to consider bringing up highlights. Now there is one other setting relating to this a lot of stuff in there, but there's a little pop up, then you call style it, khun darken the edges of your image in different ways, and if I click there we have three choices on how to do it right now is a choice called highlight priority, which gives me that highlights slider so I could let the highlights breakthrough there's another choice called color priority, which you'll find is any time you darken your picture, your picture khun sun has become more colorful or just shit another ways him by setting this the color priority, it will try to make sure the colors shift the least on that edge. It might not look as good in other ways when it comes to the darkening, but the colors will be more true on the edge or you can choose the choice called paint overlay, which is a more basic setting in here and more like older versions of software if you need to have the same look that you had with other older versions but otherwise I would mainly decide are there important highlights near the edge of the picture that I need to look natural? If so, I'd use highlight priority otherwise they might consider using color priority uh in there either way you have your highlights slider with either one of those settings to try to compensate then the other thing you can think of with this particular image is let's say I wasn't able to get the vignette ng so that it didn't affect his hand, which is dipping down like that and I find the end of his hands a little in the dark side in fact let's see if I can compensate, not compensate I should say overdo it so it becomes more obvious it's becoming more obvious that his hands getting dark but I don't like the look of that well, there's nothing I can do in here in post crop than getting tio get rid of it without undoing a lot of the vignette ing but that's when I might think about grabbing my adjustment brush in with my adjustment brush I'll double click on the word effect to resettle the sliders and I'll just say what would I need to do right there in order to make that look more like the rest of his hand you know his other hand that's when I might come in and either bring up the exposure slider or the shadow slider in painted into the image so I'll bring up let's say shadows a bit and in this case I don't want to get over spray beyond his hand right then it would be really easy to get over spray beyond his hand so I'll turn on auto mask and now I'll come in here and try to paint it into his hand and then I'll find tune these sliders either shadows or exposure to see if I can get his hand to kind of come out of that I'm ignoring it up by his wrist I'm only looking at it where it is in there I might try exposure instead or both and then it's frightening his risk too much so that's when I would say I want a race I'd have auto mass turned off and I have a real soft edge brush so that now if I come into the image of a slightly larger brush I could take the adjustment away from the picture we're using a soft edge brush and I'd say just don't affect it up here where his wrist iss and I could dip down as far as I think I need teo get it in there and then find tune this just until I think it's just right where I can't tell that I've adjusted his hand let's see if it helps at all I will turn off the little check box little switch for the adjustment brush you see the difference little bit of the backgrounds changing so I might need to um choose a race, get a harder edge brush that's smaller it is get it off in the background then let's see if it's helping so you got to think about that okay on occasion when some object is going out near the edge of your frame so that is post crop vignette in it's for any time you have cropped your photograph and you want to darken the edges to keep the attention towards the middle it's just sometimes feels weird that it's under the effects panel when you know you've seen it up in that lens panel I just know the one in the lens panel is always coming from the original corners of your picture before it was cropped and the one under the effect panel does it from the corners after you've cropped so that's the main difference uh we got any questions? Yes, we do what we got marion from bucharest, romania is asking is there a way to shift the vigna off center is there a way to shift the vignette off center? Uh, the top of my head? I don't think so, but let me glance just in case there is effects studio, I know what you would have not that I can think of, um what you'd have to do is trick light room by cropping the image in a way you don't want to meaning adds an extra space on one side so that it thinks that the newly cropped thing the centre is where you want it to be, which is off then save that image, meaning export it is a different j peg, load it back in the light room and now crop it the way you really wanted to, so that if that makes any sense, leave it, you know, so that's one way you can do it if there's another feature that allows you to move it, I'm not aware, so dorothy explorer would like to know what's the difference between grain and noise, grain and noise. Technically, I don't know like the whatever I say is just my opinion, not my not that I'm not a scholar on that, but to me, I think of grain is something that came from silver based media that used to print on photographically, and it would the look of it. Is different than digital from digital cameras noise, the noise in a digital camera to my eye looks little more like just little specks, whereas on photographic paper it had a little bit more of a shape to it other than little specks. And so I think of what came on photographic paper is being grain. What comes from digital is being noise. I don't know if that's it's technically true or not, but I think of grain is being something that can be enjoyable when you see a grainy old photograph you look at that looks cool, where is when you see a digital, noisy photograph? You're like you can't you correct for that? And so we're adding the nice version where it actually has some shape to its a variation in it, and not the annoying digital park for that comes from your digital camera that's kind of my opinion about it don't know if that's technically a difference in the terminology, right? Daniel of, um, late from l a. If you click on a pre set and then click on another, will one preset be applied on top of the other? Do the layer? It depends on how the preset was made if when you make a preset o make a preset right now, if all of these check boxes were turned on when you made the preset all he did is hit the plus sign next to the word presets to get this to show up if I hit check all then when I apply this preset to any image it's going to override everything else that have been applied to that picture because it's going to reset all of these settings to whatever's in this preset if on the other hand I click click none and then I on ly click what I need like when I tented a black and white picture and I use split tony to do it or in this particular case if I say I want effects which would be the post crop vignette ng that I just did to this picture and I leave all the other check boxes off now when I apply this particular preset the on ly thing on the picture that's going to change is the post crop vignette ing settings any changes that were made to these other categories previously to that picture are going to remain the same then if I choose another preset is long as it's not doing pros crop vignette ing as long as that check box was not turned on for that preset will still have that stuff applied to the picture and let's say the other prisoner applying only has tony it would apply just fine and it would not wipe out my post crap the netting but if there's any pre set I apply to that image that has post crop vignette ing turned on, then it would wipe out what this preset had already applied so it all depends on these check boxes and that's why when I make my presets I often hit the check none button and then I come in and onley save what I needed so if it was for that split tony where I tented a black and white only turn that thing on um that makes them much more versatile so doesn't wipe out too much from your image hopefully that answers your question okay question for rocket punch can you apply a mask to a certain area of a photo like a house in the iceland panorama example to exclude it so you can draw a graduated filter and correct all the sky including the portion visible between buildings? It's a pretty good question first I'll see if I find the gonna be in a library supposed to find pictures so I think he was talking about, uh I don't know uh, male or female and asked what he was talking about. So you see, I want this and I think he was saying, is there a way you could just say, don't adjust this area, adjust everything else I don't know if it's not over the buildings is that what can you read it again? Can you apply a mask to a certain area of the photo, like the houses in the ice land panorama example to exclude it so you can draw a graduated filter and correct all of the sky, including the portion visible in between the buildings? Okay, so I think what you're saying, wass I want to do the graduated filter. I wanted to come down nice and low, like into here, but if I do that it's going to cover up like this, this steeple, or whatever it is it's going dark in it. Is there a way I could say, don't do that, uh, in the graduated filter itself, now that I know off. But if I went to the graduated filter and I had it extending down quite a disc since so it might have covered up that what I might be able to do is let's say the adjustment that I was doing was lowering the exposure. I'm going to make this one look ugly because I wanted to be obvious. Usually I try to go for more subtle, but let's say it darkened and it went towards yellow. Okay, so it's an obvious change. What I might do is simply remember the settings that I used so remember, temperature went to one hundred and that exposure went to negative one point nine three and let's just say that's all I did well in clarity here's going one hundred so I would look at these numbers on writing down a sheet paper I'm only gonna remember two of them because whenever anything's live I can remember about two numbers so one hundred and negative one point nine three then I would go to my adjustment brush and I would do the opposite I would go teo negative one hundred and this one in the exposure I would goto positive one point it wasn't nine three nineteen you can also type in a number just click on this one point nine three and I am assuming that this will work similarly to sharpening in other things where if you put this at a negative of what something else is doing this will simply undo it so let's find out I'll grab my jester brush I'm gonna turn on auto mask and I'm gonna paint now on that little steeple like area it might be a little too much I wonder if I have any other sliders turned on if shadows turned on that might be why hold on a moment and I'll find out I'm gonna first painted in cause I can always and I don't know if my grady aged went down this far but uh it could because shadows was on and I didn't need that and I'm looks like it's also bright name or I don't know if I got this number accurately or if there's something else in their compensating but this is similar to what I would attempt to dio I would say let's try to compensate for what that graduated filter is doing by using the adjustment brush in counteraction it by bringing in the opposite direction you see that I got this to not be yellow a fine um there and, uh let's, turn off little check box here and see it just looks like it's getting way too bright and I'm not certain why? Because this isn't being moved up much, so I don't know I tried, I don't think it's exactly what he wanted, but it might give you a direction ahead and tried to get what he's looking for a thank you, sure, and this is from capture p who says what does process version mean and why is it checked? Okay, what does process version mean? I think he was talking about when we were in the creating a preset and even though I was in this pre set and I I'm trying to get this image back to the way it used to be come back in my history, um I was creating a pre set up here hit the plus sign, and even though I hit click none photo shop or I should say light room left one check box turned on I'm guessing that's why we're asking what the heck is processed version? Well, what process version is is whenever adobe comes up with a new way of adjusting an image and they incorporated in the light room, they want to try to make sure that all of your old images still open and look exactly the same as they used to they don't want to force you into updating them so that they would use the new technology the new slaughters because maybe somebody just ordered a print of one of your images and you expect it to look exactly like the last one you made. So when they come up with new sliders to add toe light room, that would change the appearance of every picture you ever open because it's a different kind of math behind it, they name that a new process version and they name it based on the date that they introduce the new technology and so you could switch between those on any image by going to the bottom of this list of adjustments and going to camera calibration that's where you'll find a choice called process and if you click there you can choose between the three different versions they've come up with so back in two thousand three the technology for adjusting images was not as fancy as that is now so if I want the sliders that usedto having that version of light room that was released back then, I could choose this. And I'd have. If I want to get to the sliders I'd have in just like room three. I would go to here and now. The sliders available under all of these slaughters will be like the old version of light room. And if I want the sliders from the newest version, I go there. So when you're saving a preset, it assumes that if you have, like, an old pre set that was made with footage with light room one, you might want to be updated to the new process version. Or, if you wanted to have the exact same, uh, effect you'd want to keep the old process version it would in. So they have that little check box and try to keep it consistent. Two little technical it's. A little bit semi confusing, but that's what it relates to.
Class Materials
bonus material
Ratings and Reviews
Gordon
Since most photographers give classes on PS, it's just great having such a great teacher teaching LR. I don't have the time or money for PS and teachers like Aaron Nates work only with PS like most others. They all are great teachers and I watch even though I can't use what they teach, I don't consider it all a waste of time. Bill Willmore is one of those great teachers and goes into great detail. I would love to have the money to purchase this class as it's impossible to retain all the detail that he goes into.
a Creativelive Student
This presentation was awesome. After going through two versions of Light Room, I still learned more in three days than I learned in 3 years doing self study with hundreds of dollars worth of books. Ben Willmore works magic in Light Room and shares his expertise with all. This is a great course and a real bargain. Not only is the course valuable, but so is the PDF as a bonus with this course. Thanks, so much. See you tomorrow for Photoshop masking.
Rico
Ben Willmore is a fantastic teacher. The PDF download is superb and worth the price of admission. If there was a way for me to do the techniques that Ben is teaching, with him, while he is teaching the technique, then that would be a perfect learning experience.