Lessons
Day 1
1Importing and Organizing Part One
55:47 2Importing and Organizing Part Two
38:08 3Tonal Adjustments
16:01 4Exposure and the Histogram
46:02 5Color Adjustments
35:06 6Fine-Tuning Individual Colors
43:15 7Maps
25:50Exporting
38:09Day 2
9Intermediate Organization
44:41 10Morning Q&A
38:53 11Localized Adjustments
1:00:57 12Image Enhancement
1:23:57 13Slideshows and Printing
1:13:47Day 3
14Shooting Tethered
30:52 15DNG Conversion and Keywording
50:15 16Keywords Q&A and Publishing Services
29:24 17Publishing to the Web
18:16 18Quick Collections, Dual Displays
13:12 19More Publishing Services
12:44 20HDR in Lightroom
23:18 21Advanced Adjustments
44:03 22Lightroom Preferences
30:02 23Sharpening Photos in Lightroom
31:02 24Book Module
15:02Lesson Info
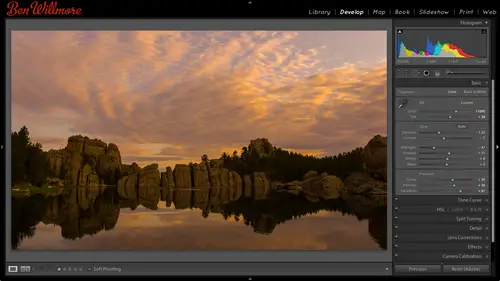
Localized Adjustments
Let's, go back to one of the images that we worked with yesterday to see how that could be done and work with a few other, uh, images as well. Uh, when I had this image yesterday, I was taken in a winery, the cellars underneath and had a yellow orange color caste. I used the white balance eyedropper, and I tried clicking on various things like this picture frame, or one of the labels on the bottles to try to color correct the picture, knowing that any area that should be a shade of gray doesn't matter what the brightness is of the shade of gray, but should be what's known as neutral, not bluish, not yellowish, not orange ish is an area that if I click on it without eyedropper, photoshopped or light room in this case can look at it and say, if there's any color in there that's probably the color of the color cast, and I'll figure out how to get rid of it. But in the same image, if I zoom up up here, you can see through to another room, and that room was lit with a different kind of ligh...
t source. So I want to figure out if there's any way, I can get that area to be color corrected as well. This could just as easily be a picture of an interior of a high end home doing fern architecture magazine, and they have some wall sconces that are tungsten light. You're using your flash, which is more daylight balance flash within that space and you didn't mix the two light sources. Ideally, you would put a color gel on your flash to match the color of the sconces that might be on the wall. So you're using all the same color of light, but you might not think of that when you're out shooting. So what if I came home and I had a mixed light source is needed to correct for so in light room when you're in the developed module just above the basic sliders that air here is this really long brush? See that thing? I think they've changed the appearance of it like for if I remember correctly, but that brushes noticed the adjustment brush. I'm just going to click on it, and when I do adjustment slaughters will appear below it and we have a limited set of sliders we can use. We don't have all the ones that you have to adjust in entire picture, but we have a good number of them now if you look at these the top ones. I'm going zero mahal out by just double clicking on any slider that's not at zero already, and I'm going to try to decide what exactly it is I'd like to change so there's a bunch of different things I can do with this. The first thing I'm going to dio, though with this particular picture is a notice in the lower right there's an exclamation point? Do you see that little exclamation point down in here any time we see that? It means that this image was most likely adjusted with an earlier version of light room in so it presents you with the sliders that were available in the old version, not the more modern ones? Uh, that we've been using, so I'm gonna click on that little icon get it to update it. And now when I did that, did you notice that a lot more slider showed up here? That's? Because earlier versions of light room, we had fewer choices when using the adjustment brush, and once I updated that picture it gave me. All of the sliders are available in the new version, so if you open an image that you've never adjusted before in the new version of light room, you'd get those sliders by default. It's on lee, if you open a picture, that's been adjusted with an old version of light room where you might find that exclamation point in the corner and you'd have to click on it to get the expanded set of sliders that were put in in in light room for so anyway, I'm gonna try to decide what I think would help to get rid of that color cast. I'm gonna do it by adjusting the white balance, which are these two slaughters, temperature intent and looking at the image, I would see the area that I see through there is two purple it so if I look at these sliders, I see this kind of purplish it's really magenta is purple over here, and I'm going to move this slider away from that color to say that's, what I wanted to do to my picture now, when I move that slider, nothing is changing in the picture because I'm in the adjustment brush and it's waiting for me to brush it into my picture. I'm just guessing at what it needs afterwards, I'll be able to change it. Then, before I paint, I'm gonna look down here at the brush settings that's where I can choose the size of my brush, I can choose how soft the edges with feather in with flo, I can choose how much of my adjustment I get when I first paint across my image, I'm going to make sure my flows turned up one hundred percent, so I get one hundred percent of my adjustment, and when I change those the brush size, I don't usually do it using the slider that's here I'm so used to working in photo shop and using the keyboard shortcut of the left and right bracket keys to make my brush larger or make it smaller that I use the same ones here. If I add this shift key to that, that is how you would change how soft the edge of the brush is if you were in photo shop the same keyboard shark that works here, you hold down the shift key and use the same square looking bracket keys on your keyboard. If you hate using keyboard shortcuts than go ahead, move these sliders around to do it, so I'm gonna get a brush a little bit smaller and maybe a semi soft edge on it, and I'm just gonna paint it into this area, uh, where I see it looking purplish and as I paint it's gonna change the image and I'm just gonna try to get it in the general area where I think it looks too purple try to cover that whole area. It looks like I was okay it guessing the setting that was going to be needed although I might have gone just a little bit too far because now to my eye there with a hint of green in there and if you look at the slider that I used to perform the adjustment it's this one over here a tent moving it away from this magenta like color moves it towards green and what happens is if you had a magenta color cast once you get rid of it by moving this a certain distance if you go any further than you'll be introducing visible blue not blue green to the image so I might back off on that slider just a little bit might also try adjusting the temperature slider to see that helps maybe I want to cool this down or warm it up maybe I'll push this a little bit towards yellow so it looks more like the room that is in the rest of the photograph I think something like that might look appropriate, so once I've painted on my picture, I confined to in the adjustment but moving these sliders it's on ly after I painted on the picture will be able to see those changes and if I look at my image you'll see a little circle with a black dot in the middle of it on the picture that little thing is known as a pin and it represents wherever I first clicked to apply this adjustment, you see it it's like in the middle of some guy's head. If I moved my mouse on top of it and I just hover over it without clicking, it should put a red overlay of my picture that shows me what part of the image is changing that's the part I painted on that's what I've isolated toe work on now. I noticed that when I see that red overlay that's, some of the red overlay overlaps the bottles at the bottom, and those bottles might be in the in the other room, the room that we're standing in when we took the photograph. And so if I want to get that over, spray onto the bottles off of there, what I could dio is at the bottom, where it defines my brush. I can choose the option called a race. I just click on the word of race and now it's thinking about erasing things, and you actually get different brush settings because it wants it so that if you switch back and forth between adding your adjustment and erasing your adjust, but that you could have different brush looks so I can come in here and now, just paint over the bottle and paint over the other bottle, try to get that off of the, uh image the only problem is I would only see that overlay when I mouse over that pin like this and so it's hard for me to tell where I need to paint to get rid of that over spray, because when I move away from the pin, that overlay goes away. Well, at the bottom of my, uh, screen, there are some options, and I think the option here called show selected mask overlay what that means is show me this overlay even when I'm not hovering over the pin. In that way, I can still see where I have over spray and sale. Maybe I need to get rid of it down here on this bottle and a little more over here, but keep in mind that no one else is going to see this overlay, so I don't have to get that mask a look. Perfect. I just need to visually look at where did the color not look right and choose a race and get it off of that area so I didn't get over spray don't stress about this looking perfect. You can turn off that check box again and just look at your image as a whole and say, is there any part that looks messed up? That overlay simply tells you where to evaluate your image to see is it messed up there or not? Now those pins sometimes can feel distracting because on occasion I'll have four five month my pictures have adjusted multiple areas and then when I'm viewing the image there just distracting I want to see the image without them so there is a choice in the lower left it's the show edit pins and I'm assuming this is the default setting called always where if I had adjusted more than one area I'd see more than one pin I like to change this to the choice called otto and what auto means is on ly show those pins when my mouse is on top of the picture so if I moved my mouse out of the image to the adjustment sliders I don't see those pins covering up my picture but then I just moved my mouse on top of the image ben shows up so let's take a look at what we can do with this in other things for now since I only needed to adjust that particular area I'm gonna hit the dun button so in this image will just have one adjustment uh and let's go look at a different picture I'll hit the letter g to go to grid and let's see what else we have some of these images that I have already been adjusted and I'm going to remove the adjustments from those although one of them I have to be careful with here I'm just going to right click on the images choose developed settings, and then I can come in here and just say reset, which means act as if I've never adjusted these or open them before. Okay, I'll get that one hit d for develop and in here I think the faces, regardless of what I do with the sliders in my adjustment, sure, I could come in here and grab the shadows and try to bring it up, but I might get other areas like down here in the dirt to be too bright, and I don't know if I'm going to get exactly what I want s o I might adjust the image is a hole in this case bring the exposure down just a tiny bit because I like the sky and the foreground a little better. You bring up clarity to get him to pop vibrance ugo, but I'm a little bit hesitant to do too much with shadows might bring out a little bit of the faces, but I don't want the other areas in the background have shadows to become too bright. So that's what I'm going to switch to the adjustment brush in with the adjustment brush it's going to remember whatever I brushed into my image last it's going to give me the same settings because it's, assuming I might be working on a serious of images that have the same problem you know if I took ten photos in that room of the winery that had the same image your issue so remember you khun double click on any slider to reset it but there's a way to reset the mall well, let's say that all these things are messed up if you double click on the word effect it's gonna reset him all so that way if you get sick and tired of having to reset for five of these by double clicking double click right on the word effect you're going to get back to normal so in here I'm going to first guess at what I would like to put on their face because otherwise when I paint over the image, I'm not going to see any change and it'll be hard to tell what I've painted far enough over the face so I'm just going to make it ballpark guess of what it needs I'm gonna tell it to bring up the shadows to give me a little more shadow detail and maybe bring up the exposure a little bit to open her toe open up the area overall that's just my guess nothing changes in the image yet because I haven't painted it in yet so then before I paint a look down here and I say what size brush though I haven't how feathered and I think I'll be pretty good there just a slightly smaller brush maybe and now I'm gonna come on to the face, and I'm just gonna paint, and now is the only time I'm going to see that adjustment, okay? I got in our face. It looks to me like it's not, um radical enough adjustment. I'm only seen the face a little bit brighter, so now I could go back and actually dial in what it truly needs. I'll bring up exposure to see how much that helps. So your face changing, I'll bring up shadows to see if that helps. I like that. Okay, I think that looks all right problem with this is I might have gotten some over spray so let's mouse over that pin to see the overlay. Can you see the red at all? Extend beyond the left edge of on the photo of her face and a little bit onto her hat, uh, that's some over spray and might not want because that is going to cause it to have a globe? And so what? I might do a zoom in. I'm used to doing two keyboard shortcuts and photoshopped, but me see if I can do it this way. Command plus is another keyboard shortcut, presuming it, because if I click right now, it thinks I want to paint usually you're used to being in the library module where you could just hit the space bar and other things to zoom up or click and clicking that would would end up using the brush anyway I have a little bit of ah over spray beyond this edge so that's where I can choose a race near the lower right and I could come in here and paint then to say get it off of the background and remember if you want to see that overlay while you're painting, turn on the check box at the bottom and then that will tell you where is that over spray because bringing up the exposure and the shadow slaughter it's probably make that sky look like it's glowing a little bit and it might want to get this off of her hat space bro give me the hand to also aiken scroll around all right so I could do something like that um I want to no longer see the overlay I turn off this check box at the bottom and I can see what I've done now if you want to see before and after with all of your adjustments and light room there's usually a little bitty light switch somewhere near the left edge of wherever the sliders are you been playing with in my case it's near the bottom of where all these sliders are if I zoom up you'll see right here there's a little kind of light switch looking thing and that's going to toggle the the's settings so it's either applying to your image or not? And so if I turned that off, I'll see what it looks like before I used the adjustment brush, then click it again and you'll see what it looks like after so I brighten up her face nicely. Now there might be other areas of the image that I want to brighten up a cz well or make other changes so let's see how I could go about doing that? Um, couple choices near the top of where all these sliders are you'll find the choice of edit or new that it means you're working on whatever pin is currently active, which means if you mouse over your picture, do you see that this pin has a little black dot in the middle of it? The black dot indicates what what's active that'll make more sense once I have more than one of them on my picture, so I can either edit that pin or if I choose new here it thinks I'm done with the adjustment I just applied and now I can create a new one that's independent of the first because when I come in maybe over on this other woman's face I might decide that she needs to be brightened a different amount and I might decide she needs a color adjustment or something else so I'm going to come in here, maybe bring my feathering up to get a softer edge and see what happens if I paint this on to her now in some images you're going to find specially faces that you might need a different amounts in different parts of the face it might be the one area's really in deep shadow in another areas in partial shadow a little bit lighter, more light hitting it so when you're in here, there is a choice called flow inflow means how much of this adjustment though I want to get my first paint stroke and so if I bring flow down I'm going to bring mine down to maybe fifty percent then it means when I paint I'm only going to get fifty percent of the adjustment of asked for it, so I'll do it over here on this side you should see this bright nning a little bit but not a lot then if I let go and click again paint across neri again, I can paint kind of back and forth and build it up so one part of this might get only one application of it. Another part might get two or three coats of it until it builds up to full strength then it ain't time I go over here and find you in these slaughters I could say bring more of the shadows or maybe try hiding exposure when you see those areas changing, if I want to tone down the bright part of her nose, then that's a different adjustment than this, I want it painted into a different area the pictures so I choose new near the upper right and with new turn on, I guess at what kind of adjustment I want remember to reset him double click on the word effect in that particular case, I might want to bring my highlights down a little bit because that's a british area get a much smaller brush and I have my flow at fifty percent meaning give me half of what I'm asking for and I can come in here try painting that in there's, an area where I need a little more a little brighter on the side of her nose just paint across that more than once buildup that effect now I think somewhat subtle what I'm doing, but if I mouse over the pin when it shows the overlay you can often notice, especially if I bring my flow way down that some areas will look lighter red, then others other areas will look more densely red because they're getting more of that application now there are some instances, though, when I can really mess things up let's see if I come in here and let's say, I want to edit one of the pins that's already there you see more than one pin on the image the pin that's got a black dot in the middle of the act of one if I want to edit the one eyed applied previously where I originally clicked on her forehead to brighten things, all I need to do is move my mouth on top of that pin and click on it when I click on it the black dot will move over there that means that that one's active right now in the sliders that appear over on the right should update to reflect what adjustment is being applied there so if you watch the sliders on the right I'll click on a different pin and wash the sliders you see him change so they're just reflecting what adjustment is being applied each one of those so let's say I was working on this one and sometimes photoshopped gets in a weird mode where that red overlay stays there even though I don't have a setting turned on telling it to stay there uh if so mouse over a different pin and then away and sometimes it'll go away that's it could be a bug and light room um but let's say that I worked on that pin and I just come in here to add some and I'm just going to try to blatantly screw up I'm going to try to brighten the area that is above her forehead I got the floor one hundred percent and I'm just gonna say brighten this up a little bit and I'll accidentally go out here hoops I'll even bring up the sliders to make it more obvious of an adjustment even though that she doesn't need that much on her face and just trying to make it obvious that have affected the sky so now let's say I want to take away from it that's where you go to near the bottom and choose a race to say let's get rid of some of the adjustment and I would usually go over here and paint the problem is how am I going to be able to precisely paint around the edge of her head it's going to take a harder edge brush there and I'd have to be very precise it might be very easy to tell where I've painted on where I haven't so there is a choice I have the set to a race and there's a check box called auto mask when auto mask has turned on photo shop is going to look at the color that is in the center of your brush and it's going to try to on ly get stuff on that color or that brightness when it sees a distinct change in brightness or color it's going to stop applying paint and so I come in here and I'm gonna paint on this in a letter it kind of over lap onto her head wrap there in what's happening if we look at this notice I did allow the circle overlap her head wrap if I mouse over that pin hover over it do you see how it stopped removing stuff once it hit her head wrap that's their that's because auto mask was turned on in auto mask means tried to prevent over spray on to other things and so it could be an overly useful feature if I wanted to brighten the rest of her wrap around her head I would say that uh in here I want to, uh, change from the erase setting toe over here the setting called a what happens is if you would have already used the array setting and you want to get backto adding two things which you really trying to do is select the brush but they put the letters and be here because they allow you to have two different settings for your brush like if you wanted a soft edge brush in a hard edge brush to switch between them so choosing a or choosing b means let's use the brush to brush in more the adjustment you could just have two settings like one with a hard edge brush one with soft and squishy between but it kind of complicates the interface if you're not used to it so anyway I'll be using that and I'll turn on auto mask and just so you can see what's going on also turn on the overlay by turning on the check box of the bottom. Okay, now, if I had on a mask turned off, I could freely paint in what I do this you could just go way out here, and even if I got stayed close to it but just got a little over spray, it would go beyond choose undo, but with auto mask on, it looks at what's underneath the center of that brush in his long as I never let the center of the brush touched the sky, it's going to try to prevent over spray two going beyond what looks different than what's underneath the center of my brush. It's based on both color and brightness, though, so I got to be careful when I get into these dark parts of her head wrap because it might try to isolate eighth um, if I don't get the cross, the little centre of my brush on that so let's, try it over here in this part of the head wrap. I don't know if that's what you really call these things you're putting around your head, but in that way I could do this without getting a bunch of over spray onto the background. If you need to do this precisely though you'd need a zoom up more because I can see a little gap in there, I might need to get that center of my brush like right now where there's a little cross hair to just touch that little edge there to say no actually go into those shades but not actually get it um beyond so anyway, auto mass could be overly helpful especially when getting rid of over spray that went on to a background grab the option called a race turn on auto mask and then just make sure the center of your brush he is on where you want either your paints or a racing toe happen on that could be very useful afterwards you can turn off auto mask and refined things by hand any time auto mask gets in your way and then remember flow is how much of the adjustment are you going to get on your first paint stroke? Then you could paint back and forth back and forth back and forth build up the change so if her face needed to be brightened mawr in one area less than another, I would paint over one area one time and the other area back and forth three times have it build up. I believe the density choice means what's the maximum I can get um without releasing the mouse, implying more s so anyway that's what we have we have a racing to get rid of this we have a and b for our brushing that was just if you happen to want to use two different settings for your brush and switch quickly before between them above that we have all our adjustment sliders there is a limited set but it's quite a wide range in light room four previous versions there were fewer choices there like you didn't have temperature intent on dh I really find this to be useful one of the other choices in here is if you ever have fabric and you see an odd pattern within the fabric it looks like it did not belong in the scene whatsoever where it's almost like an undulating worm of ah color shape going throughout the fabric that just you don't see with your eyes uh that's what's known as a more a pattern have you ever taken two screens like the kind of screen that's on your maybe on your front door screen door and put them together and then put him at weird angles they create this weird interference pattern it's known as a more a pattern if you were seeing that there's a choice in here now called moray and you'd be able to paint across their fabric and reduce or eliminate that I don't have a sample image I could find quick enough before this class tio to show you that one now all right there are also some things we could do with faces that I find to be useful so let's grab another half inch head into our develop module ben why doing faces still does on twitter had asked what's the best way to remove readiness from an isolated area on a person's face to remove readiness a couple different things you can try um when you're in the adjustment brush you can one thing you can do is lower saturation a very small amount if you lower too much their skin could start looking grey so be very careful with that another thing you could try is white balance moving it away from the magenta just a little bit and putting on the skin or uh the other thing you could do is there's a twist called color down here and if you click on the little rectangle that's on the right side you can choose a color to brush into your image it means to shift your image towards that color in what you want to do is choose the opposite of the color that is inflicting your on your image you know if you so if you have red cheeks you want more of a scientist or bluish that you're putting in it's not that you want the uh image toe look science or blue it's that blue absorbs its opposite um so blue it actually absorbs yellow um sayin is going teo absorb red so what you could do is say you want a little bit of sayin and then come in here and just brush a tiny amount of it in there and it will start absorbing some of that red it's kind of a counterintuitive thing where you thinking I don't want the initial look science, but what happens is every color has an opposite. If you look at a color wheel, they're usually directly across from each other had I known I was going to get the question I'd have a color will open here and I could show you that, but every color has an opposite and you can easily figure out if you have photoshopped the opposite of red, green and blue. Those air convenient wants to know by looking in the info palate panel in there because they're listen directly across from each other. You can go to the window menu in shoes info and in the info panel directly across from each other will show you the opposites of each other. This stands for red, green blue this stands for science magenta yellow so if she has too much magenta and her cheek, you could introduce some green it would absorb the magenta put in too much green, you'll absorb all the magenta and start making it look green if it's to read in the cheek, then you could introduce sayin into the picture science this is like a c sar teeter totter where when you put in mohr of the opposite it automatically reduces uh what would be on the other side of your see saw and so this is one thing it's useful I remember these because ah, your images are either an rgb or c m y k mode and they're always mentioned in that order I never hear of anybody saying you're in g b r mode they just don't say that they say rgb some people use being in the printing industry though say these in the order that they're printed in so sometimes they change the order of those but in photo shop and all other general programs you use they're usually in the same order so if you can memorize the order that they're in, then you khun I always say, what color is that I'm missing or what color is that I have too much of it was read I think it's the first letter of rgb so what's the first letter of seeing my k that would be the opposite. All right, so anyway that's what you could do is introduce the opposite color into, uh, the image and it should help to absorb what you're trying to get rid of, all right? There are a few things that are useful when it comes to, uh, humans when you're using the adjustment brush and so I applied it nice in the intestine brush yet let me just dark in this image a little bit for my screen this is cassandra friend of mine and they're a couple of things that don't help when it comes to people one of them is sharpening their entire face isn't always a good idea because you exaggerate any imperfections in the skin by sharpening the entire face, sharpening things like eyelashes and the teeth and things like that the hair that's great but sharply in the middle of the skin is going to exaggerate any imperfections and sometimes people don't like that. So one thing is we haven't I know we haven't talked about sharpening yet, but if I go under, uh detail here this has had some sharpening applying to it if I could go in glance at how much sharper news applied under the detailed town in this case for this particular image to seventy four for sharpening uh if I want to keep her skin looking smooth and I don't want it to be sharpened, I could go to the adjustment brush and I can take one of those sliders in here which is called sharpness in putting it into the negative. Now the negative would usually blur your picture, but before it can blur your picture it's going to try to counter act with sharpening that is applied elsewhere in light room and that's. Why? Before I went into the adjustment brush, I just glanced within all the adjustments. Sliders in the main part of light room, there was one choice called detail and I could just glance it how much sharpening is currently being applied if I set this to the opposite of that. So if I have seventy four right now being applied to the entire picture and light room, I sent my adjustment brush to negative seventy four in. When I paint it shouldn't blur the picture. It should just remove the sharpening that supplied in the main part of light room in the main adjustments. And so then I could come over here in paint on her skin to say, do not sharpen this stuff. Keep this as soft as it was in the original picture. Does that make any sense? If we apply a negative amount that matches the amount of sharpening applied to the entire picture we can counter acted without blurring the picture. If I go any further than that, you fight to bring this to neck instead of negative seventy four. I bring its negative eighty four. Then we be blurring the picture. I would rather not do that there is something else I would rather do if I want to soften the skin. If I want to soften the skin, because a lot of people just want that soft look, um, on skin tones, then I prefer to come up here to a choice called clarity. I don't know if you remember clarity when we talked about it the other day, the way I described it is that it will emphasize the textures and detail within your picture, so if you have the texture of fabric or of wood, grain or of brick or whatever, it's going to emphasize it, make it easier to see that's not great for skin that's going to make it so you can more easily see every little wrinkle line and every nothing else in someone's skin. And I warned you yesterday when I talked about clarity if you move it up and then decide that you want less of it, when you move it down, don't go into the negative side because it'll blow your picture. I don't know if you remember that, but I said that I think, well, this is when we'd want to blow our picture, but we're blurring it in a different way than normal blurring. This is a blur we could get away with a little bit more where you don't look at the picture and just go oh, it's blurred so negative clarity when it comes to skin conspire without the skin so in this case, I'll turn off this little light switch, which makes its our adjustment brushes no longer affecting the image, and I'll turn it back on and watch the skin we ended up taking out the sharpening that was being applied and putting in a little negative clarity to smooth out the skin, and so this is without that change, this is with it. Do you see how much smoother skin is now here? I might go a little overboard just to try to make it so you can easily see it because it's usually something you do that's relatively subtle try to have some constraints and be subtle with it, because when I see photos where it's overdone, I can't enjoy the photo, I'm just distracted by the effect, you know, and I'm just like, okay, they love negative clarity, you know? And I don't just for me, if you're showing me a photo of your clients might love it because most people love smooth faces when it comes to you out having photos taken so anyway, that ends up the clarity is what softening the image in the negative sharpness is just counter acting, what the sharpening, being applied elsewhere in light room, other things that I might dio and on this image, I'm not going to be overly precise with my painting because I'm just trying to talk about the adjustment sliders themselves and I'm not trying to make an image we're going to frame and hang on the wall if I was doing this in real life I would be more careful with where I painted for instance I would not have painted across her knost cols because right now they're getting softened and I don't think it looks is good I wouldn't have gotten that spot just like I would avoid her eyes her eyelashes because I want to get those nice and sharp it's the smooth parts of the skin that I would be painting on so other things we could dio let's make a new adjustment again and let's reset all these sliders by double clicking on the word effect just make sure that you've chosen new already when you double click on the word effect otherwise if you haven't clicked new yet it'll take what I've already painted on the picture and just clear out the adjustment zero it out got to make sure I've already chosen new so it thinks I'm done with the previous adjustment then I'll double click on effect then I'll decide what else would this image use? Well, how about making her eyes come out a little bit to make eyes come out? I might bring up the shadow slider a little I'm going over emphasize it a look ridiculous just so you can see it happening and then I might back off on it I might also bring up saturation to make her eyes color show up a little more, and I might bring up clarity a little bit to bring out the texture in her eyes, and with this, I want to try to make sure that I don't get over spray onto the skin so I might turn on the auto mask check box that makes sense as far as the set up goes, so we're going to say, bring these out some shadow detail, emphasize the texture and her eyes, and make her eyes a little bit more colorful. That's what I'm guessing, uh, on a mask is on, so I'm gonna try not to get over spray, and then I'll come in here and click right in the middle of the eye and see if I can just kind of trace around the colorful part of the I go to the other one to the same thing and then to see what I'm doing, I'm going to find you in these slaughters, maybe I didn't move them far enough removed him too far. First, I'll bring up shadows to see how much of that could I get away with. I'm actually not seen a great amount of a change from seen some can you see her eyes get a little bit brighter, I can see I'm changing. It's just not dramatic. If I want dramatic, it'll be way too much, but I could come over here to exposure and bring it up. Then you'll see cm isolating your eyes. Uh, if you were to do exposure, you would want to do it overly subtle around there. Let's, see how much saturation aiken get away with your eyes to be more colorful and a little bit of clarity, make him sparkle a little more. You want to see before and after I'll turn off the light switch thing? S so you can see without see how just kind of dead her eyes look, and after I would want a mouse over that and make sure I didn't get a lot of over spray because I betcha I have over spray ah lot of it on her eyelashes because the center part of her eye words black is very similar in color and brightness to her eyelashes. So when I was using auto mask, he probably went out and got all the stuff that looked a similar brightness so I could come in here in mouse, over to see my over spray and yeah, I see it going beyond the centre into other areas, I could turn on the check box at the bottom to keep that over spray visible, and then I'll say, wanna race from this and I'm not going to use autumn ask I just want to be able to paint freely small brush, you say get it off of that I don't need to brighton and make that more colorful out that way, and I might need to paint some in and other areas, but turn off that check box so I no longer see the overlay, and I'll turn off the light switch thing to see without with to see your eyes suddenly jumping other things you can do in this case. I don't think cassandra needs it, and that is teeth. If somebody drinks a lot of coffee, tea or smokes, their teeth are often going to be darker than you'd like, and they might be a bit yellow and so with teeth, you could bring up the highlights slider to make the bright areas brighter, and you could bring the saturation down a tiny amount if you make teeth very unsaturated, start looking gray, and so you have to be careful with that where the other thing you khun dio is, you could introduce the opposite color with the color choice or at the top, the temperature intent. Push it away from yellow let's, say, if that's what the color of the teeth is. But if you do her teeth just be overly careful because if you get over spray underwear gums and your de saturating or making it less yellow her gums khun start looking kind of grayish so I'd use auto mask and I would just make sure that I double check for over spray afterwards uh now when I do this often times I do the same kind of adjustment quite frequently so there is a uh choice to create presense so if you know you're going to soften the skin all the time, why don't I mouse over here and click on the pin that softening her skin so that the settings for it get shown over here at the top of all these sliders there's a little pop up menu right now it says custom and that just means that the settings that I'm applying right now are not the same as any pre sets that are installed their custom settings if I click on the word custom I can come in here and say save the current settings is a new preset and also when I do that call this smooth skin create then maybe I'll go to the pin that's for the eyes click on it so that the settings are loaded over here and I'll go again to that same area right above all the sliders where says custom and I'll choose save current settings is new preset and I'll just call this uh make eyes sparkle nice ballpark oh I'm terrible spellers uh create so now when I come back if I work on a lot of pictures of people I know what you have to remember my special formula for what to put in skin to make it smooth and all that all we need to do is click on that little poppet menu that's just above all the sliders and this is where I can switch between various presets that I've created here I have one for teeth whitening for instance um in that way if you set up maybe six or seven presets you can go much faster when you're working on faces any general questions before I move on to another image guys think of anything let me know yes there's a fair amount of questions about this so mary from costa rica would like no is it possible to mask first and then do the adjustments with the brush without the guessing the adjustments sure if you want a mask first, what I would do is I'm going to choose new near the upper right to make a new adjustment or if you're starting fresh on an image just you don't have clicked knew because you'd already be on new um I might reset these just because it's not what I'm needing so double click on the word effect and then I come over here these are all zeroed out there's no adjustment in before I paint turn on the check box of the bottom that's the one that leaves the mask visible, that red overlay, and so I'll turn that on, and now when I paint instead of seeing an adjustment show up, I'm going to see a red overlay show up. And so I know that this red overlay simply indicates a bigger brush uh, where I'm going to adjust the image once I'm done painting because if I don't have that as an overlay, I can't tell where I've painted in where I haven't he and so all I did was before I painted, I reset all the adjustments, sliders zero him out, and I turned on the check box at the bottom, so I see the red overlay they're just saying no turning on the check box of the bottom isn't going toe suddenly make the overlay show up. You gotta move your brush over to the image and start painting it's only when you start painting that you're going to start seeing that red overlay, and so I convict her redhead here. Uh, when I'm done painting and I have the red in the area that I'd like to adjust, then I turn off that check box at the bottom. In now, I can move these sliders and it's going on ly affect those areas that were previously covered with red so what we want to do to her hair let's bring up some clarity to make her hair kind of jump out a little bit. I don't. If you wantto add highlights to her hair, you could bring up the highlights. You could maybe get more shattered detail out over here. We'll do some lightning on her hair uh, that kind of stuff. That's one thing you could do with these brushes if you want to highlight somebody's hair uh, just brighten it and painted in act like she's got some highlights uh, but that's, how I go about doing it? So thank you. All right, so katie watts had said, I noticed that clarity flattened the tonality range in the face. Can you counter act the flattening of tones from clarity by bringing up the highlights? You could possibly bring up the highlights so I'd have to switch over teo first, get back to the adjustment brush and click on that pin. You could come in here and say you want to bring up the highlights and suddenly the bright areas of the skin is goingto jump a bit more, it really depends, careful if you have somebody, it was nervous and they're a little sweaty you're probably going to make that more obvious if you bring up the highlights but if they were somebody that were uh let's say powder do you know where their skin isn't didn't have ah lot of oil on it then bringing up the highlights could make it pop a little bit more you could try bringing down the shadows a teeny bit that is going to dark in the dark area but in the fact with faces I don't think the shadows are mainly going to get into the the creases and folds around the eyes so uh yeah, you could try that. All right, let's look at another one looks sometimes when I'm in light room I think I'm in photoshopped mentally and I'll use a photo shop keyboard shortcuts and it's somewhat amusing sometimes um with this I have this thing set to fill instead if it if you ever get to a point in light room where your images just seem tto fill the screen and you can't see the whole image uh you might not know what effect you've chosen to get to that and you hit the keyboard shortcuts like space part of zoom and you hit space bar you're used to it zooming out and showing you the entire picture, but instead it fills your screen where like there's extra info above this and I can't see it go to the left side and at the top where the navigator would usually be that's where you could expand it and see the miniature version of your picture or collapses and just see that word up here that will show you what view you're in and right now I'm in phil view to get back to fit view just click on the word fit you know? So if you ever get to that point where just you don't know what you did in light room you know what keyboard shortcut used or whatever and suddenly you could no longer see the whole image when you hit space part of zoom in in space party to go back to fit in window go to that navigator up here and somehow it got sent over to fill usually keyboard truck at a bump that I didn't even realize existed uh and hit fit so anyway, I just ran into that all right? So images like this one is another good candidate for using the adjustment brush. So if I come in here and grab my adjustment brush er and actually let's see here soon so we can see this guy see if I can get out a little bit just did commit command minus to see my little in here oftentimes I need isolated areas like this and any time you see a distinct difference between one area and another is when you're going to want to use the autumn ask options so things like his fingers his hand again this wall is when autumn ass could be useful if there's ever a soft edge, though in there what's not overly distinct, and whether or there's not a great difference in color or brightness between the two that's when you don't want to have auto mass turned on. So just consider that when you're moving around, rushing around on your image won't see if there's anything else. I have dinner on this image. I've made up additional changes in photo shop on this one, but, uh, this image here, I darken the surroundings all the way out here, uh, using the adjustment brush and it really made it so concentrate in on this area to make sure that I didn't get any over spray onto the clothing that's here I used auto mask after had already painted across this dark area here to darken it. I've gotten over spray onto their clothing here, so I said I wanted to a race and I turn on auto mask and it is painted on the red reddish clothing here, and it was able to take it away. But darkening the surroundings really made the, uh, kids that were here pop out so it's just another example. So, uh, I got one more this one and only see if I can get back to what I had earlier. I'm not sure if I'll be able to or not might have reset it in a way. They're okay, here's a version of an image where I just want to show you one thing that was done to it. This has already been adjusted. It's an image from iceland? I want to show you what I did with the adjustment brush in what I did with one other tool that's similar to the adjustment brush. So in this image, I'm in the developed module, and if I come in here to the adjustment brush and I'm mouse over my picture, that's what I'm going to see the pins of where I've initially clipped on my image to adjust it looks like I adjusted this area. He and I also adjusted this one when you're going through images that you've adjusted in the past, here's how I think about, uh, doing this, I could go to my justin brush mouse over my image to see if it has any pins. If I hover over the pin, I can see where each pin is affecting the image, so if there's some change I want to make, I can figure out which pin do I need to click on by just hovering over each one if I want to see what it looked like without the, uh change we have that little light switch. Remember down there if I turn it off, I'll see what it looked like before the just brush was used. Turn it back on. You see what it looked like after so you could see I did some bright ning that was selective writing down there. If you want to modify an adjustment that I had applied previously, I could move my mouth on top of my picture and then click on the pin to make it active. Remember, the pin that has a black dot in the center is the act of one right now. None of them are active it be a cz if I'm making a new adjustment if I were to click on the image, but if I click on a pin, the black dot goes in the middle so it's now active and, uh, it shouldn't right now be showing that red overlay in some reason it's gets stuck on it if that happens, because it should only stay on there. If this check boxes turned on, which could be annoying, happens on occasion just mouse over a different pin if there happens to be one and then mouse away and I find that that will get it to go away so anyway after you've clicked on one of the pins that's when you could expect the settings so I can see that in that particular area I was reducing saturation if you want to see what I did in the other area I just click on the other pin make it active and I could see what it did I brought up shadow detail and I made the image less colorful and so that's how I think about it when I'm working on existing pins let's say open an image two weeks after I'd initially adjusted it uh and you can go ahead and modify those you can just paint toe add to them where you can choose the reyes option to erase them just make sure the pin your thinking about has the black dot in the middle of it but this image also used a different feature that is very similar to the adjustment brush and so let's look at it right next to the adjustment brush is another tool and it's known as the graduated filter and I think the reason why it's called a filter instead of like a brush or something else is they're thinking about filters that you would put in front of the lens of your camera you know you could put various filters there like a polarizing filter or something else in one of those filters it's very commonly used in landscape photography would be uh a graduated neutral density filter that's a filter where it's tinted at the top you know darker it's like sunglasses at the top and that fades out to a clear filter at the bottom if you put that in front of a camera lens you could make the sky get darker but not darken the landscape that's at the bottom so graduated neutral density filter is what's often used in the field and they called this the graduated filter because it's similar to one of those in what you can do with it so I'm gonna click on that tool to make it active and there's a little spot here on my screen meaning it's already been applied I'll get rid of that by clicking on it hitting the delete key here's what the image looked like before the graduated filter was used I've adjusted the images until I started like it and I got it to the point where using the basic adjustment sliders I could no longer improve the image but there were some areas that still I didn't lie but if I moved one of the basic adjustment slaughters it would screw up another area of the picture so maybe this area down here we've become too colorful if I tried to adjust it as a whole now I could use the adjustment russian paint in an adjustment at the top of my image here but instead I'm going to use this graduated filter here's what I'm gonna do I'm gonna shift the temperature of the photograph many in the overall color of the photograph towards yellow by pushing this over here because I want more yellow appearing at the top of the picture. I might also bring up the saturation a little bit to make it more colorful, and you see, we have you can barely see the texture and the clouds that are up here. Where is down here? I can easily see the texture it's, much more of a large difference between bright and dark, so I might crank up clarity now by moving those sliders it's just like using the adjustment brush in that nothing's happened my picture yet it's waiting for me to click on the image to tell it where it should happen. But unlike using the adjustment brush, you don't just click and paint what you do instead is you click in one spot like right here and then you drag in the adjustment effects. Your image at full strength were you originally clicked and wherever you let go is where it stops affecting the image between those two areas, it will fade out like a grade, ian would fade out, so I'll do that and I noticed that I went way too far that looks ridiculous does not so I might lower my saturation, I might lower and not push the temperature quite as far and see what would happen maybe I zero it out and then slowly bring it up to say ok how far could I get away with maybe around there see what happens with clarity if I bring it down up sometimes I might end up changing the exposure darken that now I find it to be distracting though to see these lines on the damage in that little pin that's just like with the adjustment brush by default it shows the pins all the time and just like with the adjustment brush you go to the bombing your screen then it says show edit pins default settings always I sat mind auto auto means on ly show those pins when my mouse is on top of the picture and that way I could just see the end result like this and if I want to change it move my mouth's on top of the image I see it so the pin represents the adjustment as a whole the three lines represent where the adjustment starts to being applied at full strength so in this case anything above that linus full strength where the adjustment stops affecting the image which was to be the bottom one in this case anything beyond that was not affected and then the halfway point which is where the pin is and you can come up here and drag these things to extend that or compress it and control where is that one hundred percent applications point happening and where does it stop happening this ago? Extend all the way down here or does it do it more gradually there? The other thing you can do is if you grab the middle line and I don't like clicking near the pin I like clicking quite a distance away when you click on the middle line you can change the angle in case you need an odd angle, choose undo that to get rid of my odd angle so that is the graduated filter you have the same general sliders available and I find it to be useful here let's see what happens if I turn it off here's before seeing my top part of my skies not all that exciting after I got a lot more yellow in there and I don't see the image here but I have one other image I think I showed the other day in that wass uh we had an old car. I think that uh was in a partially sticking out of a garage he and I don't know if you remember it from yesterday or not it's a matter of um I'm gonna be able to find it quick enough here but it was an old car sticking there it is right there this one I think I also used to graduated filter on uh when the original see if I have it in here it was done with an older version of light remake until with that, maybe I used the adjustment brush on this version of it, but I have in the past corrected this using the graduated filter because if I reset this image to its original form, they looked like this and this foreground needed to be changed, and I didn't feel like painting across the whole thing. So when I was in the normal adjustment controls, I came in here and I brought up shadow detail to see in that garage, and I could bring down the highlights, but if I do that enough to get the foreground to really come down, which is really amazing that I can, other areas like the highlights on the car's tires might be something that I don't like, so let's say I didn't want to do it with the highlights slider like that in older versions of photo shop, I wouldn't even be able to get away with that because it would look good, but let's say I want to do it a different way go to the graduated filter guest inmate what kind of change I might need. I'm guessing I'd have to bring down the exposure quite a bit, and then I'm just gonna click right near this transition. And drag into it. Try to get the angle the match. I'll get the the length of the transition to be what I think I need, and I'll click much further away from the from the pin. Usually, I can change the angle. Maybe I need these to be a little further apart before I could get there, change the angle to match, to get more soft transition in there. But that would be another way that I would be able teo, kind of correct for that. Not making affect the rest of the image. So we have the adjustment brush where you just manually paint on the image and we have the graduated filter. If you need that effect to slowly propagate across an image frequently used for darkening skies, where the top part of this guy could look rather boring or slug slightly blown out. And by doing it and lowing the exposure, you can get a darker sky without darkening landscape.
Class Materials
bonus material
Ratings and Reviews
Gordon
Since most photographers give classes on PS, it's just great having such a great teacher teaching LR. I don't have the time or money for PS and teachers like Aaron Nates work only with PS like most others. They all are great teachers and I watch even though I can't use what they teach, I don't consider it all a waste of time. Bill Willmore is one of those great teachers and goes into great detail. I would love to have the money to purchase this class as it's impossible to retain all the detail that he goes into.
a Creativelive Student
This presentation was awesome. After going through two versions of Light Room, I still learned more in three days than I learned in 3 years doing self study with hundreds of dollars worth of books. Ben Willmore works magic in Light Room and shares his expertise with all. This is a great course and a real bargain. Not only is the course valuable, but so is the PDF as a bonus with this course. Thanks, so much. See you tomorrow for Photoshop masking.
Rico
Ben Willmore is a fantastic teacher. The PDF download is superb and worth the price of admission. If there was a way for me to do the techniques that Ben is teaching, with him, while he is teaching the technique, then that would be a perfect learning experience.