Building Your Quilt Skeleton
Lesson 3 from: T-Shirt Quilting: Warm Up With Your Life StoryDiane Gilleland
Building Your Quilt Skeleton
Lesson 3 from: T-Shirt Quilting: Warm Up With Your Life StoryDiane Gilleland
Lessons
Day 1
1Turning T-Shirts into Usable Fabric
28:15 2Organizing and Measuring Your Patterns
19:51 3Building Your Quilt Skeleton
25:03 4Stabilizing Your T-Shirts
22:28 5Creating Quilt Blocks
33:40 6Quilt Design Process
31:22 7Sizing and Layout of Your Quilt
32:42Sewing Machine Basics
19:22 9Sewing Odd-Shaped Blocks
10:35 10Sewing Your Columns Together
18:52 11Cutting Your Sashing Strips
24:49Day 2
12Planning Your Backing Piece
23:49 13Cutting and Sewing Your Backing Piece
26:09 14Making Your Quilt Sandwich, Part 1
28:07 15Making Your Quilt Sandwich, Part 2
19:16 16Tacking and Tying
34:48 17Seam Quilting
30:00 18Creating Your Binding Strips
26:11 19Attaching Your Binding Strips to Your Quilt
36:30 20Finishing Your Quilt
30:54 21Hand-sewing the Opening Closed
29:20Lesson Info
Building Your Quilt Skeleton
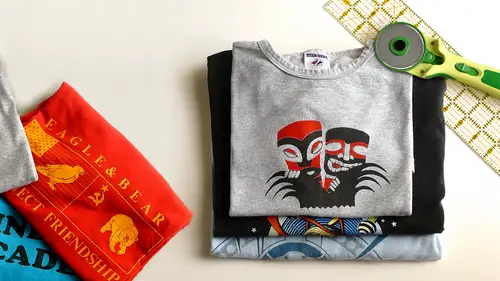
Here's, where we start playing with the lengths measurements like you mentioned, I have a worksheet for this next step of the class it's something that I designed and all of you here in the studio should have a copy of it in your in your stuffs in your work book, you can get to it be great if I knew the page number, but I encourage you to refer to the table of contents where you'll find it printed. The worksheet is called the quote skeleton worksheet. Now, if you are watching the class live on the internet and you want to get yourself a copy of this, you can I've put one up for download at my website, which is crafty pod dot com the c r a f t y p od dot com and you can just download it right from the front page, and in fact, I even threw in a little excerpt of my second book quoting happiness that you can grab at the same time if you want to, but if you don't have one of these, you can also just get a scrap of notepaper out and used that instead. So I'm going to do both methods hear on...
the overhead camera just so if you have the worksheet, you can fill it out and if not, I'll show you what to do instead house up the first thing I'm going to need to capture is my wits that I have here so in the quote skeleton worksheet that you all have in front of you look for the number one that's your first step in filling it out you've got a column in this little spreadsheet that represents these columns of your quilt that you're building did you find us ok yeah ok let's fill in the wits that you have established for your quilts ok so for here I've got a twelve inch I've got a sixteen inch and I've got a fourteen inch stack given that I am math challenged I actually borrowed a calculator from my partner and so I'm gonna use calculator to add these up but some of you might be magically capable of adding this up in your heads and if so I applaud you so when I add these three withs together that's going to give me the approximate total width of my quilt in progress here so when I add my twelve my sixteen and my fourteen inch widths together I get forty two inches what does that number mean here's what that number means we're going to aim for a lap quilts size quilt in this particular class I really believe that that's the best size of quilt toe learn the process on it's really tempting to want to make like a king size bed quilt your first go round with quoting but I can tell you from experience that that's a very bad idea it is just so much fabric to wrangle it's actually much harder to learn the various processes of quilt making when you're also trying to manage this huge amount of volume and wait. So a lab size quilt, which is what all my samples that I have with me are its still going to be great for cuddling on the couch or spreading a picnic out on it's an excellent size to learn on because it's just enough to be handling at once and you could make one of these from his few is like ten t shirts or as many as thirty, so it also gives you a nice amount of shirts to work with, so my forty two inch measurement that I've just gotten from these three piles is right in the range I need lap quilt typically measures between forty and sixty inches in width and in height it'll measure between fifty and seventy inches, so as long as your shirts measure out toe land somewhere in this range, you're going to be just fine. Okay, have any of you been able to do your measuring and get to a measurement? Where do you come out? Thirty eight yours is a thirty eight that's good because that it's kind of out of this window it's a little smaller than the window yeah and so we're probably going to add some extra fabric to pad its without which is something we're going to talk about a little later today where did you come out? Uh I'm not sure because I've only got one in each I don't have all my t shirts with me so oh no I'm not sure but it looks like about forty about forty testament yeah that'll fit their right and that's great so now that we have an idea of the width of our quilt and we've begun to separate the shirts into blocks representing columns right now we're going to start dealing with those height measurements we want to get a sense of the approximate height that the's blocks will begin to take up so oh, by the way, if I'm don't you don't have the worksheet here's a way to approximate one at home okay that's pretty easy let's work one pilot a time so I usually just set the other two stacks out of my way and I make sure that I keep my wits label somewhere that I'm not going to lose it because you don't want to lose the structure of your quote and now we're going to do pretty much the same thing we just did with our wits measurement which is we're gonna spread this shirt out and then we want to do and a measurement that's going to cover about two inches on a side we do have one very interesting point of variable that's going to hit you with a lot of these shirts, and that is this spot right here, the bottom point of the neckline, there's no rhyme or reason to how far of a distance you will have between the top your graphic in the bottom of that ripped collar, and so you kind of have to work with what the shirts have to give you here if you can get two inches above the graphic. Awesome if you could only get one inch above the graphic that's fine, too. I've even worked with shirts where the bottom of the neckline was right against the graphic, and in that case, we'll add a little extra piece to it later to fill it out. But I'm going to cover that later so we won't worry too much about it. So then, if that is the case you just use as your measurement, whatever that distances so like, mine is one inch, so winning on the bottom and top to come up with your final for right now, I would use the one inch um, we can always make these adjustments later you're finished quilt is not going to be exactly forty two inches wide, we're using that as a basis for starting our process off. As we make the quilt will figure out you may come to that quote later, joan and say you know, I really want there to be more space above that graphic and well so a strip of the back of that t shirt above the graphic and we'll fill it out so then you get your two inches but that's not going to hurt anything we've already done, so just use your one for now this one I happen to have just pretty close to two inches again you've been around everything to the next hole number, so I'll do two inches above and two inches below and I get about twelve inches here there's no need to label the height measurements for that you want to use your worksheet? So now that you've set up column headers, right with your three measurements were just going to write the heights of each shirt underneath. So right now I'm working in the twelve inch pile of shirts this shirt measures to a twelve inch height, so I'll go ahead and write that in my work sheet right underneath my twelve inch header it's everybody with me on that good okay, we'll just keep going. We need to measure through all these shirts we need to see about how much height they're going to take up, so this one looks like it's going around to about eleven inches and kite, it's all right, that measurement down, and then this one's quite a bit narrower. This is a fairly small graphic, and so I'll just measure my two inches on either side, and I come to kind of doesn't make a very round measurement to five inches, so I'll just rounded up to six again. We're just working pretty rough here. If you're working without worksheet than that just looks like this will just write the three measurements down underneath like that. There's. Nothing magical about the worksheet, it's just pretty. You can just do this on a piece of scratch paper as well. All right, have a quick questions. Just come in saying, do you ever use a large square rule? Is simply to get the last designs from the t shirts, or do you always follow the process of measuring each well? I have yet to actually come across a stack of t shirts that would accommodate the same size square ruler for every shirt. Although I have seen many, many t shirt quilts on the internet, where that's the style of design they use, they'll take one of the big square rulers, and they'll just cut each shirt to the exact same size and then sew them together in the syria's of square panels and that's, a perfectly great way to do a t shirt quilt. I've just never met a stack of t shirts yet that would accommodate that easily, so I like to get very into what the shirts have to offer and then build my design up based on that mix. I hope that makes sense if not paying me a follow up question, I'll explain better. I just want to reiterate for everyone online that this particular worksheet you can get a diane's website, which is crafty part dot com. But you were saying, dianne, you we just needed a piece of paper that just you can make your own grid, but leave the template is there on your web site? It isthe so I'm doing the exact same thing on a piece of blank paper here this is the template that you can download is a pdf from my website, but it's not necessary, so I have my sixteen inch stack here. I'm gonna work with that next, and I'm going to keep this measuring process going here's a shirt where the bottom of the neck line is quite a bit closer to the graphic, so I'll just use the one inch measurement that I have available to me all through two inches at the bottom, and I come to sixteen so I know that this seems very loosey goosey whenever I've taught this live. This is the stage of the class when I often see confused faces and then by the time we've gone through the whole process everybody's like oh right that's great so just ask you to bear with this it may seem like a lot of measuring but we're really understanding what you're shirts will yield and that's going to help us create something really beautiful with them so that's a fourteen inch measurement so as you notice, I'm not marking the's measurements on the t shirts that all there's not really that much need for it because the cutting process that I'm going to show you a little bit later we'll take care of that for us all we're trying to find out is what we can get out of our shirts here that one is just five inches high because it's such a small narrow graphic I'm also striving as we as you may notice to keep my shirts very organized because at this stage of the game you really want to preserve your individual piles because we're really we're really building our structure here that when measures out to five as well and I'm just endangering as well to keep my size label my wits label at the top so that I don't lose that information and this one measures out to fourteen so again for those of you working songs worksheet I'll just put those with it's over here on my scratch paper and then I just have a couple more in this fourteen inch stack and then we're done measuring for a little while so that one gets me to eleven inches this one gets me to twelve and this one it's ten and I'll do the same thing with my scratch paper here for you and just remind us for the view is exactly what is the final measurement for the lap quilt again we're going to be in the neighborhood of forty by sixty inches and sixty fifty to seventy inches in height so then it's calculator time again and I'm going to add up the columns here I'm going to add up the individual heights of the shirts so that I know for each of these columns have built what is the maximum amount of height that it can consume? Does that make sense? So on your worksheet you've you've got two should have something like this where you've written in the heights of all your shirts so we're just going to add vertically, I swear to you it does not get much more math ethan this in our two days together okay, so I have twenty nine inches of total available height in my stack of twelve inch blocks my big stack my sixteen inch wide blocks looks like I'm gonna have fifty two inches and then in my fourteen and schweid stack thirty three inches so if you're without worksheet I'll just put those totals down across the bottom like so okay, what this tells us is thehe proximate dimensions of our finished quilt and it also gives us a preview of what's to come as we flush out the design so I actually have a slide let me go to that right now so here's a filled, filled out quote worksheet so so the folks that internet couldn't see that more clearly this particular quilt is yielding about forty one inches in total with which you can see there on the right hand side and then I've totalled up each of the columns and so I have three columns one measuring forty one inches, one measuring sixty inches and a third one measuring one hundred five inches so have one very big stack of shirts and a couple that are smaller right? And so I can begin to interpret what's going to happen this particular quilt is actually got one hundred five inches of potential length to it which is much longer than what I need from my quilt the stacks of shirts that I am working with here the longest column measures in at fifty two inches so that's well within my blackwell range right? How are you guys coming out with here? I got eighty seven got any congratulations so I mean, so what you could do is that's in my sixteen inch with so when I could do is take one of those and trim it and move it over to another one so I don't have an eighty seven you could do that, okay or you could do this you could make a second hollow you could take your big tall column and break it into two that's going to add some wits to your quilt but I think you'll still be within the yeah I was federally mandated lap quilts eso eso that would work fine that what you suggested to which is cutting them a little differently and squeezing him into another column also perfectly legal option yeah, because I have one lonely seventeen inch alone seventy one other wits eleven, thirteen, fifteen and sixteen ok, so that was quite a bit bigger than sixteen is the one that has the most in it so I probably would opt for not adding another sixteen inches because that puts me up. I forgot what it was to sixty six or something which in the whip you know what else you could do? What else? So if you have this one lone block which totally happened to me on this quilt you could always on the backside of it insert that in the center, okay? Which is something we'll talk about on day two and we talk about backing so it's kind of orphaned there that's one use of it, okay or you could just take that and make a lovely matching seventeen inch pillow for here quilt up. Okay, so is all of this making sense to everybody starting to resolve? Ok, so so where do you come out with your math? Fourteen, fifteen and thirty but I don't have all twelve of my t shirts. Okay, so you're going to add some more shirts later. You could also do with with fourteen, fifteen and thirty, right you could you could basically make a more of a wall hanging size, you know, like if you took that thirty inch column and broke it into to fifteenth and you've got a over the couch, so I kind of thing going on that you could dio definitely great. Anyone else has not gonna make lower about the one in the back were doing for senior our boys, our seniors and to put the college t shirt on the back and have all their childhood ones in the front is kind of oh, sorry then would be a great ideas guy like that would be great. I mean, if you had if you had a lot a lot of shirts and you even wanted to do a two sided quell yeah, you could get away with that too that would be a lot of piecing very worth it it would be very fun to have one other tiny piece of interpretation you can do from the quote skeleton worksheet that I'll just show you quickly but will put more time into this later in the class is let's say this is basically where what we have created visually represented visually, so if I take your quote skeleton work sheet with the math on it, this is kind of what it looks like and cut out blocks, right? We're going to determine from the worksheet itself where we need to fill in with extra pieces of fabric, so if you look at the work sheet that you have filled out the columns that air shorter than the others, the's air the columns where extra bits of fabric are going to go to fill in the space there's a bunch of design considerations having to do with that that we'll get into later, but those are the places where we're going to use the empty back panels of your t shirts or we might go and buy some plain yardage of jersey at the fabric store kind of whatever your individual shirts needed need for the design. So for example, I've got a different quote skeleton worksheet here and so like yours, it's only thirty three inches of width, right? And we're going to need to add some additional width to that well, what we can do is something called sash ing strips we're going to spend time on how to cut these a little later on and class today, but these air nothing but big wide strips that fill out space in a quilt. So here's a quilt that I made for my nephew logan, with all if he's a big kid now, but these air, all of his little kids shirts. This kid has the best taste in t shirts out of like anybody I've ever met, but I opted to put these vertical stripes of just solid jersey that I bought in between and around the the blocks to set them apart. So that's, how you would add additional width to a quote that needed it. And, like I said, will will spend time with that later. Eso es superheroes and legos. So, yes, he's very well traveled he's traveled extensively because he's so into lego what I opted to do here was his shirts just had these awesome saturated colors to them, too. So I thought I would just cut some pieces of those colored shirts in vaguely lego shaped pieces and then sew them in between the shirts, which I really liked came that night so you can do so many creative things once you start adding to your quote blocks to really enhance them let's, see where we are here I do want to talk just briefly before we wrap up this segment about children shirts because they really do present a lot of special cases for reasons that we've already been discussing especially when you're talking little kid shirts there are some definite space issues to consider so we've just been through our whole process and we've taken you know this big stack of a more for shirts and we've created a structure we know we know basically in our heads a little bit more about what the quilts going toe look like right when you're working with little kids shirts you have to actually fish fudge that a bit so think about children shirts is although they have the world's awesome ist graphics they're also very very tiny right? So I'm gonna lay some of these out so that the overhead camera can get a look at them there's another one I would wear that shirt they don't make good shirts like this adult size is enough in my opinion you can even use things like this like this tiny one c absolutely usable but right away what you start noticing is that the ratio of fabric to graphic is radically different here right? And so you're making a little bit different measuring considerations that two inch margin that we've been working with works awesomely for adult shirts and I use it all the time but when I do this process using a children shirt I generally just try to see what I'm going to be able to get out of the shirt and that's, the measurement I use with the wits that's really important, you just want to get them to the consistent column withs and then for the height, I just do the very best I can and especially for something like this, a little ones eat it is wholly possible that you won't even be able to get a reasonable size quote block out of that. In a case like this, you might find yourself doing something like what I did in the justin quilt, which was to surround the little piece with some additional fabric so you could do something like this, which I will be able to show you how to do later in class so that you bump it up in size and it becomes a usable size piece. So we're going to cover a lot more factors of children shirts as we go forward, but cutting them out and sewing them together usually involves doing a little bit of extra piecing and a little bit of tighter measuring it's also from a design standpoint interesting because generally speaking, then because you have so small a margin of fabric happening on any side of the graphic, when you put these blocs together, they're very tight, visually there's not a lot of breathing space and so, with the kid quilt. A lot of times, I do find myself adding extra solid pieces just to give these tiny bits some room to breathe. And so you can see them more easily.
Class Materials
bonus material with purchase
Ratings and Reviews
Arlene
This was a really fabulous class with an excellent instructor. It took us from a pile of t-shirts through every step to a finished quilt. There was a lot of time spent in design which was great, since t-shirts are highly variable in color and design. The second half of the class was all about basics, including information on backing, batting, and quilt top. Then making the "sandwich" with several options on basting. And then quilting (fancy, which was discussed but not included), hand tie and a couple of machine quilting options. Then binding. Each step was explained and demonstrated. Options were very often given, with easy, non-stressful techniques encouraged. This was a excellent class and the instructor was really awesome. Questions were anticipated and thoroughly answered. The instructor was always helpful and pleasant. This course expects some basic sewing machine knowledge, but you definitely do not have to be an quilting expert to enjoy this class and end up with a wonderful quilt.
user 08dcb9
Diane Gilleland is a fantastic teacher. One of the problems I always face with quilting classes is that the teacher seems to forget that everyone is at a different ability. I love the way Diane goes slowly enough for beginners while at the same time adding tidbits of information that even an experienced quilter could appreciate. Her "laid back" approach is appealing and non-threatening, which made for a very comfortable learning experience. It is such a wonderful idea, to be able to save the memories of your t-shirts, by making them into a comfy quilt.
user-33438f
Diane was fantastic! I am fairly new to sewing and have taken a tee-shirt quilt class before, but Diane's class was so much more informative, helpful, easy to understand and professional. I can't say enough good things about the class and how impressed I was. This was my first visit to creativelive, you can be sure it will not be my last. Thank you