Planning Your Backing Piece
Lesson 12 from: T-Shirt Quilting: Warm Up With Your Life StoryDiane Gilleland
Planning Your Backing Piece
Lesson 12 from: T-Shirt Quilting: Warm Up With Your Life StoryDiane Gilleland
Lessons
Day 1
1Turning T-Shirts into Usable Fabric
28:15 2Organizing and Measuring Your Patterns
19:51 3Building Your Quilt Skeleton
25:03 4Stabilizing Your T-Shirts
22:28 5Creating Quilt Blocks
33:40 6Quilt Design Process
31:22 7Sizing and Layout of Your Quilt
32:42Sewing Machine Basics
19:22 9Sewing Odd-Shaped Blocks
10:35 10Sewing Your Columns Together
18:52 11Cutting Your Sashing Strips
24:49Day 2
12Planning Your Backing Piece
23:49 13Cutting and Sewing Your Backing Piece
26:09 14Making Your Quilt Sandwich, Part 1
28:07 15Making Your Quilt Sandwich, Part 2
19:16 16Tacking and Tying
34:48 17Seam Quilting
30:00 18Creating Your Binding Strips
26:11 19Attaching Your Binding Strips to Your Quilt
36:30 20Finishing Your Quilt
30:54 21Hand-sewing the Opening Closed
29:20Lesson Info
Planning Your Backing Piece
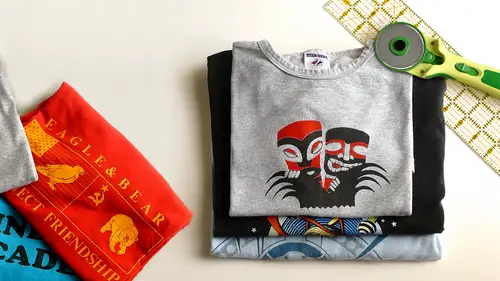
Welcome back everybody on super happy that we're all back here to really get hands on with the basic techniques of quilting today everything that we did yesterday has culminated in us having a finished quilt top at least figuratively speaking as we discussed it the top of yesterday's show it's pretty difficult to make an entire quote start to finish in a two day period, so we have really fast forwarded certain parts of the quilt making process so that we can cover everything in our two days together and give us practice at every stage of the the whole thing. So today what we're going to focus on are the things that will be coming to any quote you make, whether it's t shirt quote to a traditional quote you need to prepare backing for it, you need to make a quote sandwich you need to baste, you need to quilt it and you need to bind it and we're going to do every one of those things today for you for in the studio I have made you some sample quote tops and some sample backing pieces so yo...
u have something to work with if you don't like the looks of the one that's in front of, you can just trade with the neighbour, get something else and if you at home would like to participate in these techniques with us today, you can do that take the back panel of any t shirt that you have in your stash get a pretty big piece of usable interfacing infuse it to the back of that t shirt panel and then just cut the biggest block you can get out of it and that'll function as a surrogate quilt top and then you can use that with some scrap backing and batting fabric that you have on hand and then you can practice these techniques okay retreat behind the table for a second I want to point out that probably one of our biggest considerations today is that the processes I'm going to demonstrate for you generally are very large processes right if we were working with even a lap size quilt we'd have a quite large quote top and we have quite large backing and batting pieces and there's just no way to get a table that size in a studio this size and you definitely do not want to watch me crawling around on the floor which is how I do these things at home so I've really tried to size down all of the samples so they fit within our work space constraints what becomes a little troubling about that is that you know there's no substitute for working at size it's really a whole other thing to be wrangling pieces of fabric that large so what I'll try to do throughout today is just key you into what the process were doing feels like at a larger scale just to try to give you that preview, but you'll definitely learn all the mechanics of what you'll be doing to make a quilt that that makes sense. And as with yesterday, I had my cooking show analogy about how we were going toe basically speed things up, and I had prepped a lot of stuff in advance, same thing today, and I'll always try to give you a q is to when I'm switching samples on you, since, of course, all the t shirts will change. All right? So that said, the first thing that we need to talk about today is backing a quilt, because once you finish your quilt top that's only one side of the process, right? Every quilt needs to have some kind of fabric on the back. So these are all the quilts you saw yesterday, but I just brought them out so that I could show you some different examples of backing. Four t shirt quilting I prefer to use woven fabric is backing fabric. I know there are t shirt quilters out there who like to use the stretchy jersey like we were using yesterday, but now that you've had a little time to practice working with usable interfacing, imagine a piece of jersey fabric at this size. And then imagine fusing interfacing to the entirety of it, and all of the four of you in the studio are shaking your heads at that idea. And I applaud that, because I think that would just be a lot of work and not a tremendous amount of fun. Also, I think it's, the backing of the quilt, were stabilized jersey. You would lose a bit of breathe ability that I think gives a quilt it's, comfortable warmth, it's one thing to have a quilt, that's warm and that you can keep on you all the time. And it's another thing to have a quote that makes you immediately start sweating, so I really feel like these woven fabrics are the right choice for backings. A lot of the time, I use solid fabrics, like here as my backing, and I do that for t shirt quilting, primarily because to me, the front of a t shirt quilt is usually pretty visually active, with all those graphics and things, so I tend to like the contrast of just a single solid color. But that's, really just a personal decision. There's. No reason you have to do that. Aa lot of quotes are made with print backings. When I did the quote for justin, in fact, I found this really nice it's, kind of a subtle pattern of these little squares that has a bit of shimmer to it and I really liked that as a contrast with the activity of the tie dye that came with his shirts and holly showed us a beautiful quote she made yesterday where you're backing was like the mexican lottery acars was a very bold print fabric but it looked beautiful so you can really do anything that whatever your t shirts want that's what you can pick is a backing where did you find that fabric? By the way? Uh stone mountain daughter that they've been really good to me they find like all my if I'm stuck for something they oh that's somewhat stairs on discount guess e love that taxi needle a lot so you d'oh d'oh yeah it's a big piece of fabric for quote backing it some it can get a little expensive actually buying the quote backing like you're using the t shirts that essentially come to you for free then when you start getting into backing fabric and batting and binding that's when the costs of your quilt khun start to add up a little bit um I will say that for these t shirt quotes because to me there there's something a bit more casual and more day today than like a prize winning patchwork intricate traditional quilt I will tend to go to my bigger box craft stores where they will tend to carry brands of woven fabric that are a little less expensive often, and what you can get at a fancy or quote, store or bigger fabric store. You know, we're in a we're in a what I would consider a kind of a renaissance of quoting fabric right now, there's so many beautiful design lines out there and so much wonderful quality, and if you want to invest in that for a quote, backing absolutely go right ahead, but a lot of those finer fabrics are eight, nine dollars a yard and up, and so if you need to buy three or four yards to back a quilt, that starts adding up pretty fast. A lot of times, the stuff I buy for these quote backs is really just for five dollars a yard, and as I love to do, I wait until there's a coupon deal or a big sale of some kind, and I just get myself my backing men so you can you can save a lot of money finding out how big a piece of fabric you need for your quilt does involve a little bit of quilt math, but as we've been doing throughout this class, I will do my best to keep that mathis simple assed possible, so let's get into that part now. There's two pieces of information you need to know to calculate yardage for a quote back one of those is the width of your fabric and I have a slide that I want to show you guys when it when you find out you're in the fabric store you find a fabric that you want to have for your quote backing take it to the flip it up look at the end of the bolt because there should always be a sticker on the end of the fabric bolt that shows you what the width of that fabric a ce most or I should say many quilting cotton's are manufactured in a forty four to forty five inch with and the same as we talked about with jersey yesterday when I talk about the width of a fabric that is the distance between the two salvages okay and the salvage edges with woven fabric are always very easy to see although not on camera but they're tightly woven and they generally have some little pinholes in them and then this distance is the width of your fabric the length of your fabric is of course how much yardage you end up asking them to cut for you fabric is always sold folded like this okay, so if you know the width of your fabric that's one piece of information you need the second piece of information you need is just to always remember that one yard of fabric is always thirty six inches long okay so you know those two things and you know the dimensions of the quilt top you just made then you can decide how much yardage to buy for backing if you have a quilt top where's my quote top here it is so if you've made a quilt top and it is less wide then you're backing fabric a lot of times you can get away with just using a single piece of fabric which is actually kind of awesome if you can manage that when you back and find a quilt what you need to have is the quilt top and then the backing and the binding fabric sticking out about two inches from all sides of it this I'm going to be trimming in a minute then years will need to be trimmed as well but the backing and the batting need to be two inches larger on all sides in the quilt top itself reason behind that is when we get into quilting this a little bit later the quilting stitching has a way of gently kind of gathering up the fabric and it can actually cause the backing and binding to shrink a little bit or to sort of be drawn in word from the edges it's going to be fairly minimal but this two inch margin protects you one hundred percent from that creating problems so the first quote project I ever made when I went to quilted, I actually cut all three layers of my project to the exact same size, and then I went in quilted it. And what happened was by the time I was finished, the backing and the batting had sort of migrated to the inside, and suddenly my top was bigger than those other two pieces, and I had to cut the edges off my top to make him fit, which in that case did not do the top any favor. So that's, why we make these pieces a little bit bigger so we know that the backing peace we need to figure out the size of this got to be two inches larger and wits on each side, so for inches wider and four inches longer than our cool top that we're working with. Okay? So as I said before, if you are making a fairly small quilt maybe it's a wall hanging size like this baby quilt or something like that if it's narrower and with than this forty four, forty five inches you have to work with, then you can just figure out the length of your quilt versus thirty six inches in the yard and how many yards do you need? And then just by that many yards and use one big piece of fabric that's kind of great to do that math let's say, I have for the sake of argument, a fifty two inch long quill top. Then all I have to do aside from figure out how to put my calculator pieces together, all I have to do is a divide. My fifty two inches by thirty six and that's going to bring out the yard. The arctic I need that comes to one point four just round that up to one point five yards, and then you'll have plenty to cover the back of your quilt. So that's. Pretty straightforward. So far. Right. Ok, you really want to do that math before you go to the quilt shop? Because I brought my quilt in, I get that and they kind of knew the size. And then I made the backing. But I have enough wool fabric now to dio like two other. Well, it was a happy accident was more than another one. Just like how you think I have been having a closet somewhere about twelve miles of yellow binding that came out of a simple accident. I will say, um, that although I'm showing you how to do this the long way, we live in a magnificent technological age. And there are so many online calculators for quilt, backings and bindings now could just do an online search for, quote, back in calculator, and it'll let you put in the dimensions of your quilt and it'll say by this much fabric and it's awesome, and the robert kauffman fabric company makes a mobile app for ios and android and it's called quilters little helper, and it really is and you should definitely downloaded. If you like to work mobile, you can put in the dimensions of your quilt the width of your backing fabric. It'll tell you exactly how much to buy and what's great about that is if I'm at the fabric store and I haven't decided on my fabric and I can just pull the wits off the bolt and put that in with the dimensions of my quote, get the result and go straight to the cutting counter, so quilter's little helper is awesome. So what about the let's say eighty five to ninety percent of quotes that you're going to make where this forty four forty five inch standard backing fabric is not going to be wide enough? What do you do then? What we're going to do in this class is we're going to make a single scene backing, so the backing pieces I've given you all in the studio are basically pretty close to the size you need so here's the part where you get to watch me so for a minute, but this is such a great technique for making this kind of backing, and so I wanted to make sure and demonstrated in real time for you guys so let's say that we're working with the quilt that's about forty eight inches wide and fifty two inches long and are backing fabric here has got this forty four inch with, so I'm a little short on the wind, but we did the math, and so we know based on a fifty two inch length of quilt top that we're going to need a yard and a half of backing fabric just to cover the length of it, to do a single seem backing just by twice that much fabric. So instead of a yard and a half, you would buy three yards or whatever length you end up meeting by twice that amount, and then we're going to take this long length of folded fabric. We're going to fold it a little differently, and then we're going to sew a seam on it, and that will give us a big, squarish piece of fabric that'll be plenty big enough is backing for a big quote top, so this is a nifty nifty technique that I actually learned on youtube. From a company called the sewing quilt shop, and they have a video on it. I used to do a much more complicated process of trying to cut this long, long piece of yardage into two equal pieces so I could sew them together, but seriously wrangling enormous pieces of fabric anytime you can avoid doing it, he really should. So what I can do in this case, interestingly, is open the fabric out, give it a little shake, ok? And then I have a salvage edge along both sides now, and I will take these to salvage edges that I'm holding, and I'll put them together and I'll match up the two ends like this, and then I just want to keep these salvage edges lined up, so I'm essentially taking fabric that was once folded lengthwise, and I'm going to fold it crosswise, um, fabric that you purchased before you do this, you know, you know, you know, I mean, you often do for this particular technique, I haven't found it to be super needful, but why don't we talk about that? Just because this is a good moment to talk about that, and this is a good, giant piece of fabric to work with, so thank you very much, you're online news, same day, a few sheep it's is backing because that's already a larger piece of fabric something mentioned that and antique sisters is online as well, saying they've actually got a lot of quote backing that they checked out from fifth stores as well yes, you can get really cheap fabric it through stores and she would work I use sheets all the time. In fact, I have several quilts that were made with sheets is backing because I can buy a sheet for about five dollars in my political thrift and once you cut off the forehands, what is it but just a giant piece of fabric you know, save a bundle that way, just inspect them in the store really carefully for things like rips and stains and warn spots and that's all yeah it's a great suggestion. Thank you for that. So we talked a little bit about grain in the context of interface and yesterday and of course, any woven fabric also has a grain to it. If you've ever sewn garments you know about something called straight of grain which is the point where the horizontal and the vertical threads are perfectly perpendicular to each other and when fabric is cut on the strait of grain and drapes better it so is better it presses better just behaves better when you buy fabric in the fabric store it's always in this long folded strip he comes off the bolt that way and there's a lot of variability toe how accurately a fabric store staffer will make this cut when they cut off a piece for you so it's never a bad idea to establish the strait of grain and the piece of fabric that you have because that gives you straight edges to cup from the way that you would do that is to first press out the crease that was manufactured not manufactured but it was pressed into the fabric when it was put on the bolt now that I'm not going to take the time to press this entire three are the length but we'll work with one end of it and that way you can see the process in action the first thing I want to do is get this crease out of my way because once it's gone I'll be able to see the grain through the drape of the fabric it's actually a pretty cool process and there's no need to press the entire thing you just pressing out the crease okay so then what shall dio is you'll put the two selva judges back together and you can either work with the entire length of the fabric or you can work with a section of it or if you have a giant length like I have like miles of this here right I could get a friend to stand at the other end and hold that but not needed for this demo. Ok, so take a look at how this fold is hanging right now. Does that look fairly straight to you? How about now? What's happening to the fold now? Right. So this is where the fabrics not hanging on grain because it's not hanging straight, but as I just slide, the's edges x I'm really just sort of sliding the pieces back and forth with my thumb and forefinger. And when I get to the point where the grayness straight that fold hangs very nicely that's pretty easy to see. And then all I have to do is come back over here to the ironing board, dragging my miles of fabric with me. And if I lay this fold on the ironing board now, aiken repress it just lightly. I just need to make an authoritative edge to cut from like we talked about yesterday and I can pop this on my cutting, matt. And as you may notice, the edges of the fabric or not lining up now when they were cut for me and the fabric store they did. But now that I have established a straight a grain, I need to trim z's so that they're matching again go ahead, holly, they need from the store d wash your backing before you that's a great question, it's actually, a huge question in quilting is do you pre washer did not pre wash as it is a traditional quilter? Do you pre wash some things I do, but like this tie quote that I made, it was wool, and I didn't look at the label, and I know she's never gonna wash it. So isaac e think that kind of beautifully encapsulates the whole answer to the question of whether to wash or not. So there are quilters who are very staunch about pre washing everything that goes into your quilt, all of the patchwork fabric, all of the backing, all of the binding people even pre wash their batting, so I think for me it comes down to what does the quilts life look like? Is it going to be a hard wearing quilt like a baby quote that needs to be laundered many, many times? Well, it's probably good to just pre wash everything it's going to be laundered a lot. Why risk a lot of shrinkage? You're making an incredibly beautiful quilt out of neckties with this beautiful kind of like a wool crepe background. And no, I can't imagine anybody ever laundering that it would be a crime to launder, quote, so there's absolutely no need in that case, to pre wash anything. I you know, you're looking at a mixed bag with t shirt quotes because the front side of the quilt is all t shirts that have generally been laundered hundreds of times any shrinkage that they're going to do, they've already done so since you're going to add backing as a new element, it's probably a good idea to pre wash that and let it do any shrinking it's going to do because you're top certainly not going to shrink any, and that way everything can behave the same way on the first washing when it all goes together as a quilt, if that makes sense, so I will also tend to wash my binding fabric for the same reason so but that said, I have a feeling that there's probably plenty of quilters out there watching on the internet. Who would disagree with that? Because michelle b who's actually a regular with us. Well, about michelle she's in sunny california. She was asking us. Well, if we should. Prewashed fabric. Excellent it's a great. I'm glad that came up. Thank you for bringing that up, holly. It does look crispy. Now, what is asking do press with just a nine iron or the stage? Do you use water or anything else to make it super straight? I just use my iron I generally do turn the steam on at this point because I'm working with the woven fabric as opposed to a wooden at fabric with the fuse herbal like we were doing yesterday but I don't I don't get to usually my iron covers the majority of what I need to do to do these quote processes so this actually is a good moment to mention you know as I've been trying to impress upon all of us there's no hard and fast rules to quote making and in fact there are endless variety of opinions and tips and tricks out there I'm just showing you my favorite methods that air inexpensive and easy and efficient and you've probably got ideas that I've never even thought of that would be awesome to share in this context and weaken really all learn from each other so please share anything you want to share if you go to our course page you can actually upload images of your work and you can also share them on instagram and twitter as well. In fact, antony who was we were using as a model yesterday he actually provided a lot of t shirts on diane put them together for a quickly him he's actually uploaded some of his images he's actually with candidates on instagram so anything that you'd like to share five on the course page on twitter or instagram we'd love to hear from you
Class Materials
bonus material with purchase
Ratings and Reviews
Arlene
This was a really fabulous class with an excellent instructor. It took us from a pile of t-shirts through every step to a finished quilt. There was a lot of time spent in design which was great, since t-shirts are highly variable in color and design. The second half of the class was all about basics, including information on backing, batting, and quilt top. Then making the "sandwich" with several options on basting. And then quilting (fancy, which was discussed but not included), hand tie and a couple of machine quilting options. Then binding. Each step was explained and demonstrated. Options were very often given, with easy, non-stressful techniques encouraged. This was a excellent class and the instructor was really awesome. Questions were anticipated and thoroughly answered. The instructor was always helpful and pleasant. This course expects some basic sewing machine knowledge, but you definitely do not have to be an quilting expert to enjoy this class and end up with a wonderful quilt.
user 08dcb9
Diane Gilleland is a fantastic teacher. One of the problems I always face with quilting classes is that the teacher seems to forget that everyone is at a different ability. I love the way Diane goes slowly enough for beginners while at the same time adding tidbits of information that even an experienced quilter could appreciate. Her "laid back" approach is appealing and non-threatening, which made for a very comfortable learning experience. It is such a wonderful idea, to be able to save the memories of your t-shirts, by making them into a comfy quilt.
user-33438f
Diane was fantastic! I am fairly new to sewing and have taken a tee-shirt quilt class before, but Diane's class was so much more informative, helpful, easy to understand and professional. I can't say enough good things about the class and how impressed I was. This was my first visit to creativelive, you can be sure it will not be my last. Thank you