Lessons
Day 1
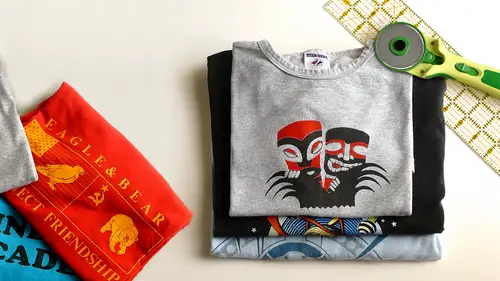
1Turning T-Shirts into Usable Fabric
28:15 2Organizing and Measuring Your Patterns
19:51 3Building Your Quilt Skeleton
25:03 4Stabilizing Your T-Shirts
22:28 5Creating Quilt Blocks
33:40 6Quilt Design Process
31:22 7Sizing and Layout of Your Quilt
32:42Sewing Machine Basics
19:22 9Sewing Odd-Shaped Blocks
10:35 10Sewing Your Columns Together
18:52 11Cutting Your Sashing Strips
24:49Day 2
12Planning Your Backing Piece
23:49 13Cutting and Sewing Your Backing Piece
26:09 14Making Your Quilt Sandwich, Part 1
28:07 15Making Your Quilt Sandwich, Part 2
19:16 16Tacking and Tying
34:48 17Seam Quilting
30:00 18Creating Your Binding Strips
26:11 19Attaching Your Binding Strips to Your Quilt
36:30 20Finishing Your Quilt
30:54 21Hand-sewing the Opening Closed
29:20Lesson Info
Tacking and Tying
So let's play with our hand tied method first it's a great method it particularly for a quilt that won't see a whole lot of wear and tear. I will say that this is probably the most relatively delicate method of quilting, meaning if you hand tie a quilt, generally speaking, you want to wash it less frequently because it's just it's not is going to be a strong as machine stitching it's still very functional, but it's, great for quotes that don't need to do a lot of being, you know, be laundered a great deal. What we need for that are a big hand sewing needle, and we're going to start with some embroidery floss, which is we have some pearl cotton here, and there should be some of the city each of your workstations, the type of needle I'm using for this is a show neil needle, which you can readily get at craft stores. The thing that makes the show neil needle is it has a very large eye and a sharp point. Let's, let's, start this simply, just take about twelve inches of the embroidery floss...
, threat him on your show, neil natal, and do not tie a knot in the end, I have taught hundreds of crafting classes, and I will tell you that there's no elegant way to say that sentence out loud, I've tried every permutation of do not tie a knot in the end and it's never coming out very well. So here we are, we're ready to make a hand tie and a close up on this would be very helpful if we can get it. So I'll start here in a section of the quilt that's very visible hand time could not be easier. You just simply take your needle down into all three layers of the fabric, and then you bring it back up through all three layers of the fabric and you bring it back up about a quarter inch away so you can see on the back about how much fabric I've picked up. And you can also see on the front about how far my needles gone and then you just pull the floss through like so then you can actually pull the needle often centered sex it's a little easier without it. And then you just tie the ends of this floss into a double knot a nice, tight one because it needs to be pretty permanent and you can even do a triple. Not if you want to be extra extra strong about it, and then you would trim. The ends of the floss short, but they generally do stick out a little bit and that's that's all there is to a hand tight it's a very simple little process how some things that make it kind of extra fancy that you khun d'oh is you can actually double up those ties so I've just done one this direction I can make a second one right under it so see how I've got my tie going vertically I'm going to make another one going horizontally so on the back of the quilt that'll make a little stitched x and on the top I'll be able to have a little more substance to my little spot of tying here just makes a cute little almost a pom pom effect that's nice so say now that's a little a little more substantial on the front and on the back it just makes a little cross so you can do them singly or you can do them doubly which is fun the other thing you khun dio now the show neil needles they you're using are fairly small size and if he wanted to dio ah larger yarn tie which is what I've done on the kid's quilt here you would need to size up your needle to more of an upholstery needle which is huge and enormous eye and has a very sharp point and these air generally only sold in packs of general purpose home repair type needles so you do have to spend a little bit more to get this kind of needle, but if you want to work with a big yard it's very much needed, so I will say, you guys here in the studio just have the smaller should kneel needles, why don't you continue practicing your hand ties with the embroidery floss? And I'll just quickly show a yarn tie for contrast of size, and then we'll talk about some techniques for making this hand tango faster non perfectionists denmark, where you put thes do you decide where they go beforehand? I will explain all of that in one moment. Ok, that's an excellent question. So just to put one of these just to put a yarn tie next to the embroidery floss ties, you can see the difference. This is a little thicker, obviously we're putting enormous bulk through the layers of the fabric we're putting it through fabric we've so this is more work to work with the sticker yarn. I generally pull it through the back first and then I bring it back up instead of trying to do the whole stitch in one passes they do with the embroidery floss, but then what's nice about these is when you tie them they haven't they have a nice substantial weight to them now the the type of yarn I like to use for this application is generally acrylic knitting yard, because acrylic knitting arness plastic it's going to stand up well through washings, where is a cotton or of wool yarn tended get matted and yucky looking with washing thiss embroidery floss works just fine through multiple washings. I find it is going to get fuzzy. The ends are gonna fray, but it'll it'll look nice. So now let's address jones question about marking and measuring and where you going? Where the heck are we going to put these tax right? So I'm gonna switch back to embroidery floss the pattern in which you quilt and this is true of any quoting method it's really going to be driven by what's going on in your quote, top and there's, different considerations for different methods. So I'm not quite speaking globally here yet, but for hand tie quilting like we're doing, you do want to be careful about not trying to quilt over any point where you have seems meeting seems can anybody guess why that isthe? Yeah. Seems there's a bunch of seem allowances collected at those points and trying to jab the hand sewing nail through them. I would really not be fun for anyone, so you'll want to steer clear the seams, but you've got all the open areas that you can work in, and you can really do whatever makes sense. Now I have a quote here where all I did was I put a tie in the center of every one of the blocks and the blocks, the ties form of fairly random looking pattern on the back of the quilt, because, of course, the blocks air in a somewhat random pattern on the front of the quilt, but for this type of pretty functional quilting that's completely fine, right? We were really are operating in a more functional than highly decorative quoting universe here that makes sense. Sure, I'm the smaller quote, because you've gone to all the trouble tio get it squared off in nice and it's small enough, do you ever just based around the outside edge, just so it stays all the three layers stay together because I've seen that done, I just didn't know I personally don't like to do that because I feel like you, you've locked the quilt down at the edges, and there still may be movement that needs to happen from the center out, whereas when your quilting, you're always smoothing and you're always keeping the fabric flat, but if you've already an ingrid at the edges you've been pete id that motion what tends to happen that is the smoothing that you do build up into these kind of bubbles that come up against your basting seem line? Does that make sense? That's been my experience? Debbie, do you have a different e just done on a thing? I have seen some people based or stitch thie edge of the top alone not anchoring it to the front the back but before they layer together that way it's kind of like a stay stitch, so it kind of keeps everything from stretching as you go along so you khun based or stay stitch your edges of your top but I'm with her on this one I would leave it move as it needs to be excellent, thank you very much so you do have to, you know, kind of start somewhere and you may want to have your ties being some semblance of a straight blind you can absolutely do that. What I like to have for that purpose is some kind of removable fabric marker. You guys have water soluble markers in your kids and I'm using something awesome called a free csi on penn or a friction pan, I actually don't know the correct pronunciation, but they're these air made by pilot and you can really get them in office supply stores as well as quoting stores the thing that I love about this pen and I would love to have a shot of this going on because it's pretty awesome is that you, khun it's a ballpoint pen you can write directly on your fabric, make all the martin what I put you on an airplane and you suddenly stop writing that's nice so I could make marks directly on my quilt in a theoretical universe where this pen is operating, you can see a little bit, though, right? And then with a hot iron, those marks come right off so you can mark quilting stuff with this so easily, and then just now for the water soluble pens that you are using, you could make marks on fabric and then just spray a little water on them and they removed. But the thing about those water soluble pens is if you iron over that mark, it will become permanent. So you do want to use a lot of caution, not that you're going to be doing a lot of pressing at this point cause this is covered with safety pins that you don't want to put a hot iron to anyway, but that is a consideration to know, so I I do like this friction pen better sorry minus decided to stop working the ones that just disappear automatically, yes, they're soluble those air fine although what I find is this quilting being a slow process a lot of times I'll do my marking and then I might not get to the mark to quilted for two or three days and by then the marks long gone so defend just depends on what you're working on so if I wanted to make some marks here you can always use your trusty quilting ruler you can use your pen and then you can really mark out whatever you like in terms of a pattern so that part is up to you maybe you want to do kind of just rose so if I were going to quilt or you are going to put some quilted rose on here why don't we just for the sake of argument put a row three inches from the edge and since we have a kind of even eighteen inches to work with here I'll just put a tie about every four inches so I'll just make a little dot in the fabric at that point and then why don't I add another road right next to it so I'll line my ruler up against the dots that I just drew and I'll put marks in the same four inch increments and then I have a place to sink my needle down right and instead of trying to make one individual tie at a time this is also since we have these nice road is to work with this is a good moment to make a bunch of ties at once so if I start with a much longer strand of this embroidery floss like let's say three arm's length worst worth then I can really combine this stuff this is pretty fun to d'oh so my first mark is right here I'll just go ahead and take the needle down and then back up and I'll pull the this floss through but I'll leave a pretty good tale of that hanging because I'll need that tie with in a minute and then I'll just leave it connected and I'll go to my next little spot that I marked and I'll take another tie right there and what I'll do is I'll leave these connected loosely so I want kind of a loose length of floss between them but I'm going to leave them connected for the moment but I'll do another one here a question coming in from jean ginou diana you're familiar with shadow quilting shadow quilting I am not that sounds like a good question for debbie yeah you know shadow quilting gina's asking this shadow creek quilting will work for this application she said it's the kind of cruelty where you outline the pictures oh yes in fact when we discuss machine quilting a little bit later that's exactly what we'll be doing is following the lines created by the blocks I didn't realize it had the name something new from us there's rain for that it's called eco quoting go cool things. The one I've heard yeah, and and that would mean like actually following around one of the grass alex and then half an inch out follow around again and then half in a job fall around again. It kind of creates an echo. Oh yes, I've done that before. With hexagons and made could have been expanding hexagon pattern it's really fun. Find those face she's been the echo quilting and in the ties in the in the ditch in yes, a mix and match all the time and every set of shirts has a different story to tell. So just choose what's quilting modes makes sense for it on the thiss khun b a little smorgasbord and it could be a smart ish for lucky shot studios asking down how far apart are you making the ties? Just to recap, I think that the ties should always be at least for this style of batting in this size. A quilt, right? I like to keep my ties three to six inches apart. Six being the maximum distance. You want them to be that's? Actually a pretty loosely quilted quilt, but as long as it's not getting a lot of rough handling and it's not being laundered frequently, that'll function just fine if you want to have a little tougher usage for this and you want to wash it more, get those ties closer to three inches apart, so we've completed a row here you can see that I have stitched all of the stitches to make the ties, but that that they're all connected is one long piece of floss, so I just need a paris scissors to cut that, make sure you were all painting attention, ok, excellent are these not the coolest thing should never see what we're going to do is cut those, so I'll go ahead and cut the slack that's between them, but I'm being careful not to pull out the little stitches I made timers like I'm starting to tie down here before I cut, so that I make sure I don't drink it all through, and to be perfectly honest, I generally do it that way because I I just like to tie with long pieces and my fingers rather than fiddle with the shorter ones, but definitely there are a lot of soldiers who prefer to save the labor of doing the whole thing in one step so they'll they'll kind of assembly line it like I'm doing here. In either method is person perfectly legal you really get to choose the ways into this that makes the most sense for the way that you like to craft so if you do the middle stitch or if you do one stitch it would be bigger obviously then does it matter how how big I do about a quarter inch under stitch if it's a big stitch what happens is it's not a secure of attacking point because it's more diffused if you were so I like the quarter inch now rg h is asking if you ever do this in reverse and could you do it in reverse where because they wanted the tie ends to be on the other side of the cross on the back that's a really interesting idea I have not personally done that because I think of the backing of the quilt is the part that will be against me and I feel like all those little ties might feel like spiders or something but there's no reason you couldn't if it were a wall hanging quote for example that would actually be a very pretty neat point finish and then those ties on the back wouldn't make a difference at all. He could do something similar with a like a quote you were going to use this picnic blanket and that would be fine if you view is actually missed the name of the pilot pen you're using specifically so it's called either the fricks eon or the friction pen the way it is spelled is fr I x I o n that's the word to do an online search foreign you'll find their website right away comes in a lot of different colors if you like to mark in a lot of different colors the one thing it's not great for his dark colored fabrics because of course it's a ballpoint pen essentially that's what it was brought to market as it's just some really smart quilter figured out that it removed had removable mark so there are more for dark fabrics all kind of fabric markers that you can get that will mark on a dark fabric and as the mark dries, it turns white like chalk and then you have it is a mark in the news brush it away when you're finished with it clover actually makes a really nice one of those do you ever use dressmakers joke I don't just because I'm not very precise with it it's you know dressmakers choc has made it miss you are apparently aware in a big block which is nice for large marks, but when I'm doing tiny little dots like this, I like to have the precision of a pent it you can get dressmakers chalk in the form of pencils though, and that works well so the hand tying is pretty darn simple right does anyone have have questions on it or comments on how the process feels in your hands are just how are you liking this is a mode of quilting is this something you might use on a big quilt at some point a multi task with though if you were watching a madman your living room from excellent quilting method for for mad win another fine netflix programming holly's I'm kind of going no okay so tell me your thoughts on this thai quilting I guess not sure I like it with things I've well right well I did another quote where I did have little loose bits and the cat just thinks that their toys and they get destroyed so I think it would just be danger danger are those the points j k o that your dog would chew on this you know you want to hold lt's so I don't think he'd go for the anything necessarily that wasn't tied down or smooth he just likes to chew through fabric oh um but the only his own stuff I mean because I'm giving this to create what they wanted that was silly. Well, I will say if if you're not crazy about those they could not be easier to remove yeah just uh find a place where you can get a pair of scissors under it and clipped the thread and then just pull it right out so you can remove him if you don't like him super beginner friendly yeah see that comes right out and then there's no evidence to tie was ever there picking with so I like him for child and baby quilts like if you're making a quote for a gift and you don't necessarily have a ton of time to spend, this is a fast way to go I like it because it's a slow moving, relaxed form of quilting and as you'll soon see machine quilting is kind of another athletic activity it's sometimes it's just nice to sit with the quilts on your lap and kind of make little not hang out so it's a nice thing to have in your arsenal for sure, okay, so if anyone less anyone else has questions will move on to machine tacking. All right, so machine tacking is very similar to what we've just done and that it's just little points where the layers connect together. But as debbie was kind of describing earlier with the basting by machine it's really similar to do this tacking by machine because we'll make the tax and then we'll move the quilt and will leave a long stitch between them and then we'll make another attack and then you kind of clipped the threads in between so it moves a little faster and obviously, since you're operating a machine instead of your hands with machine tacking, you now have the freedom to place tax that the's points where the seems made up because my machine needle can go right through a bunch of layers of fabric and in fact, for this quilt here, the hudson quote that I made that's exactly what I did, I actually put machine tax at every point where blocks met up and that's how I quilted it, and since there were so many blocks in this quilt, I was able to put a whole lot of points attacking all over it. So I'm going to actually ask debbie to come up and demo how this works on a burn in a machine because she's, the master of all these digital displays and we'll walk us through the best way to make this kind of little machine bartek that we're going to do well, thank you. Big applause for debbie, because she's so awesome you don't know this is all about fun, right? Ok, so what we're going to do is we're going to choose his exact stitch, so it doesn't really matter what sewing machine you have, you can just use yours execs stitch and on our machine it's it's stitch number two so I'm going to select it and you girls, if you just want to hang tight until I'm done and I'll come around and help you get to it we are going to kind of did some tests sewing because it's really important to do that sort of thing whenever you're not sure how things are going to look so I did some tests sewing and we're using a stitch with on our zigzag of three point six and we're going to turn the stitch length way down two point two and we have a digital readout on this machine so I know exactly what I'm going to set it at so and that's really nice because I can exactly know what it's going to do so I'm going to turn my speed down a little bit and just gonna pull the fabric up underneath the foot like this I just want to make sure I don't have anything underneath okay dropped the presser foot now we if you did his exact and you didn't lock the stitch at the beginning and at the end of that it might come out and that's not a good thing so there's a little lock stitch button on the front of your machine it's right underneath it's the second button from the left under the screen it looks like a threat not right so I'm going to touch that first and what that will do is it will give me three stitches in one spot to lock it and then it will move on to my six egg and I'm actually going to count how many stitches I want because diane told me how many she wanted so I know how many so I'm gonna count seven stitches then I'm going to touch the lock stitch again and we'll lock three times and we'll call it done and it's really very easy so I'm going to do three lakhs stitches then zigs saying happen if we did not use those locks stitches at the beginning and ending of the bartek but it could come out when you wash it yet polls right out yeah the lock stitch knots the threat it prevents it from coming up yeah so lock three times and it's done then you just lift and pull and then actually if you were doing the whole quote you could just move to the next position dropped the foot touch the lock three lakhs one two three six eggs seven stitches one, two, three four five six seven stop block stitch one two, three done and then you can just pull in drag and clip your stitches in between as you go it's really very easy questions no okay thank you so much you're welcome so let's let's talk a little bit about that. So the the thing that's great about this particular style of quilting as I said before it allows you to quilted all those matching points of seems which is great for security and obviously much easier than working with a hand sewn technique they're this's also much faster then the hand quilting that we were just doing obviously and since you're able to do a lot of tax at once and just leave threads between them you could actually put your tax all over the whole quilt and then as you can see the's long pieces of thread will be between them attaching them and that is true on the front side and the back side and get those end pieces out of the way and so what you do then it should go all over the quilt and you trim away the excess thread on both sides get rid of that being very careful not to cut your original stitches which I actually think I just did I'm sorry debbie so I like to use this again when I'm a bit in a bit more of a hurry and I want to give a quilt some good security but I just don't have a lot of time to spend on it or for some reason the shirts that I'm working with seemed to really call for a very invisible style of quilting because although I'm using black thread here for visibility if you're actually using a thread color that coordinates well with your quilt these tax are very difficult to see so it's nice because it's kind of like invisible quilting in a way now on the machine that I work on it home what I need to do always is match my machine tax to the color of my backing and that is because on my machine if I were to put a different color in the bobbin than I have in the top of the machine my bar tax and marbled which in my case I don't like but w is this the same experience you have with the bernie ana um or would you keep the thread colors the same on both I think it depends on what look you want and you can always adjust your tension on machine so if like test sewing because it's really important to test so so I would test so and see what it looked like and then if I needed to adjust my top tension or my bob intention a little bit to make it match better or for decorative effect you might want to use variegated threat and then it won't matter that's true so that's always kind of look uh so it just depends on what look you want that test something is really important test insee excellent so you've seen this happen on the bernie nina and you can see that it's very automated and quick and in fact on some burning a models they even have like a bar tax stitch where you literally can just set it to do one repeat and you punch a single button and it makes the whole thing with the lock stitch and everything and it does it in one step on older machines and more entry level machines aa lot of times you just have to consult your manual and figure out what's the best way to do it isthe so go ahead, holly for that I and my machine it had like a little it's like a little star but a very secure I don't know, but you know, like could you use that instead? It is that security can we're actually going to get there in one second, so hold death on so on the machine that I work on to get these little bar tax, I don't really have anything to automated, so I use my zigzag stitch I start at a zero stitch width, which works like the lock stitch that mary started. I said, mary, because I worked with your colleague mary on another class I'm sorry, so it works just like that lock stitch then I dial up the width of my zigzag to the setting I want from my bar attack and I count those seven stitches that just gives you a nice little firm rectangle of stitching, and then I crank the stitch with down again to zero and I put a few lakhs stitches in so it's going to be a different process for different sewing machine models, and I would recommend checking your manual and if you no longer have your manual, eh shame on you and be go on the internet and search the make and model of your machine and the word manual and you'll find a pdf of it in no time and play around and see what settings on your machine will get you this kind of bar attack easily definitely I agree with debbie tests it's all about test sewing and it's all about finding the settings that are going to make the best results for you but yes, it's holly mentioned you don't just have to do bar attacks if you're working with a beautiful machine like this one that has a lot of decorative stitches aa lot of times you can press those into service to work is really pretty little tax so do you want to come up and show how to do that? The shelby's in our chat room is being thrilled debbie that you showed them how to do the lock stitch something they didn't know before so fabulous there are so many cool features on saying machines these days and a lot of people have them and they don't know how to use them so that's kind of why I'm here okay to do a decorative stitch and I think we picked one that was the star and it's what am I stuck on? Okay um it's stitch number seven eleven on this particular machine so I'm just going to go to our stitch menu and we're selecting thie decorative stitches and I'll touch okay? And then I'm going to move down to the menu seven zebra one and open it and there are all these really cool decorative stitches in this machine and I'm just going to move down to number seven eleven and touch okay? So whenever I do that stitch again on this machine, I would need to touch the lock stitch first, so I'm going to drop my foot going to touch the lock so gives me three stitches it's going to do my star and this machine is a five and a half millimeter wide machine and now I'm going to touch the lock and that will lock it in place and stop and there's my star and I think those air so cute if you khun picture those scattered all over the surface of a quilt that would just be adorable and then they'd also shows little stars on the back as well. So you get this extra little pattern he was pretty thread I use decorative threads a lot, so embroidery threats on variegated threats really make this kind of process kind of fun, especially if you're using the decorative stitches so there lots of decorative stitches we just happened to pick the star, but there are lots of other ones in there that you could just do one in time and and they look fantastic so always one good. Thank you. You know the thing that's nice about this is with this machine tacking process. You can use a decorative thread as we're going to talk about in a second for straight line machine quilting. A lot of times for beginners, I recommend using a thread that very closely matches your fabrics because then it's really hard to see ifyou've messed up a quilting scene because it lends right in, but you're not having tow line up any kind of straight seams here you're just sewing it tiny individual points on your quilt, which means you really can use a bright contrast ing threat because he really there's no way to go crooked here, you're just sewing one tiny thing at a time. Can I answer questions from the internet or tomorrow? I think it's I am ing irene had just asked the question about how to use machine technically, you're not familiar with nina machines, so thank you for explaining that appreciate that we've got a few people asking j w legs and also another viewer asking, do you ever use a quilt? Sorry, an embroidery hoop or any kind of frame before you actually start when you're attacking every together? Does that do you find that helps hold things together when you're making your sandwich? I typically only use those when I'm going to hand quilt, too quilt so meaning like little tiny hand stitches, quilting quilt, generally speaking for laying out and such I I wouldn't find that to be is helpful because you need a lot of mobility and all of your layers as you're smoothing out from center and a hoop just like basting around the edges would lock the quilt down at those edges, and then you'd have fabric sort of banking up against them if that makes sense really with bamboo betting and have you ever used it? That's a question, another question I'm not I love having you in this room for these questions I think that I I've used bamboo cooling up, adding one time and it's lovely, it just feels so nice it's really it's expensive s o it's for those special quilt so I did a silk quote and it was all just silk fabric front and back, and I put the bamboo batting in between that because it was kind of a special kind of thing, but I did quilt it with an embroidery hoop because I use my embroidery machine to quote, I did pretty feathers that I am not capable of drawing my brother machine did beautiful feathers that's lovely, but bamboo is really nice for those special moments. He's got a lot of love for you out there on the internet. Tv people saying they're so glad that you're showing them how to use the machine.
Class Materials
bonus material with purchase
Ratings and Reviews
Arlene
This was a really fabulous class with an excellent instructor. It took us from a pile of t-shirts through every step to a finished quilt. There was a lot of time spent in design which was great, since t-shirts are highly variable in color and design. The second half of the class was all about basics, including information on backing, batting, and quilt top. Then making the "sandwich" with several options on basting. And then quilting (fancy, which was discussed but not included), hand tie and a couple of machine quilting options. Then binding. Each step was explained and demonstrated. Options were very often given, with easy, non-stressful techniques encouraged. This was a excellent class and the instructor was really awesome. Questions were anticipated and thoroughly answered. The instructor was always helpful and pleasant. This course expects some basic sewing machine knowledge, but you definitely do not have to be an quilting expert to enjoy this class and end up with a wonderful quilt.
user 08dcb9
Diane Gilleland is a fantastic teacher. One of the problems I always face with quilting classes is that the teacher seems to forget that everyone is at a different ability. I love the way Diane goes slowly enough for beginners while at the same time adding tidbits of information that even an experienced quilter could appreciate. Her "laid back" approach is appealing and non-threatening, which made for a very comfortable learning experience. It is such a wonderful idea, to be able to save the memories of your t-shirts, by making them into a comfy quilt.
user-33438f
Diane was fantastic! I am fairly new to sewing and have taken a tee-shirt quilt class before, but Diane's class was so much more informative, helpful, easy to understand and professional. I can't say enough good things about the class and how impressed I was. This was my first visit to creativelive, you can be sure it will not be my last. Thank you