Organizing and Measuring Your Patterns
Lesson 2 from: T-Shirt Quilting: Warm Up With Your Life StoryDiane Gilleland
Organizing and Measuring Your Patterns
Lesson 2 from: T-Shirt Quilting: Warm Up With Your Life StoryDiane Gilleland
Lessons
Day 1
1Turning T-Shirts into Usable Fabric
28:15 2Organizing and Measuring Your Patterns
19:51 3Building Your Quilt Skeleton
25:03 4Stabilizing Your T-Shirts
22:28 5Creating Quilt Blocks
33:40 6Quilt Design Process
31:22 7Sizing and Layout of Your Quilt
32:42Sewing Machine Basics
19:22 9Sewing Odd-Shaped Blocks
10:35 10Sewing Your Columns Together
18:52 11Cutting Your Sashing Strips
24:49Day 2
12Planning Your Backing Piece
23:49 13Cutting and Sewing Your Backing Piece
26:09 14Making Your Quilt Sandwich, Part 1
28:07 15Making Your Quilt Sandwich, Part 2
19:16 16Tacking and Tying
34:48 17Seam Quilting
30:00 18Creating Your Binding Strips
26:11 19Attaching Your Binding Strips to Your Quilt
36:30 20Finishing Your Quilt
30:54 21Hand-sewing the Opening Closed
29:20Lesson Info
Organizing and Measuring Your Patterns
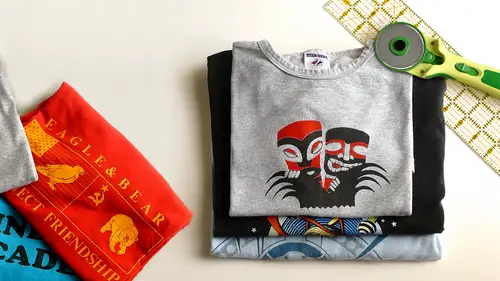
So here's the cooking show part of the magic where I move ahead from shirts I was just cutting up to a whole bunch of shirts already magically pre cut for me. I've got a pile here that they all have these front graphics on them, and I've got a pile here, that's just unprintable back panels the's, I'm going to save until later today and we're gonna work with these now. So when I first started making t shirt quilts, what I discovered was that it is very, very intimidating to stare at a pile of t shirts and say, how the heck am I going to figure out what this quilt looks like? So I set out to find ways to narrow the field of decisions I needed to make it any one time so it's hard to say like, oh, I'm gonna make this big quilt and I don't know where I'm going colors I'm going put together and how bigger the blocks going to be? Okay? We're just going to take this one step at a time. We're first going to do a little bit of measuring and for those of you here with me, I know I haven't given y...
ou any time to cut apart every shirt in your pile, but you can do this measuring on your uncut shirts as well, sometimes when I make a quilt I cut the shirts partying panel's first, and sometimes I just do this next measuring step on the uncut shirts quote looks great either way, so I am trying to figure out what I call the skeleton of my quilt what is the underlying structure of the design gonna look like? And in order to get to that, I need to do a little bit of measuring because I need to figure out out of all these graphics how much space do these take up, how much room does each of them need? And then later we'll take all that and fit it together like a big puzzle. I do want to give you a sense of what I mean by by underlying structure. So this quote that I made for justin is a really good example of that. We're right now going to do a measuring process that will allow us to determine some vertical columns, so as you can see, this quilt is very strongly made of a vertical columns of blocks, and they're all of the same width and that forms the structure of this quilt. And then we played around with where the colors were placed on how the graphics fit together within that does that make sense and every quilt that I make from t shirts that's the way that I proceed and they don't always come out looking this way so the quilt I made for my partner keeton doesn't even really show much of ah column structure and yet it's there it's a more active looking quote, but it still has that underlying column structure, right? Okay, so to get to that, we start measuring the graphics on these t shirts one by one, and we're gonna start sorting them into piles so I believe you guys have some note paper and pens in her around your workstations, and I'm using post it notes, so if you want to, you can take the note paper you haven't tear ups and little pieces because all you need are some little labels for the moment. Here's, what we're going to do start with our first shirt visible here, I'm gonna measure across the graphic of the shirt with my quoting ruler here and what I want to get to is the width of the graphic plus roughly two inches on each side. And so I start with what appears to me to be the widest point in the graphic, right? And then I'll just get my ruler around until I can see that I can fit it to inch margin on either side of that this is not precision measuring we're doing at this point in the class this is really rough getting a picture of things measuring, so for this shirt that I'm working with with of the graphic and two inches on each side works out to twelve inches years might work out to eleven or use might work out to seventeen solid material the sketch, your two inch margin on each side and your fine so I'm going to make a label with that with on it, stick that on the first shirt and then I'm going to set it to the side there and I'm gonna forget about it for a second we're going to move on to the next shirt and then I'll do the same thing and I'll measure the widest part of the graphic, which appears to me to kind of start here the bottom of this, eh? And move to this edge and then I'll add two inches and you may notice here that adding two inches would not get me to around measurement because there's actually a little bit of extra here don't worry about it round everything up to the nearest inch it's not a precise science at this point, so this looks to me like I could do fourteen inches and have two inches plus a little bit on each side that's totally fine, so again a label that and then I'll set this up as a separate pile and we'll keep going, and as you measure these, you're going to find that they're going to very naturally form piles of specific wits every pile of shirts is different so you're going to have a different number of piles and that's fine because we're goingto work all that into a pattern as we go this is just telling us how much horizontal space each of these shirts needs to take does that make sense? It's everybody on the internet feeling ok about this? Any questions coming up yes about a question coming from away well, I don't know the exact username authorities for that but thing is there advice for courting pieces of sweatshirts t shirts? Was that to think of fabric beefy sort of quilt I think it could be done o yes holly has done this will tell us severely races and what was the experience like um it's in the uh one t shirt quote that I have so it just is who fear but it works great so excellent you know, we look forward to seeing that later later in the class today you don't have to and jews because the leaves I mean, I love that you asked that that's totally going to happen and I'm gonna get to that in just a second if you can hold on to that question now we have a very similar question actually come in from terrorist wagon is on life saying I have a few she's t shirts that actually have holes warning to the graphics is there any way start to use those or do I have to break it to my husband that we need to throw them away? You totally can I think in that case what you need to do is get creative about how you're going to reinforce that but it's going to be visible so you might want to use a really tights exact stitch all around the opening and put a piece fabric underneath that whole you know it's going to be an extra visual element in your quilt and so you can totally use the fabric but there's really not a way to make the whole invisible at this point but if your husband is attached to that shirt you should just use it you could also put a patch over it depending on the placement of the whole relative to the printed graphic right? You could put some what they call fuse herbal wedding on a piece of t shirts crap that you have left over that you've cut into aa heart or something something that represents your husband and then you could just fuse that right over the hole that would work too so definitely a lot of creative solutions for that kind of stuff same applies to stains you can easily patch over a stain if the part of the shirt you want to use has the stain on it and you can't avoid that are we just measuring this and not for the moment, just wait, okay? Yeah, we'll do the height as a separate ok step question back to kind of the different materials, so by some heather for his first job at starbucks it's not a t shirt material, can it still be used? How would one attach it to a piece of fabric? Or you could absolutely is that is that on a little pocket or it's just stitched on the bed of the apron it stitched on there with the arena, so one could just so you could just cut a big block and then since we're going to stabilize this mitt t shirt fabric so it won't stretch, that piece of canvas will fit right into the scheme. Thank you. What a cool idea! So this, uh, we're in, we're in another little paint drying zone here, I'm just going to try to speed myself up a little bit, so I don't bore you guys, but I'm just continuing to make piles and I'm continuing to do this measuring and I'm continuing to label at some point we're going to run into a shirt that's the same with is one of the other piles have already created, and then we'll just add that the shirt to that pile so here's one of those shirts like tara mentioned where there's just not a lot of fabric relative to the printed graphic, right? We're actually not even going to get two inches on each side of the graphic that's okay, this is kind of where our loosey goosey sensibility comes into play. If I can't get two inches on either side, I'll take an inch and a half I'll take one inch it's okay, that has designed implications later, but they're not big implications, so we'll be able to work with it just fine. So I'm going to I'm going to take about one inch on each side, and that puts me at a fourteen inch with and so I'll just go ahead and add this one to my fourteen inch pile guys stole a label in the process. There we go and this one gets to live in the fifteen inch pile on this one goes on the fourteen inch pile, this one is a sixteen inch with so that needs its own pile. So as you can see for this first stage, you're going to need a lot of space, a lot of flat area to work with here's, another one of those shirts without a lot of fabric to speak of, you can really see a big difference in fact, between this shirt here and this one, I actually really love this on big in europe, sure very much great, but this shirt is fairly large in size and there's just an ocean of fabric for me to work with, I can really make this plot quite big around the graphic, but with shirts with a larger graphic. A lot of times you're just very limited into the size that you can use and these were some of the variables that we play with as we arrive at a quilt design loving your spinnin this is an easy one to say that they keep the sleeve fabrics because then if they can actually use that to reinforce any holes or gaps in there already, is that something you'd recommend that's a brilliant idea? Yeah, I love that. You know what I would love to know from the internet chat rooms as well as just any t shirts stories that you all have. What are your favorite shirts what's on them and how did they come into your life like air they meaningful to you? That would be great tio have to refer to as we go so here's a shirt that is another really good example of this thing where the sleeves air taking away some of the fabric that we have to work with, right? So if I am able to measure down here near the side seam of the shirt, I can get my two inch margin just fine, but if I need to measure appear I'm really going to be very tight to the graphic so you do have a choice and I think as we go forward in the design process today this bit will make a lot more sense so I would say you know took this in the back of your head and think about it but what I will typically do is opt for more space because t shirt graphics as you can actually really see from my emerging tabletop here t shirt graphics are often very bold and when you put a whole bunch of them together in a quilt top it's actually a very visually active field and so I like to create a cz much breathing room as I can so I'll always apt to cut a little wider later in the class I'm going to show you how to patch these areas so that they fill out this full quote blocks rectangles ok so with that said that looks like a sixteen inch with okay so what this represents my just oh, I forgot to do I'm big in europe sorry that fits very cleanly into a fifteen inch with so we'll add it to the fifteen inch pile okay, so what this represents is a a t shirt quilt in progress we've now taken this big game orpheus pile of shirts and we've organized it into the beginnings of some vertical columns little form the underlying design structure of our quilt doesn't really look like a structure at this point, but I promise you it is the thing we need to do now is look and see whether there's any piles here that have fewer than three shirts because if you translate this to a quilt with vertical columns, you'll notice that every column of this quilt has more than one shirt in it, right? Okay, so that's we want to get piles of shirt piles of t shirts here that we can then convert the vertical columns so we need to make sure if we have any piles with just one shirt in them, we need to try to combine them with another pile so that we can start narrowing this whole stack down. Okay, so I measured this one originally is an eleven inch wide graphic. The question is, if I measured a little more space on either side of the graphic or even a little less face on either side of the graphic, could I go ahead and join it with one of the other stacks? Ok, that's pretty easy. I have a stack of shirts that's twelve inches wide here and it would be very easy for me to cut a little extra space on either side of this new york graphic so I can go ahead and add this shirt to the twelve inch pile. I've also got this thirteen inch wide graphic that I measured so again can I measure a little more or a little less on either side of the graphic and join this loan shirt to one of the other piles I've got forming and absolutely I still have this twelve inch pile I could measure a little shy of the two inches and I could get a perfectly nice twelve inch wide block so I'll go ahead and add this so the twelve inch pile so now I have four piles instead of many more and then I have my sixteen inch wide stack here which on lee has two shirts in it this is where things get a little more problematic because a wide t shirt graphic is a wide t shirt graphic you can't really cut it now are without getting into cutting and stitching across the screen printing itself right? So the question is do we want to try to cut other shirts much wider too bring these into another stack or do we want to perhaps let them be a big dominant element of the quilt and fill in around them and again like I know that at this point it might be a little challenging to visualize some of what I'm saying it's one of those things that once you've seen the whole process I guarantee you're going to be like oh that's what she was talking about two hours ago so I promise it all will come together just fine for this particular pile I do have this fifteen inch wide stack and I've got a sixteen inch wide stack what would be the simplest solution? What would you guys say fifteen seconds to cut it to fifteen cut the sixteen two of fifteen which I could do I just I always just lay the rule over and double check that I'm not going to get into too much trouble I would opt for the sixteen inch on lee because you're dealing with rectangles or square so if everything's a multiple of four on either side it always works out uh that's very fancy remember force that could be four inches by sixteen inches or twelve inches by eight inches but when you come to piecing your teacher quote always coming together that's true that's true, I don't I don't typically worry a lot about measurements once were beyond this little point that we're in, but I think that's a great that represents a great piece of quote making advice which is like make the math is easy as you humanly can and I hugely espouse that idea I just don't believe in like I don't believe in fractions of measurements here I don't believe in in weird odd measurements just keep the math easy and then the quotes going to turn out great and yeah don't don't make it complicated, so so your suggestion then would be to take this stack of shirts that is set up to be cut to fifteen inches and try to cut him all the sixteen inches so that they would go into that in that you can put your sixteen inch long weird guy but it up right at the end of uh huh that's true just four seems to be the magic number, remember? I like that so either solution is perfectly legal here. This is one of the reasons that teaching t shirt quilting sometimes seems like too confusing because it's like I think a lot of times people want a set of specific rules to follow when in fact we really have a lot of options and you're just making the best choice you can in the moment. So if it were me, I would probably actually just take this whole stack that could be cut to fifteen inches. I know I can cut in one inch wider I'll just marry those two stacks together now I have a big stack of sixteen inch wide blocks, so here we have now a three column quilt, right? Everybody can see that I'm gonna have won fourteen inch wide column it has three shirts in it. I'm going to have a sixteen inch wide column it's got one, two three for five shirts in it and I'm going to have twelve inch wide column and that one has three shirts in it, ok
Class Materials
bonus material with purchase
Ratings and Reviews
Arlene
This was a really fabulous class with an excellent instructor. It took us from a pile of t-shirts through every step to a finished quilt. There was a lot of time spent in design which was great, since t-shirts are highly variable in color and design. The second half of the class was all about basics, including information on backing, batting, and quilt top. Then making the "sandwich" with several options on basting. And then quilting (fancy, which was discussed but not included), hand tie and a couple of machine quilting options. Then binding. Each step was explained and demonstrated. Options were very often given, with easy, non-stressful techniques encouraged. This was a excellent class and the instructor was really awesome. Questions were anticipated and thoroughly answered. The instructor was always helpful and pleasant. This course expects some basic sewing machine knowledge, but you definitely do not have to be an quilting expert to enjoy this class and end up with a wonderful quilt.
user 08dcb9
Diane Gilleland is a fantastic teacher. One of the problems I always face with quilting classes is that the teacher seems to forget that everyone is at a different ability. I love the way Diane goes slowly enough for beginners while at the same time adding tidbits of information that even an experienced quilter could appreciate. Her "laid back" approach is appealing and non-threatening, which made for a very comfortable learning experience. It is such a wonderful idea, to be able to save the memories of your t-shirts, by making them into a comfy quilt.
user-33438f
Diane was fantastic! I am fairly new to sewing and have taken a tee-shirt quilt class before, but Diane's class was so much more informative, helpful, easy to understand and professional. I can't say enough good things about the class and how impressed I was. This was my first visit to creativelive, you can be sure it will not be my last. Thank you