Sewing Odd-Shaped Blocks
Lesson 9 from: T-Shirt Quilting: Warm Up With Your Life StoryDiane Gilleland
Sewing Odd-Shaped Blocks
Lesson 9 from: T-Shirt Quilting: Warm Up With Your Life StoryDiane Gilleland
Lessons
Day 1
1Turning T-Shirts into Usable Fabric
28:15 2Organizing and Measuring Your Patterns
19:51 3Building Your Quilt Skeleton
25:03 4Stabilizing Your T-Shirts
22:28 5Creating Quilt Blocks
33:40 6Quilt Design Process
31:22 7Sizing and Layout of Your Quilt
32:42Sewing Machine Basics
19:22 9Sewing Odd-Shaped Blocks
10:35 10Sewing Your Columns Together
18:52 11Cutting Your Sashing Strips
24:49Day 2
12Planning Your Backing Piece
23:49 13Cutting and Sewing Your Backing Piece
26:09 14Making Your Quilt Sandwich, Part 1
28:07 15Making Your Quilt Sandwich, Part 2
19:16 16Tacking and Tying
34:48 17Seam Quilting
30:00 18Creating Your Binding Strips
26:11 19Attaching Your Binding Strips to Your Quilt
36:30 20Finishing Your Quilt
30:54 21Hand-sewing the Opening Closed
29:20Lesson Info
Sewing Odd-Shaped Blocks
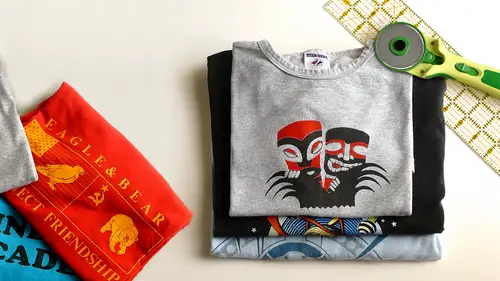
So now that we've done a little straight seem sewing and while you guys were working on your strips of blocs, I want to sort of veer into a slightly different but related topic and that is when we cut a quilt block as we've been discussing that ends up with some missing pieces because our shirt just didn't have enough fabric to fill out the whole block so this is a very awesome block that I cut from a tiny little kid's shirt and there right here where the arm holes where there's just not enough fabric to work with. So I want to show you how to correct that while you guys were continuing to sow your blocks together, okay, so the first thing we need to d'oh is create straight edges where these openings are because it's very difficult to sew a curved seem with precision but it's very easy to sew a straight seem with precision as you've now discovered, so I'm actually just going to take my ruler and my rotary cutter and I'm just going to cut the corner of the block all the way off and I'm ...
just going to cut away some excess sometimes it's tempting to want to do, you know, cut his little fabricas you can what I want you to avoid is creating a very long angle here it this edge because this is actually fairly difficult to so along and also since we're going to sew a big extra piece to this corner and then trim it to match the original edge of the quilt block here we're going to end up with another seem really close to this scene which is kind of messy to deal with when you're quilting so I actually cut this a little more extreme angle so that I don't have any long angles to cope with so go ahead and take both of those off there's nothingto lineup here it's just getting rid of the messy curved edge okay so I went ahead and pre fused myself a big old scrap from the same shirt so this comes off the back of that same shirt and I'll cut some pieces out of here that I can sew into these corners and then we'll just trim those pieces to match the original edges of the block so to figure out the size of those pieces I just need to line the top and the right edges of the block up with two lines on my cutting that so I'm kind of drawing the corner I need here and that also gives me an idea of what size of peace will fill this corner remember my measuring and cutting mantra which is make it much bigger than you need it to be and then trim it down so right here I can see that using the one inch squares on my cutting that that a piece two inches wide and one two, three four inches tall would nicely fill that missing corner. So what I'm going to do is cut way bigger than that I'm going to go for inches across and I'm going to go six inches down there's thieves, thieves corner seems get a little tricky, so I would say just cut much bigger than you think you're going to need and you'll be fine, so I'm going to cut four inch by six inch chunk out of the back of the shirt here and then we're going to sew that on to that corner, so go ahead, make myself a nice straight edge to start with like we've been doing this is the same old process don't worry about the question of grain here the seams air so short, it's not going to make a difference in this case, I'll just use my measurement here that one, two, three, four inches and then a line this up with the cutting that lines that I can get straight vertical cuts and I'll cut a six inch piece here as well, I'm just gonna cheat it even okay? All right, so this was a little tricky, but this really works, so the first thing I'm going to do is position the two pieces together like you see in the overhead camera, thie extra piece that I'm sewing on extends out from the edge and the top of the block, and then I'll take my ruler, and I will just line the edge of the ruler up with the corner that I cut off and I'll go ahead and cut through canister piece. So now these two angles match up perfectly. You can discard this or save it for another project, and now I can put these right sides together, and I make sure that the extra piece extends well beyond the edges of the block, right? And then I can pin it or not pin it as we as we want, and then also a scene with this, so let me do that, they said before, I am a pinar, so I'm going to pin mine and I'll just so a quarter inch from the raw edge, just like you're doing with your block seems any seem that you so with this whole quote project is always going to be a quarter interesting, and then we'll do the same pressing process that we did for a straight scene. Saul place that on ironing board and what kind of cheat the same allowance open with my fingers, and then I'll press it flat and same thing from the front of the block and again in front of the block people's pressing cloth. So now this has a nice big corner piece on it and all I have to dio is trim the edge of the extra piece to match the edge of the block and it becomes a perfect fit, so the easiest way to do that is to line the edge that you're trimming up with a nice straight line on your cutting that and that way you have a way to know what the line your ruler with at the top appear because you don't have the edge of the fabric toe work with appear so that way you can use the line, you just do the vertical trim and we'll spin it so it's comfortable for cutting we'll line the such up again and to our shores on a trip now we've filled out that whole corner and interestingly, these kinds of piecing seems in blocks really don't show up in the context of the finished quilt like I had to tell you about that one tie dyed one before and if you knew there was a scene there and in all of my sample quotes I do this constantly they're full of seems in most of time you can't see him, you know I didn't go to them then it doesn't look like it's an imperfection or anything no no the one the one color of shirt where they really remain pretty visible is a white shirt but a dark shirt or black shirt they just they just vanish hidden in the context of it. So so that's how you repair a corner you can really do that kind of fix and a lot of context, so I have a slide that I would love to show so there's a block in the hudson quote that I made for my sister in law and this is a shirt she had cut the neckline or the neck a band out of so it would be more comfortable to wear on the job and the way she had cut the net bandit came right down to the very top of where the graphic wass and I knew that I didn't want to so my block at that point because of the graphic would be judging right into the block below it so I simply cut just like we've done here along strip I made it a little wider and a little longer than I need it and then when I sewed them together, it just it just looks exactly like a block so it's the greatest thing so you can make these repairs any time there. I'm not going to spend any more time on that subject because there's not a lot of need tio generally speaking, if you're missing something, cut the edge straight and then cut a much bigger piece than what you need stabilize it been sewn together is that pretty okay with the internet crowd? Any questions on that? No, I think they were following that it's, not just some clarification, its application questions. I think we did cover this, but did you mention the number of the needle? Does it not matter? No, I usually just debbie debbie would be a great resource here. I often use a eighty and a size eighteen. Ito was kind of the middle, so if you're not sure you kind of start there for using a really lightweight fabric, you'd want a sixty, seventy harry awake fabric to ninety or even higher. But for this, probably an eighty, you could use a ninety even so, either one of those would be fine. Yeah, thank you are using the same color for the bobbin as you are for the threat. I am good. Yes, I would love to have a debbie and I love to have access to a debbie at all times of my life, actually really lovely make that happen.
Class Materials
bonus material with purchase
Ratings and Reviews
Arlene
This was a really fabulous class with an excellent instructor. It took us from a pile of t-shirts through every step to a finished quilt. There was a lot of time spent in design which was great, since t-shirts are highly variable in color and design. The second half of the class was all about basics, including information on backing, batting, and quilt top. Then making the "sandwich" with several options on basting. And then quilting (fancy, which was discussed but not included), hand tie and a couple of machine quilting options. Then binding. Each step was explained and demonstrated. Options were very often given, with easy, non-stressful techniques encouraged. This was a excellent class and the instructor was really awesome. Questions were anticipated and thoroughly answered. The instructor was always helpful and pleasant. This course expects some basic sewing machine knowledge, but you definitely do not have to be an quilting expert to enjoy this class and end up with a wonderful quilt.
user 08dcb9
Diane Gilleland is a fantastic teacher. One of the problems I always face with quilting classes is that the teacher seems to forget that everyone is at a different ability. I love the way Diane goes slowly enough for beginners while at the same time adding tidbits of information that even an experienced quilter could appreciate. Her "laid back" approach is appealing and non-threatening, which made for a very comfortable learning experience. It is such a wonderful idea, to be able to save the memories of your t-shirts, by making them into a comfy quilt.
user-33438f
Diane was fantastic! I am fairly new to sewing and have taken a tee-shirt quilt class before, but Diane's class was so much more informative, helpful, easy to understand and professional. I can't say enough good things about the class and how impressed I was. This was my first visit to creativelive, you can be sure it will not be my last. Thank you