Making Your Quilt Sandwich, Part 2
Lesson 15 from: T-Shirt Quilting: Warm Up With Your Life StoryDiane Gilleland
Making Your Quilt Sandwich, Part 2
Lesson 15 from: T-Shirt Quilting: Warm Up With Your Life StoryDiane Gilleland
Lessons
Day 1
1Turning T-Shirts into Usable Fabric
28:15 2Organizing and Measuring Your Patterns
19:51 3Building Your Quilt Skeleton
25:03 4Stabilizing Your T-Shirts
22:28 5Creating Quilt Blocks
33:40 6Quilt Design Process
31:22 7Sizing and Layout of Your Quilt
32:42Sewing Machine Basics
19:22 9Sewing Odd-Shaped Blocks
10:35 10Sewing Your Columns Together
18:52 11Cutting Your Sashing Strips
24:49Day 2
12Planning Your Backing Piece
23:49 13Cutting and Sewing Your Backing Piece
26:09 14Making Your Quilt Sandwich, Part 1
28:07 15Making Your Quilt Sandwich, Part 2
19:16 16Tacking and Tying
34:48 17Seam Quilting
30:00 18Creating Your Binding Strips
26:11 19Attaching Your Binding Strips to Your Quilt
36:30 20Finishing Your Quilt
30:54 21Hand-sewing the Opening Closed
29:20Lesson Info
Making Your Quilt Sandwich, Part 2
When we last visited our quilt sandwich way, had it all laid out on the table here, we've got our three layers are backing is on the bottom, and it is facing down got our batting layer on top of that, we've got our top on top of that facing up, so these three layers air now oriented, exactly as they will be in the finished quilt, and now what we need to do is temporarily hold them together. And as I mentioned at the end of the last segment, what we're going to use for that is safety pins, so you all should have little dishes of safety pins handy. You can really use either a one and a half inch safety pin, which is the smaller guy here, assuming that's visible in the overhead camera, or you can use the next size up, which is a two inch safety pin, they work about the same for me, just different hands might find them to be slightly more or less comfortable, so I would say, try both and see what you think. The way that we do, this is we're going to start basting in the center of the quilt...
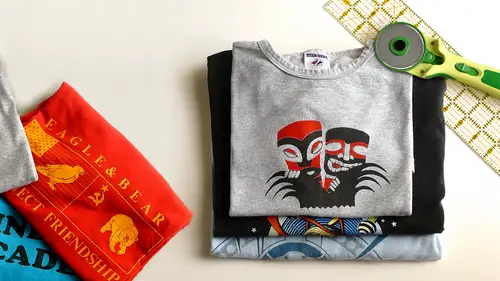
, and then we're going to work outward in all directions, it's a great opportunity to really give your layers of very good final smoothing and I even so this s o that there'd be a little bit of waving us in a couple places to be able to show you how you can really correct that in the basting process here, so we'll do all of that. So I'm guessing everyone in this room has operated a safety pin before, so you just open it and you rock it through the three layers you don't have to pin a big chunk, you just have to get it down through all the three layers and back out and then you close it. What I usually do is I feel around for the table top and then that's when I bring the pin back up, so I go down until I feel the table top and then I bring the pin back up those of you who might be pinning on, say, an expensive oak dining table probably don't want to be using that method because you can easily scratch your table, but if you're working on a work surface that it doesn't mind a little scratching, then that's a great method. Obviously you can't get your hand under here because we've taped the backing down, so you're working entirely from the top, so we'll just keep pinning I like to place a safety pin about every three inches around my quilt to keep it nice and secure because we're working with t shirts and because they have these printed graphics on them it's good to mention that I would recommend not pinning through the screen printed section whenever that is possible because in a lot of cases, pins and needles khun leave permanent holes in that stuff we'll talk a little bit more about that when we get to quilting in the next segment. But for now, since you really have the freedom to place these safety pins anywhere, just try to steer them clear of the t shirt graphics and place them anywhere else on the shirts so, like a city's can be very random, the great thing about safety pin basting is that you can move these pins around easily as your quilting that's why a lot of quilters like to use it for a lot of different kinds of quilts, so here I want to be able to get a pin in this region but there's a lot of screen printing here, but another great thing with the safety pins is you can always find some little sliver of un printed space even within the most complicated graphic and you can sneak a safety pin in there very easily now safety pins or not always perfect I just ran across one that seems to have a little burr something in its tip and I'm finding that it's not going into the quote layers very well don't damage your quilt with one something like this just discard it and move on to the next pin just random every we're just randomly holding the layers down there are quilters who probably would do this in a more orderly fashion but I think we've already amply covered my feelings about orderliness so we're doing it this way what's really more important is that you are spacing these out fairly evenly and you're getting that roughly three inch margin now you can buy tools that makes a safety pin operation a little easier one thing that you would definitely begin to notice if we were working at full size and you would be opening and closing you know one hundred safety pins or something eyes that your fingers are going to get very tired and this can actually to your finger nail some pretty well so there are tools on the market that make this a little simpler one of them is called quick clips quick with a k and clips with a k and it's ah a little handle with a metal bar that when you put the safety pin through your layers it slides right under here and it assists you in the closure it's actually really handing I've never seen anything but rave reviews for it anywhere seeing that pop up on the internet so you may want to invest in one of those if you find this pinning process to be kind of painful or you have a nicer manicure than I do that you want to preserve also mentioned that in quilt stores you can get a bent version of these safety pins they actually are manufactured with a little bit of a dip in them so they're kind of u shaped and those air designed specifically for this basting process because they rock in and out of the layers more easily. I tend to stick with straight pins because those those bent cans air three times more expensive generally than the straight ones. But if you do a lot of quilting and you do a lot of safety pin basing it might be an investment that you want to make I generally try never to pin based into seems because as we remember from our sewing discussion yesterday on either side of thes seem lines are seem allowances that have been pressed open so within a half inch of this scene the fabric is doubly thick and so trying to get a safety pin through extra layers is just more work for your hands and not necessary when you khun place a pin just to one side of that area and only go through three layers if that makes sense which I hope it does so again it's a good moment to talk about working at full size and to mention that if this were a full size quilt we would once again be crawling all over the floor and trying to get every part of this quilt and in fact, because the quilt is big enough, it's actually difficult to reach the very center of it many times without crawling on top of it a little bit. And so you you just crawl very carefully and try not to disturb your layers too much and then you work your way out. So debbie, is this the method of basting you use? Or do you use something different with t shirt quilting? I tend to use the spray basting okay, uh, five o five spray and and I usually just spray the batting, not the fabric, so I'd spray the underside of the batting and put it on top of the bottom. But they backing of the quote and then spray the top side of the batting and put my top on top of that. So what do you do about over spray? How do you manage that when use? I am very careful on I get to the edges of things. Um, but yes, I'm some people have a spray box if you're using a smaller project, of course you can get a cardboard box and dropped the project in the box and sprayed in the box so you prevent over spray that way, sometimes I take the walk things outside, spray it and then bring it inside and and and use it that way, so it just depends that's great you could do if you could do a full size quilt outside then and bring it back in. I like that idea. Sure, now is a really important I have ever question here online to make sure that you do have everything secure down would you be able to sew, continue without having upended or sprayed it? Whatever choices that you used to secure the layers for the most part, if you were to begin basting, I'm sorry for the most part. If you were to begin quoting your quilt without having basted the layers together, you really run the risk of the layers shifting around quite a bit and also of your quilt sort of getting lumps and bumps in it as you work that you then can't smooth out what this basting process does. No matter what form of basting you use, it keeps these layers nice and flat and smooth so that you're finished. Quote looks as good as I can, so I think it is an important step on one of our viewers uses her queen size or king size bed as her surface. For her that's an interesting technique and arlene in the chat room was saying she does the same as usually works on the floor with a special session of the safety pins keep snagging the carpet so she often tax it to the floor I happens to me all the time to actually they tell us what have you ever basted with your selling machine no tell me how you do so there's a stitch on the side machine that's one stitch and stop and then you lift your press her foot drag one stitch and stop lift your press her foot and drag and you can drag it every three inches and put one one more one more stitch is like a giant long basting stitch that's interesting it's it's great okay so two questions for you on that is that bernie no specific singer do you think that that would have I do not think it's a burning a exclusive it's probably not on every sewing machine out in the market ok the specific stitch in our quilting menus I said I should call the basting stage it's yes contested told me you said you've used them it's another day with what she would like I can t o here's what I'm finding interesting about that though if I were working with a lap size quilt this is something that will see happen when we machine quote a little bit later but of course sewing machine has a kind of opening here and so if I had a full quilt and I were trying to do that, how can I manage to keep the quilt very flat as I'm moving? My put my stitches all over it and he thoughts on that just as with other like what you're doing, you would start in the center so work your way out yeah, and I think I would say spray based it somewhat first to keep everything stable, but then you would smooth as you go start in the middle and moved the fabric away from the head of the machine to the left. So is your smoothing and and go to that side and then you flip it around and then do the other side from the center out that's a great idea it would be a lot faster to it is it works great, excellent there's so many ways to do this stuff it's really maybe with spray basting other than the over spray in that I think there are quilters who are not thrilled about the potential fumes, although I know that not every brand has fume issues now I believe there are some that are meant to be low fume now it doesn't make your needle sticky or anything in it the one I used it's called five in five actually dissipates, so if I spray basted this today and came back tomorrow it kind of wouldn't be very stuck anymore because it kind of dissipates over time ok, excellent thank you for sharing that so then I just have this last little bit to finish and here's where my quote tops got a little bit of ah waving a senate so I just to show you that you can really use this basting process to get those things out, but I am getting a lot of snagging pins today, there's another one you can actually place depends a little closer together and just carefully smooth the fabric as you're working and that can help correct that nicely and then once you based it, it'll help to smooth the fabric even more. You can't correct major problems with the quote this way, but if you've got just a little bit of waving us, you can really go a long way toward flattening it out in the basting any other thoughts or questions from online before we move on from the steppe check hail let's be really interesting what people have been saying because at merrill and actually I think debbie has used the same tip is you have the sources says when you're using the long thread on a needle making an ex cross along the edge also has worked for her I think she calls him spot spot stitches not using not so instead of there easy to pull out afterwards excellent excellent glad you shared that thank you. I should point out this is a really good moment while I'm all leaning over here and practicing such bad basting ergonomics right now when you're when you're spread out on the floor doing this be very careful of your body the first quilt I ever based it on the floor pretty seriously injured my back just over straining it by trying to do too much leaning and stretching it's really a good idea too watch what your body is doing and not try to do too much acrobatics training because this is going to take you a while to do a full size and you know crawling around on the floor is not a comfortable activity for a lot of us so you want to take this very carefully so are we all pretty well pin based it or close to it looks like we are okay, so let me get rid of these so these pins they're going to stay in here for a while what we can do now is I will remove the tape that's holding my backing down and then what's really cool of this stage is now that you've tasted it these layers pretty much behave like a quilt albeit a rough edged sort of quilt with safety pins everywhere but they're hanging together now and I can fold this and roll it and carry it to do things because they're all bonded once again with the bad basting ergonomics don't do what I'm doing right now there we go all right, nice job, everybody so there we go now we're ready to do some quilting, so for the moment I'm going to set this out of my way because I want to talk a little bit about quilting in the general sense for t shirt quote specifically and I also want to show you the three styles of quilting that we're gonna work on in this segment. I do think that t shirt quilts khun get by with fairly simple quilting you may be used to seeing traditional quilts with beautiful patterns of swirls and feathers and all kinds of things, and the thing that makes that tough with t shirt quilting is simply the variability in their graphics. So to give you an example of what I'm talking about with t shirts, you can see everything from stuff like this big seven where the graphic is a very thick, sticky latex kind of ink that would be hard for a needle to go through. And then a machine presser foot would tend to stick to a little bit onward to really very thin graphics like this staff here, which is almost indistinguishable from the texture of the quilt itself, and that means that doing very fancy quilting where your quilting all over the surface like thiss is a really mixed bad if you happen to be working with the collection of t shirts where all of the screen printing is of the same kind and you do a test and you find that you can so over it and it doesn't stick, your machine doesn't stick to the screen printing. And you, khun sosa, great smooth seems then you may want to try a more dense, all over kind of quilting, but of course the world of t shirts is a world of variables, and we won't know that until we have holler shirts. And you know what? Your quote top looks like an all of that. So in this class I am goingto recommend quilting fairly minimally, because, generally speaking, we want to protect the screen, printed emblems on the shirts and keep those free of any stitching. We want to do just enough quilting to hold the layers together, and we also want to keep it simple and fun. It actually takes an incredibly long time to do that sort of feathery, swirly, complex quilting, which is great if that's what you like doing. But if you're new to quilting that maybe a lot more effort than you actually want to take on. So the three styles of quilting we're going to talk about in this segment one of them is hand tie quilting which you can see very clearly here on the kid's quilt that I made it's just little yarn ties that go through to the back of the quilt and just offer little points of quilting we're also going to learn howto machine tie or also called machine tacking which is a very similar concept thes they're going to be awfully hard to see on camera but this quilt is quilted with some little bar tax in this there in green and they're just little short machines exact blocks of stitching and they basically do the same thing they anchor the quilted specific points and then we're also going to do a little bit of straight line machine quilting which is my preferred method and that's the kind of thing where you're actually sewing seems through all three layers of the quilt toe hold the layers down so that gives you three techniques that you can kind of mix and match and see what your your particular quilt in quote graphics need and go with that so the samples that you guys have are going to be there for you to practice all three methods on and since we're just practicing you don't have you know please don't worry about extreme beauty except for you holly you have to because you've done so much for a beautiful piece just allow yourself to do all the practice you want. You might wantto divide your quote, top into three regions and practice each on a different region. Or maybe you just want to play some all over haphazardly and see what happens, whatever you're comfortable with. And if you're following along at home, as I mentioned, if you just have made a big piece of stabilized t shirt and you wanted to layer it with some scrap fabric and some batting than you could play along with us at home as well.
Class Materials
bonus material with purchase
Ratings and Reviews
Arlene
This was a really fabulous class with an excellent instructor. It took us from a pile of t-shirts through every step to a finished quilt. There was a lot of time spent in design which was great, since t-shirts are highly variable in color and design. The second half of the class was all about basics, including information on backing, batting, and quilt top. Then making the "sandwich" with several options on basting. And then quilting (fancy, which was discussed but not included), hand tie and a couple of machine quilting options. Then binding. Each step was explained and demonstrated. Options were very often given, with easy, non-stressful techniques encouraged. This was a excellent class and the instructor was really awesome. Questions were anticipated and thoroughly answered. The instructor was always helpful and pleasant. This course expects some basic sewing machine knowledge, but you definitely do not have to be an quilting expert to enjoy this class and end up with a wonderful quilt.
user 08dcb9
Diane Gilleland is a fantastic teacher. One of the problems I always face with quilting classes is that the teacher seems to forget that everyone is at a different ability. I love the way Diane goes slowly enough for beginners while at the same time adding tidbits of information that even an experienced quilter could appreciate. Her "laid back" approach is appealing and non-threatening, which made for a very comfortable learning experience. It is such a wonderful idea, to be able to save the memories of your t-shirts, by making them into a comfy quilt.
user-33438f
Diane was fantastic! I am fairly new to sewing and have taken a tee-shirt quilt class before, but Diane's class was so much more informative, helpful, easy to understand and professional. I can't say enough good things about the class and how impressed I was. This was my first visit to creativelive, you can be sure it will not be my last. Thank you