Export Strategies and Proofing Previews with Process Recipes
Lesson 47 from: Get The Most Out of Your Photos with Capture One Pro 10David Grover
Export Strategies and Proofing Previews with Process Recipes
Lesson 47 from: Get The Most Out of Your Photos with Capture One Pro 10David Grover
Lesson Info
47. Export Strategies and Proofing Previews with Process Recipes
Lessons
Introduction
08:11 2What's Possible with Capture One: Quick Edit
06:50 3Capture One Versions: Installation Basics
02:19 4Interface Introduction and Customization
27:16 5The Power of Keyboard Shortcuts
09:27 6Image Management Basics
10:38 7Organization Best Practices
09:53 8Building your First Catalog
19:47Image File Management Automation
06:42 10Advanced Catalog Organization
17:41 11How to Add Meta Data
12:42 12Searching and Filtering Techniques
11:31 13Further Catalog Strategies
07:09 14Basic Selecting, Rating and Culling Techniques
15:31 15Advanced Selecting, Rating and Culling Techniques
20:54 16Basic Composing Techniques: Cropping, Rotation, Straightening
09:29 17How to Correct for Perspective
12:35 18Basic Tool Behavior
11:04 19Tool Basics Part 1
22:44 20Tool Basics Part 2
06:34 21Converting to Black and White and Adding Grain
10:13 22How to Apply Image Adjustments Globally
08:02 23Sharpening and Noise Reduction
09:58 24How to Create and Save Styles and Presets
07:40 25Why Should You Shoot Tethered?
02:26 26How to Set-Up Your Tethered Hardware
02:15 27How To Set Up A Tethered Photoshoot Project
11:07 28Basic Session Workflow Organizing And Making Selects
21:45 29Basic Session Workflow Exporting
05:44 30Advanced Session Workflow
15:00 31Creating Selections With Smart Albums
06:20 32Advanced Exporting
09:03 33Saving Session Templates
03:14 34Collaborating On Set With Capture Pilot
17:45 35Using The Color Editor Basic Color Adjustment
15:26 36Skin Tone Adjustments
09:30 37Color Grading Using The Color Balance Tool
12:54 38Image Processing Demo Perfecting Color
08:11 39Create Masks for Local Adjustments using Brushes & Gradients
12:31 40Advanced Local Adjustments using Masks
17:15 41Dodging and Burning in Capture One
11:30 42Creating Local Adjustments with the Color Editor
07:15 43How to Use Local Adjustment Masks for Color Editing
03:43 44How to Remove Objects in your Image
09:07 45Image Processing Demo: Local Adjustments
05:57 46Exporting with File>Export
08:07 47Export Strategies and Proofing Previews with Process Recipes
11:49 48How to Export for Social Media
05:11 49More Clever Tricks with Capture One Pro 10
05:57 50Final Q&A
13:11Lesson Info
Export Strategies and Proofing Previews with Process Recipes
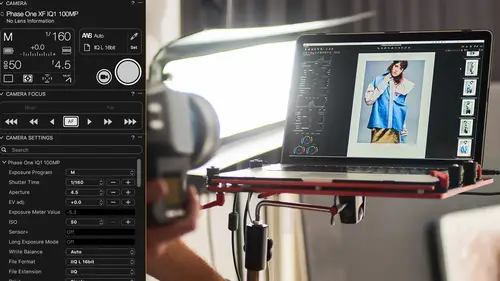
So if we look at process recipes, we can do pretty much everything that we saw with the simple file, export, but it's much more powerful. And we can use a great feature in Capture One 10, which is recipe proofing. Which allows you to visualize within Capture One exactly what the export is going to look like. So if you remember, when we processed out the earlier lesson with Jeff. We made this quick process recipe, which gave us, gives us, a .JPEG, two thousand pixels on the long edge, like so. Now really we've got no idea how that's going to look on my export. And when you reduce the size of an image, what's gonna happen is that you get a negative effect on the sharpening. So when we drop that size down we can potentially lose some sharpness with that image. So what we can do is if we zoom this image to 100% Like so. We've already applied some sharpening with our sharpening tools. Remember we did that locally, so there's no sharpening on the background, but we popped in some additional ...
sharpening on that layer, like so. And we're now looking at this at 100%. But this particular Process Recipe is actually going to scale it down to two thousand pixels across. Which, potentially, will give us a negative effect on the sharpening. So if I click this icon here, the two spectacles, or the one spectacle, rather. By default in the default workspace it sits over here I just moved it across, I find it more convenient. If we turn that on, Capture One will immediately proof to the currently chosen recipe. So now we're looking exactly at this two thousand pixels across. We're visualizing the .JPEG compression, and the ICC Profile as well. So this is exactly how it's going to look on export. No guess work whatsoever. And the benefit of that is, First of all, we can actually, probably, drop down our .JPEG compression quite a bit, without losing quality. Whereas before we really had, kind of, no idea how that compression was going to influence it. So if we drop that right down to zero, you can see it starting to get a bit rough around the edges. So if we just pull up that quality until we get an acceptable level, probably around there. But it also means that I'm making a smaller .JPEG now, because I can really get the best quality to size sort of ratio. I obviously don't want my .JPEG to be too big, because if it's going on the web, It's gonna load up faster if it's a smaller file size. So we can really balance the quality against the file size. And in the Process Summary, we'll actually get a rough idea of how many kilobytes the image is going to be. Like so. So let's go back and continue sort of proofing. So we're happy with my .JPEG quality compression. We're seeing it as exactly two thousand pixels across. We've got the proofing warning at the top. So we know we're proofing as well. If we go into adjustments. You saw here we got an additional category for output sharp. So right now there's no output sharpening, it's only using the sharpening that we did in our local adjustment. But what we can do is add some additional output sharpening for screen, for example. And this opens up a few more basic sharpening sliders, which we can then use to add some additional sharpening if we feel necessary to give us a bit more extra pop as such There's also output sharpening for print. Where we can actually put a distance in that we view in the printer. Either in inch or centimeters, or a percentage of the diagonal as well. So that way, we get optimum sharpening for viewing a print at a certain distance. And the final option will actually disable everything. Which again is often a good choice for retouch if you want to hand off the file, but strip all the sharpening away. Then simply choosing, disable all that, will take all that sharpening off. So very good when you're going to retouch if the retoucher has specifically requested that don't sharpen the file. I will handle that in the post production phase. But it's quite nice to be able to visualize that sharpening as your working so that the client is happy, and so on. Let's do a little bit extra for screen, like so. Also just to note to sharpening as well. You'll also see in the Lens Correction tool that there's a checkbox here called, Defraction Correction. So if we turn that on, we can also visualize if that's helping as well. And what Defraction Correction does is to help compensate for smaller apertures when we shoot. So if we shoot at very small apertures it can have a softening effect on the image. So that's something that we can also decide whether we want to have on or off. Turning it on does mean it takes longer for the image to process. And it's really only useful for much smaller aperture shots. But again we can visualize that with our proofing. Metadata, the same as in the export as we saw before. And also we can add a watermark either through text. By just adding some basic copyright text, or through dragging and dropping an image like your company logo for example. So now I'm perfectly proofing this. So it looks great and I'm happy with that. And then we're sort of ready to export. The only thing you really have to remember is that when you want to proof your export. Set to 100% first in the zoom value, then click on the Proof You Icon, and then immediately that will give you the output. If you make adjustments to, you know, anything else. It might be ever so slightly slower, because we're, you know, making those adjustments on the fly, as well. So we've proofed pretty happily, we can turn that off. We can fit back to screen if we wish, and then output location, like we did in the basic one before. We can choose a token to divide up by Sub Folders. Now remember when we shot into a session earlier with Jeff, by default, everything goes into that output folder. In a catalog you have to choose that destination. So if we just choose a folder, let's go back to pictures, let's just pop it into my exports, like so. So that's set my output folder. I can add an additional Sub Folder with a token again, if I wish. So let's just quickly run that export. So I can do Command+D for example. That will process out. You also get the process icon spinning up there if we want to go to my exports quickly. There's my shot, nicely proofed to two thousand pixels, like so. Nicely sharpened for screen for that particular output. So let's have a look at some of the other options that we've got in Process Recipes, which we've looked at briefly. And don't forget to make a new Process Recipe. You can just hit plus down here, which will give you a new recipe. If you want to get, you know, rid of a Process Recipe at any point. You can just hit minus and it takes it away. So if we look in the File tab. Let's look at some of the other options. Now again, if you remember earlier when we were shooting directly tether capture with Jeff earlier, the defaults mean that generally, everything is always arriving to the output folder. When you're working in a catalog by default, the file tab here, will tell you to go and look at the Output Location, and that's where the images will end up. But specific recipes can also go to specific destinations. So you can have individual recipes going elsewhere. So if for example, this recipe you wanted to post somewhere else. You can simply select a new folder and that recipe will have an individual output location. Now that can be useful for lots of reasons. I personally have a recipe, which goes straight to my Dropbox. Which is really good for sharing with clients as well. So if we wanted to make a Dropbox recipe, we can say, Plus. Let's call that Client Dropbox, for example. And in the file tab we would simply select that folder. If we just pretend I have a Dropbox here. A Dropbox like so. And then that particular Process Recipe will go straight to that location. So Process Recipes are not limited to that global location, which is set here in Output Location. Really handy. Also you'll see here, we've got Image Folder. So if you choose Image Folder, it will return the output directly along side the original RAW file. So if you always want to keep your RAWs and .TIFFs or .JPEGS or whatever in the same place. Just choose Image Folder, like so. So if I click that. That takes me to the Image Folder of where that particular RAW file is. We can also, again, add sub folders here as well. Through the use of tokens, if we wish, as well. So if you use a token in the Sub Folder here. This is where it will stat building, and then if you have another Sub Folder token here, it will continue on from there. I mean that's getting, sort of, pretty deep into the possibilities of Process Recipes and generally, probably most of you, won't need to go to such lengths. But there are cases where, you know, E-commerce, very high pressure situations, lots of exports flying out the door. That we really need to be very specific about where we post those different exports. So adjustments we saw ignore crop the proofing. Metadata, we saw in the Process Recipe before. And watermark, we know about as well. There's one final thing that, for export, which isn't necessarily handled by Process Recipes. But just so you know it's there. If you right-click on an image, and you want to bypass Process Recipes, and the basic file exporter. You can just say, Edit With, after right-clicking. And that means you go straight to another editor like Photoshop, for example. So we can choose basic file types here .TIFF, .JPEG, and so on. And then what that will do is create your export, open it in Photoshop, and place the .TIFF or the .JPEG alongside the original RAW file. So like a roundtrip process, basically. And that .TIFF will be automatically added to the catalog without you having to import, or automatically added to the session without you having to import. And you have the same possibilities with adjustments, as well. There is no limit to the number of Process Recipes you can have. You can just keep adding them, making new ones. Deleting them and so on. There's also no limit to the amount of Process Recipes that you can have triggered. When you start the process. Just use as many or as little as you need to satisfy your needs.
Class Materials
Bonus Materials
Bonus Materials with Purchase
Ratings and Reviews
Stef
This is a good overview of Capture One 10. The course is well structured and presented logically and progressively with clear and concise examples. The software is intricate and the amount of details presented will benefit from a second or third viewing, along with sufficient practice. David is an excellent teacher, slow enough to follow, fast enough to keep the listener's interest. I would agree with a previous reviewer that the shooting session was uninspired but the tethered demo was thoroughly useful nevertheless for someone to become an assistant, for instance. If you have ever used LR in this role, you will appreciate the power and stability of C1 for tethering. With regards to the comment about this class being non-creative; before you can run you have to walk and this course is all about understanding how to operate the software not about what you eventually want to do with it. Capture One is well designed, speedy and its homogeneous interface makes it easy to get to a result once you have a good knowledge of its layout and principles, compared for example with LR which is all over the place with modes, inconsistent and slow operations. Likewise, the C1 color editor is miles ahead of LR color functions, in simplicity and overall efficiency. This class is about mechanics for a reason; creativity is a parallel stream. It would have been beneficial to have a module highlighting major differences with LR for people migrating to Capture One as the word on the street is that C1 is hard. I would suggest to listen in to convince yourself of the contrary. All in all, I recommend this class; it is time well invested if you want to become more comfortable with Capture One and discover its potential.
user-b05602
The course is excellent and David does a nice job. However, I'm an advanced armature, not a professional. I had my own personal color darkroom, then Photoshop/Bridge, and NIK which I still use occasionally. My intention is to rely on Capture One which I purchased about 90 days ago. I would have appreciated a SIMPLE, here is how you load (Import) an image, "save" or "save as" and how to simply export an image (Variant). Yes those items are covered but, David has a tendency to casually and very quickly jump from Tool Tabs or Cursor Tools or the Tool Bar and then magically it's done and he has moved on. How did he do it. Based on David's training, I love the results I get with Capture One Pro. Yes, I know this is not Photoshop - it's much better. I never used Lightroom. I added variant to my vocabulary and I understand all the tools. I still struggle with the simple import, save, save as, and export of a image I worked on and cropped, then trying to consistently open that image as I see it in Capture One Pro. Sometimes it works, sometimes it doesn't and I don't know why. I will continue to re-review the course materials and I will figure it out. I know there is something simple I missed as David navigated the various tools and pull downs. I recommend this class but it does little for the armature. Capture One Pro is second nature to him and he knows all the ins and outs. I would help me a lot if he just add a 5 minute intro, importing an image from a folder, just crop it, then export the variant and open it in Photoshop.
Maria Baptiste
I recently purchased Capture One because I needed a RAW converter that was more dependable and also more reliable when it came to shooting tethered. I also noticed that many of the photogs I follow really enjoy using Capture One and rave about its efficiency. After looking at a few YouTube videos I decided that I needed something more thorough and of course CreativeLive delivered. This is an excellent course and David Grover is a superb instructor. His in depth and thorough knowledge of the software is obvious but his manner of speaking and the simplicity with which he provides directions makes it easy to learn Capture One and lets you appreciate a sophisticated and expertly engineered software. If you're working with Capture One 11, layers is a little different than in version 10 but otherwise everything David discusses is the same. I thoroughly enjoyed the course and will continue to refer back to sections as needed. Thank you Creative Live and David Grover!!