Description of Isometric, Oblique, 1-2-3 Point Perspective Views
Lesson 5 from: Sketch like an Industrial DesignerJorge Paricio
Description of Isometric, Oblique, 1-2-3 Point Perspective Views
Lesson 5 from: Sketch like an Industrial DesignerJorge Paricio
Lesson Info
5. Description of Isometric, Oblique, 1-2-3 Point Perspective Views
Lessons
Introduction
06:17 2Preliminary Sketches of Different Products
05:53 3Steps of Rendering Coffee Maker
06:02 4How to Create Quick Orthographic Views
20:35 5Description of Isometric, Oblique, 1-2-3 Point Perspective Views
11:03 6Best Angle for Perspective View
06:16 7Perspective View on Graphics 360 Paper using Different Materials
13:31 8Final Render of Coffee Maker
15:19Working with Preliminary Sketches of Street Cleaner
16:25 10Chrome and Reflective Materials
10:42 11Final Render of Exterior of Street Cleaner
06:41 12Sketches of Interior of Street Sweeper
09:18 13Design Concepts for the Interior
07:20 14Final Rendering of Interior and Exterior of Sweeper
17:47 15Defining Final Outlines and Contrast
08:04 16Creating Texture and Composition
04:31Lesson Info
Description of Isometric, Oblique, 1-2-3 Point Perspective Views
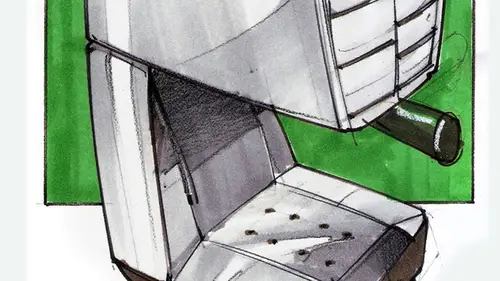
all right, so in this face, we're going to be explaining the different views that we have when we render on object. So sketch like an industrial designer. The first thing induction design. When you figure out how to sketch, we have to know the perspective that we want to use. And I am mentioning here three different for different perspectives that you can play with. They have some pages to show to the camera. We have what would be called oblique perspective of some of the books will call it isometric than we have three point perspective and then two point perspective Now in three point perspective, when we sketch what we dio when you render an object whips when we come up with an object. When we need to come up with a design that we like, we start with three basic shapes. I don't have the cameras picking that up. Let's to it in black so that it looks very clear how tall the object is, how wide and how deep. If you get these three dimensions, how tall, how wide and how deep. Once we get...
these three dimensions, it gets a lot of this year to render on object, right? So first we get the three dimensions going on, it's find this pencil. But now what we have over here is a three point perspective because we have the vanishing point on the this would be finishing point on the right. Then we have a vanishing point on the left, going to the P l Vanishing point on the left, and we also have 1/3 vanishing point very far away from us on the ground. So we have three vanishing points this direction, this direction in this direction. This is very hard to dio. It's not impossible, but it takes more practice. So basically you have your shape and you have again your three vanishing points and the 3rd 1 coming down. So I showed you the most difficult. Now I'll show you the East year, but but sometimes the clients, by not really interpret this correctly. What I mean by that IHS In an oblique perspective, we don't have a vanishing point. The lines are parallel to each other, so these lines that I am marking here, our pilot to each other. Let's do a little notation here. Single Tik vertical lines are vertical. The lines that are going to the right are these guys. But they are parallel to each other, you see, And the ones going to the left, our pilot to each other. You see the difference between that and this these convergent to appoint, converge to a point, converge to a point thes, never meet. They go palette to each other to the infinite point is like the railroad line. Never really meat to a point. So this is not what to do. This is not what to do because it is a lot harder thing is what to do, which is a lot easier. So the convention would be to use vertical lines parallel. They never meet. Okay, I think I had it and uncle and invited. Everybody is supposed to be Palo. But then we have the alliance converging on the left to a vanishing point on these lines, converging to a vanishing point on the right. So these would go to VP. Are these go to vpl finishing point on the left vanishing point on the right. When we connect those two points, we create the horizon line which roughly would be placed somewhere here. You don't need to market. Um but I'll do it now on this case on the paper, HL means horizon line the horizon nineties, where your eyes are in product design. Most of the products that you would be designing in industrial design would be objects. That Jew, I would say 80% of the time objects that you hold in your hand. You don't hold objects in your hand. Us if you were, You know, the next soccer team winner. Right? And you hold the trophy like this, you hold the object like this, or you put it on the counter and you look slightly down. This is important. You always have to place your products if they are small again, slightly below the horizon line. So this is your eyes. You don't sharpen your pencils like this, right? It's slightly lower. Right? So you see any bit of the top same thing with this piece of furniture. You see a little bit of the top and you see the two sides, but just a little bit of the top because, you know, it would be up to hear if I am standing, the table would be up to here I wouldn't be here, but it would be here. The same thing would happen with an object with a regular object. All right, so you get the idea, Then we get the best out of these two vertical lines remained vertical Palo to each other. But we have to vanishing points. Yeah, so with the the correct, the correct picture, the vertical lines of always apparel and they never meet. But the horizontal Sorry, vanishing lines they do meet. They do intersect at some point. And that makes it correct. Yes. Okay. Left and right. They meet vertical lines, Never meet. Great question. And we have over here a copy machine that again reviews the same thing that I have reviewed. So I'll go faster with this. You see, the green lines go to the vanishing point on the right, red lines go to the vanishing point on the left. This is isometric or oblique. They never meet by symmetric means that I have three access over here. You see, if I put a tracing if I put another piece of paper on top the same thing. These lines are pilot to each other, partly to each other. Parallel to each other. Isometric view means that I am using this grid. And I have 120 degrees on each of these three angles. I did not keep, um, 120 over here because this place, this piece of furniture was placed in a strange, a strange angle. All right, But most of the times you would do this 181 120 degrees for the three, um, for the three access. All right, so this is two point perspective and three point perspective. So what I did over here is this is almost like stepping back one one pace. Right? So we have isometric three point. You see how the lines kind of, um, gather into a vanishing point very far down, they converge here and here on this is my winner. Right. So we have left. We have right and lines her vertical. Got it. So once we have that, we can go and figure out, um, how we can really work with our perspective. And this is what I was talking about about figuring out my This is a different sketch off a desktop computer. Just the tower, right? When you come up with a design you always have to find. I mentioned it before. How tall it is, How wide and how deep and what I have done over here is just a serious of fund sketches so that you guys would see what happens when you draw from different angles. All right, so I have these vanishing point, this one here, and another one coming down. Whoa, that's kind of radical, but I don't see either side, so it's kind of weird. Um, this is see what happens. I'm I wanted to draw oddities over here before I get into the good one. See what happens over here. I am, actually, if I was going Teoh, kneel down and look at this table. My eyes would be at this level. This is how I would draw my computer. The bottom line is on the table, so I am. But you never look at a, uh, computer like this, right? Like who you are So told. That's not how you really do it, right? You look at it slightly more. A 3/4 of you, slightly looking down, right? So that's why my horizon line over here would be right there on the floor over here would be kind of crazy. Tall. I am really on the second floor looking down. I put this on the patio and I am on the second level of my house looking at my computer. That's not how you would draw it right over here. I have my left and my right vanishing points. And I am looking at it. These two points. And once I joined them with a line, that would be my horizon line. You would look at the computer like this, My eyes in the middle. Is that really how you would look at a computer like there's not really right? Um, it's more like this, but better like this. So once you have your, um, you have to figure out two things, then how wide, How deep and how tall the height, your three dimensions of your object. And then you need to relate them to your horizon line. All right, My horizon line. If I extend these two lines were here the other ones when we're here, the horizon line over here. So my eyes are slightly higher from the object. The object is here. I'm looking slightly down which is great. It's a bonus because I can see top on the two sides got it, so it's a good thing that you would get that.
Class Materials
Bonus Materials with Purchase
Ratings and Reviews
Mike
I thought this was a well rounded introduction to this subject. Really liked the teachers attitude as well - very inspiring!