Lessons
Introduction
06:17 2Preliminary Sketches of Different Products
05:53 3Steps of Rendering Coffee Maker
06:02 4How to Create Quick Orthographic Views
20:35 5Description of Isometric, Oblique, 1-2-3 Point Perspective Views
11:03 6Best Angle for Perspective View
06:16 7Perspective View on Graphics 360 Paper using Different Materials
13:31 8Final Render of Coffee Maker
15:19Working with Preliminary Sketches of Street Cleaner
16:25 10Chrome and Reflective Materials
10:42 11Final Render of Exterior of Street Cleaner
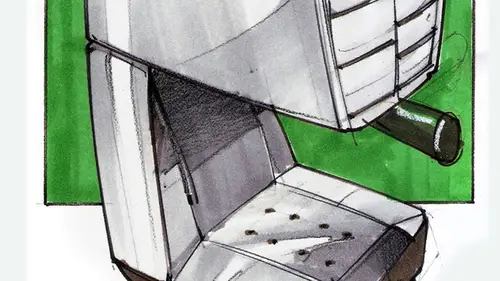
06:41 12Sketches of Interior of Street Sweeper
09:18 13Design Concepts for the Interior
07:20 14Final Rendering of Interior and Exterior of Sweeper
17:47 15Defining Final Outlines and Contrast
08:04 16Creating Texture and Composition
04:31Lesson Info
Introduction
This is sketch like an industry designer. I am Jorge Horacio. Um, today I am going to teach you on design, and I'll focus on drawing and rendering for product design. Very fun field. Today you're going to learn free and rendering. So just freehand today, we're gonna go over perspective, how to work with front side top views. I also cover the tools of the trade that we use with work sends with sense of scale, how to work with different materials. Had to represent different materials on the paper from shiny, too dull and also had to add body parts to our designs. I also want to mention that we have on the download section we have a packet ready for you. So make sure that Jew downloaded and review all the pages because we'll follow along some of these pages. Let's get started. That's about Crown Diame, a designer, and I have designed all kinds of things. And certainly product design is a great field to be in. Um so I want to mention that I published the book and you'll see in the packet. ...
The cover page is Well, that's the introduction salad. Just show it to the camera. And just if you wanna have more information on it, um, you would have some good references there. So now, um, I would like to cover the media on the paper that is used in product design. All right, so what you see here is a table full of materials. We're going to cover the beginning and the end of this. So the most important tools certainly would be your markers, then followed by pencils, which we have two different kinds, regular color pencils. And then we have more specific pencils, mostly black and white. We have some pastels as well as pens of different line weights, Um, from very thick, very thin, everything in between. And then some rulers that I'll be using, whether it would be straight rulers or French curves, which are the curves that we use to create interesting Kercher's on our products. All right, so regarding the papers, it is important that we understand what we have on hand in product design. How, when we render, we have mostly marker paper. One of the best brand says graphics 3 60 made by being frank, great material to work with. We can really do great with this assed. Long as we follow very simple principles. Your micro, Your Marcal paper has a front in the back. Make you make sure that you used front. Sometimes we forget that as simple as it ISS. And I've seen some designers actually using putting a little F on the corner marking the front so that when you put it on the back to work on the back, you will know you are working in reverse. You use paddle strokes with your markers to failing entire surfaces. Um, we also have tracing paper, which you can purchasing a role. Or you can find, you know, tracing paper on path such as this one. And you would just read one page at a time. This is great to evolve your drawing in stages. Sometimes you do not want to start, um, and finished on the same page Before I go deeper into this, let me show you some fun stuff. What we have over here is some drawings that I have done in the past. You see, you'll see some of these in the packet just to get your salivating on what we could do. This is a coffee maker. We have a perspective. You We have two views there, and it's highly reflective. I was thinking we could do some chrome material on it. Completely different. We have a pair of shoes that we can work on. Same shape on both. Roughly at least the same outline. Roughly on both. But we have different textures. How do we get those going? Um, we'll cover that, too. As a designer, you always have to have a keen eye to look for texture. You know the words. You have to have your sensitivity and your fingertips. You have to touch everything. Just the opposite, As your parents might say when you were tiny, right? Don't touch everything. Touch everything, learned your materials, how they not your lick member. Follow your materials. You really have a a good sense on how they are. Like under different lighting conditions. How they look like all that knowledge. You can apply it to your drawings. All right, So you're actually rehearsing? No. You are researching your researching your materials. Um right. You see, the very same outlines two different results all together, so you can do that as a designer will also cover how to do body parts in our drawings so that we can have a sense of scale. How big is my design? Right. You don't know if he would be very big or very small. Sometimes if you just have a drawing alone, you don't know how big or small that would be. You don't have a sense of scale if you draw, for example, are coffee maker? You pretty much know how a coffee maker is, right? Well, they are big and small, so they may be some variations. See, over here, I have a coffee. Mud. Once you do that, you know pretty much how big this optic would be, even if I hadn't added my dimensions. So it's good to have that as a reference. All right?
Class Materials
Bonus Materials with Purchase
Ratings and Reviews
Mike
I thought this was a well rounded introduction to this subject. Really liked the teachers attitude as well - very inspiring!