Lessons
Introduction
06:17 2Preliminary Sketches of Different Products
05:53 3Steps of Rendering Coffee Maker
06:02 4How to Create Quick Orthographic Views
20:35 5Description of Isometric, Oblique, 1-2-3 Point Perspective Views
11:03 6Best Angle for Perspective View
06:16 7Perspective View on Graphics 360 Paper using Different Materials
13:31 8Final Render of Coffee Maker
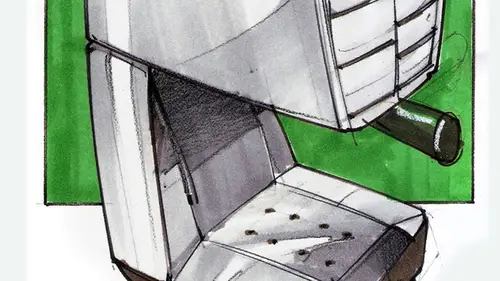
15:19Working with Preliminary Sketches of Street Cleaner
16:25 10Chrome and Reflective Materials
10:42 11Final Render of Exterior of Street Cleaner
06:41 12Sketches of Interior of Street Sweeper
09:18 13Design Concepts for the Interior
07:20 14Final Rendering of Interior and Exterior of Sweeper
17:47 15Defining Final Outlines and Contrast
08:04 16Creating Texture and Composition
04:31Lesson Info
Steps of Rendering Coffee Maker
okay in this face, um, we're gonna be rendering a coffee maker. Using a one perspective. We're going to do one perspective, you and also work with Ortho graphic views. All right, So what I have over here is some preliminary sketches that I got started, and I would like to compare thes two types of sketches. All right, so I was talking about using new spring to get ideation done quickly. And this is what I recommend. See, the camera can pick it quickly. Non photo blue. And I would recommend that we follow this in exactly the same order its board. 1234 Non photo blue. That would be the first step, which is this pencil. You can get lots of lines going on very quickly. I know. I'm drawing sideways. You get the good sketch out, but still, you don't know exactly all the details. That's okay. We use construction lines. Many lines hairlines, many of them using this pencil. And the second face would be using a thin black men to define the shapes that we have initiated. Okay, that's blue. Wrong ...
caller will use in black pen once we have the outlines with non photo blue. We would outline them exactly as I have them done over here, right? Notice, for example, how in some corners I am actually stopping a little bit longer to these harm. I really my ankle points. Just to make sure that I do a good job, my perspective would kind of lock in uncertain spots, right? You see how some of these corners are thicker, right? That gives me a visual interpretation on how big my sketch would be from beginning to end. So that's the second face. Third face, we would use very light grey markers again. If we use newsprint, we would be wearing out this markers. Faster rights. Just being be aware of that. No worries. I just need to know about that. Always test your markers on the site. You see, that's a little bit too dark. That's when you would get instead of saying, you know, sketching or doing your sketches over there, your tests on the side. You get another piece of paper of the same type on the side, and you test them there just on this side, just to make sure new spring would actually take a little bit longer to dry. You can always put the back of your hand to see if it is cool or warm to the touch. If it is cool, it means that it hasn't dried up yet. And then you just apply very quickly. Very quickly. Okay, you're tomes. This is the second pass on the same Great. Just to get you a sense of where you're going. All right, don't forget this part over here. I wrote kind off jokingly, but I mean it fast and furious. Just like the movie go super fast. Don't worry if you're doing a good job or about job. The important thing is to judge your ideas down on paper. Will worry about if your drawings our worldwide percent further or not. Okay, so we have a deal here, right? Don't worry if you're doing good or not, just get your ideas down. Will worry later again if you like them or not. This is another way of sketching, which is using black pens directly upon thesis for a copy paper, which is a paper that I do not recommend using. But sometimes that's the best paper that we have a hand right, played in today or in between tours and you don't. You know, you just grabbed from your printer paper and then you just start working. The's are done the same way that I have done my non photo blue sketches. But the difference between this and that this is a step further. We have to be more in control because the lines that you do on the paper cannot be erased. You feel that you're more in control because you have your blue tones, your blue toned pencil, and you feel you can really do more. Still, this is when you would just breathe and take. You're a couple of seconds and then just sketch. Remember, leave your notions. If you're doing a good job or a bad job later, you just catch out your designs. Even if they look ridiculous at the very beginning, you don't care. You just catch out and have fun sometimes doing this face, I kid you not. I put some fun music, and sometimes I even dancing between sketches. Something to just get the pressure off trying. What do I do that because you want to use your services, cross your creative side of the brain whichever side it iss your creative side of the brain, and we'll worry about making sure that you do a good job later. First, get your sketches down, all right. Using black pants for radiation recovered the process and cons, you know, line that you put down lying that stays. If you can live with that, we'll do great. Once you do some outlines that you like, you can always use slightly thicker outlines to define your shapes a bit more and you can define it. This is kind of a horrible sketch as far as design goes. I don't really love it, but I am still sketching it. And I worry about that later. All right, so you can do just a quick sketch and then to have it lined up with the rest and then park it aside. Take a break. Whatever type of break you like. You go for a little stroll, you play with your cat or your dog, or you go to the kitchen and get some water. Whatever. And then you come back and you're like, Yeah, I like this one. I like this
Class Materials
Bonus Materials with Purchase
Ratings and Reviews
Mike
I thought this was a well rounded introduction to this subject. Really liked the teachers attitude as well - very inspiring!