Using Plates to Create a Pano in Lightroom®
Lesson 36 from: Cinematic Lighting for PortraitureChris Knight
Using Plates to Create a Pano in Lightroom®
Lesson 36 from: Cinematic Lighting for PortraitureChris Knight
Lessons
Class Introduction
04:29 2What is Cinematic Lighting?
06:42 3Motivated & Practical Lighting
07:41 45 Cinematic Lighting Tips
04:53 5Low-Key & Upstage Lighting
06:26 6Control Your Fill Lighting
05:18 7Show Depth In Your Image
13:24 8Pre-Production for Cinematic Lighting
22:42Grip Tools: Clamps
08:41 10Grip Tools: Apple Boxes, C-Stands & Grip Heads
10:53 11Grip Tools: Pins & Portable Gear
04:50 12Grip Tools: Scrims, Silks, Flags & Tape
13:52 13Grip Tools: Wind and Haze Machines
04:07 14Grip Tools: Unusual Tools
04:47 15Grip Tools: Filters
11:05 16Grip Tools: Q&A
15:04 17Theater Shoot: Concept
08:03 18Theater Shoot: Pre-Production Considerations
08:48 19Theater Shoot: Lighting Gear
04:27 20Theater Shoot: Motivated Lighting Considerations
26:47 21Theater Shoot: Lighting Walkthrough
20:45 22Theater Shoot: Capturing The 1st Shot
27:37 23Theater Shoot: Hero Shot
21:47 24Theater Shoot: Capturing In The Seats
21:48 25Airstrip Shoot: Concept
05:49 26Airstrip Shoot: Pre-Production Considerations
19:31 27The Haircut: Location Specifics and Motivated Lighting
13:17 28Working With Scrims On Location
06:34 29The Haircut: Getting the Shot
24:28 30The Haircut: Shooting Plates
08:21 31Staggered Planes: Location Specifics and Motivated Lighting
08:10 32Staggered Planes: Getting The Shot
08:23 33Capturing Plates With Talent In Background
16:26 34Airstrip: Environmental Portraits
07:01 35Airstrip: Location Shooting Q&A
22:05 36Using Plates to Create a Pano in Lightroom®
16:08 37Transform Tool
04:50 38Post-Processing 1st Theater Shot
09:48 39Retouching Details in Photoshop®
13:09 40Color Grading in Alien Skin Exposure X3
06:27 41Post-Processing Theater Hero Shot in Photoshop®
08:11 42Creating a Spotlight in Photoshop®
05:31 43Adjusting Color for Cinematic Lighting
12:28 44Post-Processing: The Haircut
12:08 45Coloring the Sky and Removing Modern Building
05:10 46Creating a Pano Using Plates in Photoshop®
17:12 47Developing Cinematic Portraits in Lightroom®
07:29 48Retouching Cinematic Portraits in Photoshop®
08:57 49Color Grading Cinematic Portraits in Alien Skin
13:20Lesson Info
Using Plates to Create a Pano in Lightroom®
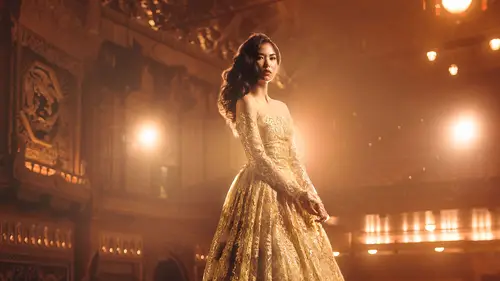
We are going to now take a little bit of a dive into putting these images together. And if you are not used to assembling these kinds of images, putting some plates together, overlaying it, all that kind of fancy stuff, you're in, you're in for a treat. And you're gonna hopefully be a little bit happy with how not that complicated it is. It's more about the time, the time that goes into it and maybe a few different variables that we have to sort out but overall it's, it's relatively painless to achieve. And so I wanna start off by digging right into the theater shoot. The first shoot that we did. And I'm gonna take a look at putting together one of these, one of these pano's right off the bat. The benefit of this particular series is that it blends together a, really nicely. And b, we don't have to worry about overlaying plates upon each other. It's just 'cause we don't have to erase anything. The shots there. It's just a matter of putting it together. And so I went through a bunch of ...
different images and selected this one as my main key shot. The one that I liked. I really liked the effortlessness of her pose. I liked the expression. I thought the whole thing worked really well. The lighting looks great. She looks great. And so this was the image that I wanted to go with. So now comes the task of putting this together. And so what I'm gonna do here is combine this with all of my other plated images. And so this is kind of what they look like. And what I did, there's a couple more than necessary here. I had a couple of duplicates. But it's fine. It's gonna work. So I basically went to the right. And you can see how this plate overlaps with some of the image by maybe about 20% or so. That's important. You have to give, you have to give the information, enough information for it to be able to line up. So we've got that one over to the right hand side. Obviously I have the little soft box in the corner of the frame. But I'm not gonna use that. You can also see that in this particular frame the soft box isn't firing. And that's because when I took this plate I had that light that was lighting her face off. So, instead of overlaying a bunch of different plates and erasing them, I actually just selected this version. And I'm gonna leave it up to LightRoom in this particular case to put that one overtop. And save me from having to combine them separately. Now in some of the later images, it doesn't quite work that seamlessly. This just happened to be a really good example that worked as we planned it out. And so the right side has nothing on it as opposed to when it was originally shot, there was a big light over here which is lighting her face. So what I'm gonna do is I'm gonna select all of these together. Now with the exception, like you can kind of see that there is one in the middle of, of the frame that I've kind of turned off. I've not included. There is actually a frame missing in here that would show a little bit more of, of the stage without her on it. It was the clean plate. And so I can always use that as a backup if I need to. But I have removed it because she is taking the place of that space in the frame. If I were to use the, the plate where she's not standing in the frame and it's the same frame it will potentially cause problems for me. And it'll maybe only show part of her. Or erase her completely. Which is pretty common. In the pano's for the second shot that you saw at the airfield, that was a common issue that I had when I was combining stuff together. Is it was automatically editing out body parts. And so I had to be a little bit inventive and creative with combining that. So this is, you know, kind of scrolling through it you can see what it looks like. I did one pass across the main plane. And then I went up a little bit. And then went across as well. So I basically gave myself a little bit of height on it. Now you can process this ahead of time if you want. You can also process it once it's combined. The really great thing about stitching panoramas in LightRoom is that creates a digital negative file. So it more or less gives you a RAW file that you can work with. So you still have all of that flexibility from the original RAW. The downside of stitching panoramas in LightRoom is it's not always as good. It's not always as successful as Photoshops is. Photoshops is a little bit better. But LightRoom is a little bit faster. And it's a little bit more flexible. So I always try to get my stitching done in LightRoom if I can. If it presents me problems, I will use Photoshop stitch to do it. And we're gonna talk about this a little bit later, but the way in which you would need to do it for Photoshop is you'd have to export it as TIFF file. Then you have to open it up into the photo merge. And it's just, it's a, you don't have flexibility in the file. And so I basically will use that if I am running into issues with the stitch in LightRoom. The other thing is I have to color grade the individual images first when I'm doing it in Photoshop because I don't have the flexibility after the fact. LightRoom gives me the whole flexibility first. So I'm gonna go ahead and select all of these images. Then you have to be a little bit understanding to your computer. So I'm gonna try to stitch together 11 different photos. These are each 50 megapixels. So it's gonna be a very large file by the time it's all said and done. I'm actually not gonna use a lot of the information. I'm gonna throw away a lot of what shows up above. This is, as we said earlier, important that you capture a lot more than you need. If you can help it. So what I'm gonna do is select all of these. And just to make this easy I've put it into a quick collection. And that was just to kind of organize it to show you guys but you can also do this in your main folder. So everything is selected. I've selected one, held down shift, and clicked to select them all. You can also give yourself a command a. Or a, let's, it's a control a on PC. Command a on Mac. I'm gonna go to right click on this. And I'm gonna go to where it says photo merge. And then I'm gonna go to panorama. And so this is gonna take a minute. And there are probably two main projections that I use. I mentioned how there's a little bit of trial and error that happens during this process when you figure out which perspective you want the panorama to map to. One of which is perspective. And the other is cylindrical. I almost never use spherical. I'm usually using a cylindrical or perspective. Perspective is going to end up distorting the image to kind of look like it's shot with a wide angle lens. So if you remember I shot these early frames with a wide angle lens. And that's very much a similar level of distortion that you would expect if this were shot with a wide enough angle lens that it could grab the shot. There's a couple things that you can do to tweak what this frame looks like. So, if I clicked on auto-crop for example, it automatically crops in and hides all of the stuff that's not there. You can also use something called boundary warp. And boundary warp will say, hey look at all this missing information. In varying levels of distortion I'll fill it in. And obviously this is a little bit weird. But maybe you do it part of the way. And then your crop when you do it gives you a little bit more of the frame. But you can see how in this particular case it's starting to warp the edges of the proscenium. So if you don't want that, you gotta go to something a little bit closer to how it started from the original perspective. And again, I'd still put a regular crop on this. So I would crop quite a bit from that top edge of the frame and even over on the left hand side. I'd probably crop into about here over on this side and here on this side. And then I'd, to like here on the top. That's how I would probably go about it. Now, if you also remember, when we were talking about this, I said that I wasn't a huge fan, like I preferred the level of compression and perspective that looked closer to an anamorphic lens. Something that mapped it with a little bit less of a perspective distortion. And so on this particular set of images, I actually found that I preferred the cylindrical mapping. I'm gonna undo this auto-crop here for a second. And so you can see that it just looks a little bit more, straight up and down as opposed to, like the vertical lines look a little bit more up and down instead of distorted inward from perspective. And again you can use boundary warp to fill that frame out. It kind of gives you somewhere halfway in between the two. I actually thought boundary warp worked really well on this image. But I'm gonna kind of bring it to maybe about here. I think that looks really good. And I mean obviously I'm gonna crop, crop in on this. But I'm gonna go ahead and hit merge. And this'll take a minute. As you can see it's stitching everything together. And while this is going you just kind of have to play a game on your phone. I don't know. It tends to be really really process here. Intensive. And it really is taxing on the computer. So when you're doing this and you're trying to Photoshop it's just, it'll take minutes and minutes and minutes. This should probably not take that long I hope. So, we will just let it go for a moment. Yeah, oh yeah, please. Thank you. Just like a technical question, do you from when you're importing your photos, do you do it from your computer or from a hard drive? External hard drive? So my, the way I structure my images and the way I import them, so these were tethered. And so they were, they automatically came in. And the really amazing thing about tethering is when you do an auto, when you develop the image, as it comes in, everything automatically gets developed. Which is really nice. When I'm shooting to a card, I store everything on an external drive normally. When I am traveling, I put things on here. And then as soon as I get home, they go to an external drive. So I move them from the card to the external drive or from my laptop to the external drive. And then I import them into LightRoom. That's my preferred method. The downside is this is running a separate catalog than the one that I run at home. The one I run at home is my main catalog. This is my, I'm shooting on location catalog. And when I've processed the image, or have developed the image, I don't necessarily want to lose that. And if I just drag and drop the files from one folder to the other I do. So my solution for that is, it usually takes a little bit longer, but I find that it saves me the effort in the long run, is when I'm in this version of LightRoom I plug it into my external that I have at home. And I export everything as a DNG. And when you export it as a DNG from LightRoom, it holds onto that sidecar information. The development process. And it just saves it so I don't have to reprocess everything if I happen to have done work on the computer. 'Cause that's also pretty common. Hey I needed to process stuff here. I got it close to where I wanted it. And I was working on it. I don't want to have to redo it again. And so exporting it as a DNG takes a little bit longer but it preserves all that information. Which is really nice. Yeah. I know when you do HDR, whatever you click first makes a difference for what's ghosted and not. And I don't know the LightRoom term for your, your first click image. The number one image. Does it make a difference in panorama what's, what that first image clicked is? I don't think so. But I can't say for certain. I don't think it does. I mean, I've tried a lot of different variations on panos and sometimes it's just, doesn't work always. And so I'll, if I doesn't, I'll try different projections. I'll even try different selections. So with the second airfield image, which again I'm gonna show you guys a bit later, I spent a lot of time trying to swap out certain images to figure out where I could prevent ghosting. And so it's like, okay, well let's try this one with one. And you're trying to combine it. And that's the most tedious thing. 'Cause as you saw just to render this image out took a couple of minutes. And so you gotta do that each time. Which kind of sucks a little bit but it's part of the process. So, this is, did you have a question? I was gonna ask about the view, I didn't hear, I didn't know about the exporting as DNG. I've always imported from another catalog. Which is another function that brings in the metadata. But do you see a difference or is it the same? It's probably the same thing. It just, this way I'm, I'm not hooking one computer up to the other computer. I just, it's, for me, for me, it's just easier to just plug the hard drive in directly and export it and then bring it back. And then, I mean, your method's probably faster. It's just (audience laughing) it's achieving the same result. Which is really what matters. I just don't wanna process the same thing a second time. That's my thing. So this is the image that it produces. And it's pretty big. So as you can see I'm gonna zoom in and it's gonna figure out how to do that. There we go, there we go. But what I think is particularly cool, so like this 100% cropped. And it's pretty, pretty well rendered. It's decently sharp. But if you look at how small this is, here in the thumbnail, this is a very large image. It's very very large. And so that ISO of 1000 doesn't really mean much when the noise is relatively that small. So what I'm gonna do is I'm gonna grab my, my crop tool to start trimming this down. And if I were to go with like a regular four, three, which is what the crop was normally, like this is kind of what it would look like. And it would look like, you know, any number of these other images that I would shoot with this lens. But, because I am going for something that feels a little bit more cinematic, for fun, I'm gonna go to a 16, nine. And I'm gonna bring this in a little bit. Maybe shift it over here. To something that kind of looks like that. Maybe I'll tweak it ever so slightly. Show a little bit more of the environment. Something like that. Okay, that becomes my frame. And I think this looks really nice. Especially when you go from here, to here.
Class Materials
Bonus Materials with Purchase
Ratings and Reviews
Bruce Walker
This course is simply terrific, and I highly recommend it. Firstly it arrived at the perfect time for me as I am soon to do a studio shoot very much in keeping with a cinematic or theatrical aesthetic. Secondly it's taught by Chris Knight who I swear is like a long-lost twin brother. :-) There are so many parallels in the way he thinks and works to my own style. So I avidly watched this as soon as it was available for anytime streaming. This is the first time I have made extensive use of the CL iPhone app, btw, and I love how it pretty much enabled me to seamlessly switch back and forth from desktop viewing to my iPad that I carry around the house during the day. I was able to make coffee and still carry on taking in the course, uninterrupted. The content is fantastic, delivered succinctly yet entertainingly. Some material and ideas are already in my repertoire and were reinforced and validated by Chris' demonstrations. But he also introduced a lot of ideas and methods new to me and very welcome. I was particularly glad to see how practical it is to stitch a series of tripod shots into a wide pano. I have been afraid to try that but I will now be using that in my next shoot, for sure. As alway, his post production practices revealed all kinds of tips about Lightroom and Photoshop I didn't know. Negatives. The volume level mastering is iffy. It started out at a decent level then midway through one of the early lessons dropped so much I had to turn up my sound system to compensate. And as I write this one lesson (34) is missing and in its place was a duplicate of the next lesson (35). I expect CL will have that fixed shortly though (I sent support a note).
Jeph DeLorme
One of the best classes I have viewed at Creative Live. Definitely worth the investment of time and money. The pace of the class allows you to learn extra tips and tricks throughout the process. Great instructor, highly recommend this class to anyone looking to step up their creative game.
a Creativelive Student
excellent class in all regards. outstanding instructor with experience in complicated cinematic shoots but who also is willing to thoroughly cover the basic nuts and bolts. i wish all creative live classes were of this quality.
Student Work
Related Classes
Lighting