How to Use Local Adjustment Masks for Color Editing
Lesson 43 from: Get The Most Out of Your Photos with Capture One Pro 10David Grover
How to Use Local Adjustment Masks for Color Editing
Lesson 43 from: Get The Most Out of Your Photos with Capture One Pro 10David Grover
Lesson Info
43. How to Use Local Adjustment Masks for Color Editing
Lessons
Introduction
08:11 2What's Possible with Capture One: Quick Edit
06:50 3Capture One Versions: Installation Basics
02:19 4Interface Introduction and Customization
27:16 5The Power of Keyboard Shortcuts
09:27 6Image Management Basics
10:38 7Organization Best Practices
09:53 8Building your First Catalog
19:47Image File Management Automation
06:42 10Advanced Catalog Organization
17:41 11How to Add Meta Data
12:42 12Searching and Filtering Techniques
11:31 13Further Catalog Strategies
07:09 14Basic Selecting, Rating and Culling Techniques
15:31 15Advanced Selecting, Rating and Culling Techniques
20:54 16Basic Composing Techniques: Cropping, Rotation, Straightening
09:29 17How to Correct for Perspective
12:35 18Basic Tool Behavior
11:04 19Tool Basics Part 1
22:44 20Tool Basics Part 2
06:34 21Converting to Black and White and Adding Grain
10:13 22How to Apply Image Adjustments Globally
08:02 23Sharpening and Noise Reduction
09:58 24How to Create and Save Styles and Presets
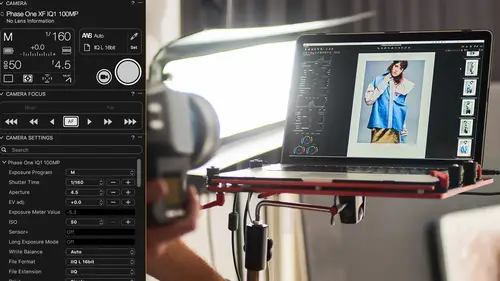
07:40 25Why Should You Shoot Tethered?
02:26 26How to Set-Up Your Tethered Hardware
02:15 27How To Set Up A Tethered Photoshoot Project
11:07 28Basic Session Workflow Organizing And Making Selects
21:45 29Basic Session Workflow Exporting
05:44 30Advanced Session Workflow
15:00 31Creating Selections With Smart Albums
06:20 32Advanced Exporting
09:03 33Saving Session Templates
03:14 34Collaborating On Set With Capture Pilot
17:45 35Using The Color Editor Basic Color Adjustment
15:26 36Skin Tone Adjustments
09:30 37Color Grading Using The Color Balance Tool
12:54 38Image Processing Demo Perfecting Color
08:11 39Create Masks for Local Adjustments using Brushes & Gradients
12:31 40Advanced Local Adjustments using Masks
17:15 41Dodging and Burning in Capture One
11:30 42Creating Local Adjustments with the Color Editor
07:15 43How to Use Local Adjustment Masks for Color Editing
03:43 44How to Remove Objects in your Image
09:07 45Image Processing Demo: Local Adjustments
05:57 46Exporting with File>Export
08:07 47Export Strategies and Proofing Previews with Process Recipes
11:49 48How to Export for Social Media
05:11 49More Clever Tricks with Capture One Pro 10
05:57 50Final Q&A
13:11Lesson Info
How to Use Local Adjustment Masks for Color Editing
So if we look at this kind of shot here and then we go to our color editor and then we pick out something like, you know, this one for example. Now if I pull around lightness you can see that it's affecting a great deal of the rest of the image. Now we could try to work with the color editor as we did earlier by narrowing the range down and so on, but straight away we can probably find just doing a very quick mask will make our job much easier. And again, we can be quite sloppy with the mask drawing because we're picking a color within the mask. So if I just right-click, let's get full opacity, and then just do a really sort of quick mask here like that, nothing fancy. Go to the color editor. Pick within that mask, and now when I'm adjusting it's only affecting within that mask. And it doesn't matter that the mask is kind of a bit rough around the edges, because we're really working on a color within that masked area. Similar sort of principle with this one, we could do a very quick ma...
sk here for example. Like so, probably do a little bit slightly better job than that, just in case there's any tone there. Go to the color editor, pick within that mask and now I'm pretty free to just adjust that one. So it's a really handy thing to know about. Sometimes that can be quicker than trying to squeeze down the color range, and sort of working with smoothness, is just quickly throw on a mask and then do so. Same goes for this one; if we let's say we wanted to just wanted to tweak, say, the chilies up in the right-hand corner but we've got tomatoes as well. Same color range. So we do a quick mask over here, "m" on the keyboard, again don't have to be too fussy, like so. Pick within that, so grab the color picker, pick over here, and now I can play around with the density or saturation or whatever I want to do and it's only going to affect this area. There's no possibility with the color editor on its own just to restrict to that color tone. There's nothing we could have done. We would have ended up affecting these, these, and these and so on, so it makes much more sense to do that kind of quick rough mask and then pick that color within the mask, as it were. Again, little sort of subtle one over here. If we wanted to just brighten up this flower in the corner, you'll find if we pick that in the color editor and then just raise the lightness we're kind of affecting this one to some extent as well, so very quick, you can do it super fast, quick splotch like that, color editor, pick within the mask, and then we can just adjust that as we feel suit. These ones over here as well. Make another layer, quick splotch over here, like so, and then pick within that mask and then we're easily just adjusting that particular spot, not affecting anything over here, or anything else of a similar tone.
Class Materials
Bonus Materials
Bonus Materials with Purchase
Ratings and Reviews
Stef
This is a good overview of Capture One 10. The course is well structured and presented logically and progressively with clear and concise examples. The software is intricate and the amount of details presented will benefit from a second or third viewing, along with sufficient practice. David is an excellent teacher, slow enough to follow, fast enough to keep the listener's interest. I would agree with a previous reviewer that the shooting session was uninspired but the tethered demo was thoroughly useful nevertheless for someone to become an assistant, for instance. If you have ever used LR in this role, you will appreciate the power and stability of C1 for tethering. With regards to the comment about this class being non-creative; before you can run you have to walk and this course is all about understanding how to operate the software not about what you eventually want to do with it. Capture One is well designed, speedy and its homogeneous interface makes it easy to get to a result once you have a good knowledge of its layout and principles, compared for example with LR which is all over the place with modes, inconsistent and slow operations. Likewise, the C1 color editor is miles ahead of LR color functions, in simplicity and overall efficiency. This class is about mechanics for a reason; creativity is a parallel stream. It would have been beneficial to have a module highlighting major differences with LR for people migrating to Capture One as the word on the street is that C1 is hard. I would suggest to listen in to convince yourself of the contrary. All in all, I recommend this class; it is time well invested if you want to become more comfortable with Capture One and discover its potential.
user-b05602
The course is excellent and David does a nice job. However, I'm an advanced armature, not a professional. I had my own personal color darkroom, then Photoshop/Bridge, and NIK which I still use occasionally. My intention is to rely on Capture One which I purchased about 90 days ago. I would have appreciated a SIMPLE, here is how you load (Import) an image, "save" or "save as" and how to simply export an image (Variant). Yes those items are covered but, David has a tendency to casually and very quickly jump from Tool Tabs or Cursor Tools or the Tool Bar and then magically it's done and he has moved on. How did he do it. Based on David's training, I love the results I get with Capture One Pro. Yes, I know this is not Photoshop - it's much better. I never used Lightroom. I added variant to my vocabulary and I understand all the tools. I still struggle with the simple import, save, save as, and export of a image I worked on and cropped, then trying to consistently open that image as I see it in Capture One Pro. Sometimes it works, sometimes it doesn't and I don't know why. I will continue to re-review the course materials and I will figure it out. I know there is something simple I missed as David navigated the various tools and pull downs. I recommend this class but it does little for the armature. Capture One Pro is second nature to him and he knows all the ins and outs. I would help me a lot if he just add a 5 minute intro, importing an image from a folder, just crop it, then export the variant and open it in Photoshop.
Maria Baptiste
I recently purchased Capture One because I needed a RAW converter that was more dependable and also more reliable when it came to shooting tethered. I also noticed that many of the photogs I follow really enjoy using Capture One and rave about its efficiency. After looking at a few YouTube videos I decided that I needed something more thorough and of course CreativeLive delivered. This is an excellent course and David Grover is a superb instructor. His in depth and thorough knowledge of the software is obvious but his manner of speaking and the simplicity with which he provides directions makes it easy to learn Capture One and lets you appreciate a sophisticated and expertly engineered software. If you're working with Capture One 11, layers is a little different than in version 10 but otherwise everything David discusses is the same. I thoroughly enjoyed the course and will continue to refer back to sections as needed. Thank you Creative Live and David Grover!!