Lessons
Overview of Fine Art Landscape and Travel Photography
08:44 2Our Passion For Photography
07:38 3Looking For The Next Great Photo
19:05 4Peter and Tony's Photography
18:35 5What is a Landscape?
15:48 6Considering Color: What is Real?
13:16 7Shooting Travel Photography: Exotic Locations
13:33 8Preparing for a Travel Shoot: Research
16:35Who Should You Travel With?
12:13 10Photographing People
04:25 11Choosing Gear for Travel
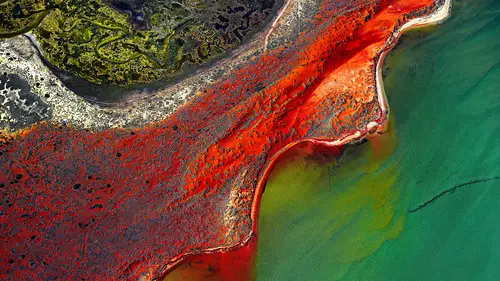
21:26 12Overview of Aerial Photography
09:03 13Flying Machines: Planes, Helicopters, Balloons and Drones
18:05 14Shutter Speed in Aerial Shooting
12:48 15Manual vs Auto Focus
14:28 16Lenses for Aerials
13:14 17What to Shoot When You're in the Air
17:52 18Using Emotion to Capture Your Images
14:28 19What Stories Do You Want to Tell?
08:44 20Who Are You as a Photographer?
14:41 21Finding Your Creative Process
14:20 22Getting Your Vision Across
26:56 23Quick Image Enhancements Using Lightroom and Capture One
06:21 24Light, Color and White Balance in Lightroom
19:55 25Histogram, Hue and Contrast in Lightroom
09:16 26Masking in Lightroom
11:50 27Cropping and Aspect Ratios in Lightroom
13:19 28Image Adjustments With Capture One
13:38 29Further Adjustments With Capture One
13:44 30Advanced Editing Concepts With Photoshop
07:38 31Peter Eastway Enhances Landscape Details
13:08 32Tony Hewitt Uses Multiple Images to Build Texture
13:04 33Peter Eastway Aerial Edit
09:33 34Tony Hewitt Aerial Edit
15:40 35Part 1
10:31 36Part 2
08:18 37Part 3
09:31 38Part 4
07:08 39Part 5
05:50 40Part 6
24:19 41Sharing Your Vision: Exhibitions
11:54 42The Artist's Statement
10:17 43Preparing Print Files
03:39 44Framing Options
05:50 45Exhibition Space
06:43 46Once the Exhibition Is Up
13:11 47Making a Photo Book
18:49 48The Art of the Print
16:51Lesson Info
Part 1
What do we ask, Tony? We ask for 20 pictures to judge. We asked for photos that make us look good. Look at this. And we got these photographs, there's some amazing photographs that were submitted to us, and I'm sorry out there in audience land, if you sent us something too good, there is a really good chance that we did not pick it, because there's nothing we can add to it. But it was interesting, Ken I said, we all get the chance to learn, 'cause I'm glad we all kind of includes us, so we get to learn. We're looking at things then. You must know where that was, wouldn't that be? Well, that's right. So really this session, what we're going to be doing is perhaps offering options and ideas, new directions. We will certainly pass comment on what we like about them, and there's a lot to say about that, but at the same time, hopefully give you some other ideas or some other directions that you could have taken or perhaps take it. We're gonna play around a little bit using the...
se files in Capture One. However, we're using Jpegs, Peter. We are using jpegs, so there's a limit to how far we can push and pull images, but I think for the purposes of the demonstration, so as long as everybody has agreed, our in-house audience and those of you out there, as long as everybody's on the same page, these are ideas that you could take with the pictures so that when you're looking at your own photo, you think, oh, maybe I could add a little bit more or take a little bit back away, so let's see. Yeah, and just, I was just gonna say, you know, on that note, if I look back, someone asked me, are you happy with most of your pictures, and I could probably tell you that there's less than 10 pictures in my entire career that I've taken, finished, and hung, or finalized. I'd agree with that. I fell into that. That I would not go back and do anything to, but you do reach a point where you do realize that I've gone as far as I need to go at this point. And all the same, it's funny, when someone orders a photograph out of your catalog, and you've got it, you're putting it up, and you go, oh, geez, did I leave that in, and you just go add a little adjustment layer and fix it all up, so that's natural, so yeah, and I want to reiterate that these are just our opinions, and we might be wrong. Geez, did I say that? Yeah, well that's gotta be the second time. Okay, all right, so here's a great example from Eric. He's one of our oldest members. He's got the microphone in his hand. Tell us a little bit about what we are aiming at because, can I just criticize you right up front? Please don't give us stuff this good to start with. (chuckles) Oh, I thought you had true criticism. So do you want me to say something about the image? So what's your purpose? Put that photograph into context for us so that we know what we're playing with. Okay, well, I've been chasing after Aspen shots for a lot of years and I have other renditions of other stands. This particular stand, I could see, I was traveling down by the lake, and I could see it up on the hillside. This is grizzly bear country so people don't often, you know, root from the road, but you can see the claw marks on the trees there, but I wanted to capture that stand and there was almost a passion that just overcame me that there was no fear of the bears and I just had to go and get this shot, and so, when I got up in there, it was kind of a tight shot, and when I initially went, I was just gonna shoot it with an 85 from a distance, but as I got closer, I realized that I had the wrong lens, that I had a 35 on me so I made do with what I had, and but in order to get everything into the image, I actually did some squishing to get the tree trunks, I wanted all those grizzly bear claw marks on the left tree there, I wanted those in the image, so I actually squished those trunks up to make them look a little bit fatter, plumper, and then every one of those, those main trees, well not every one, but most of those main trees, the two on the left, the two on the right, you know, have all been masked and lightened up, and kind of almost modeled a little bit with burning and dodging on the sides of the trees to give them a more roundness feel to them, and the colors were really intense. It was a wet, mild Fall last year, and so, the colors turned real gradually together, but the red vines were a little dull, and so those, the red vines were kind of pushed a little bit to help match the intensity of the rest of it, but it could be considered a little overwhelming with all the color, and one thing I've learned over the years too is sometimes the color, if it's too overwhelming, people don't want it in their living room because it doesn't go with anything else. Yeah, that's true. And then, the format, the two one format is real important to me because this really may sound kind of stupid, it's kind of like the old lady that cut both ends off her ham so it could fit into her oven, I make it into this format because I'm printing on a 24 inch printer and I can go four feet wide with that 24 inches, so it's a two to one, and so that's why I like that format, so that's why it ended up with that way. Okay, next photo. (laughter) So, Pete and I have talked about this one before, and it's interesting, you said you've done some modeling, you've lightened up the trees, and I suppose the first thing that came to mind when you talk about the colors, the question for us would be have you gone as far as you could go? Or have you gone as far as is acceptable? I suppose that's the question that's going through my mind. If it's for sale, that's one thing, whereas we're not gonna talk about that. We don't care whether you make money or not. It's all a matter about the fine arts, so yeah. So I'd still, personally, I'd still like to see the trees with a little bit more punch coming out. When I look at that piece turned upside down, which I'll explain in a minute why, and some of you would know why, I do find that blue in the background a little distracting in terms of the Aspens and the color, so I'd like to maybe do some fine tweaks to bring the attention to the foreground. You can use color. You've got yellows, reds, and greens. You can use color, and to bring the attention to the Aspens and maybe just, drop back the blue intensity, but that's just me, what do you think? Well, I think they are great observations. I suppose as I'm looking at the top right, he's quite light, and I know we've got sky there. I was just wondering whether maybe we could, you know, try backing that down. Let's just have a go at it, realizing that we've got a few limitations with our time, et cetera. We'll add in a layer, bring up a brush. Come on, catch up. Okay. I think I'm gonna go over here to anchors. That's not quite working. All righty, so we got our brush, Draw Mask, and we'll just darken that area down, the top there. Now, I've got the trees in there, and I'm just gonna come to my high dynamic range, which is the highlight, and I just want to darken down the highlight areas, just a little bit, just to put a little bit of tone back into there, and just, you know, keep the eye from going down there. The blues, you mentioned, Tony? Yeah, I just found the blues quite, what happens is that I'm looking at the Aspen trees, but because of the blue, I'm being pulled through the Aspen trees, and I end up in the background, which is not where, that's why it was interesting to hear you. If you said this is the view through the Aspen trees, then the blue becomes a little more relevant. When you say it's about the Aspen trees, about the color, about the bear marks, then I want to stop the, straight away when you say that, you don't go so far into the background. Yeah, I actually added some punch to the blue in the water. That's Saint Mary's Lake in Glacier National Park. It's highly recognized by tourists, and that's my primary market, and so, I wanted for them to say, oh yeah, I've been by that lake, and recognize it, and oh yeah, I want to buy it. Great, great reason. It was a total marketing move. Yep, yep, yep, okay, all right, so, already, you're discovering the challenges of being an artist in your own right, and getting someone to purchase your print. I always talk about a couple of, no, I'm gonna be talking about those stories next time, so I won't steal my own thunder. Okay, all right. So now, we can still bring those trees forward a bit more and create a little bit more depth, so perhaps there's a way we can lighten those trees. I know you've done it, but maybe a little bit higher. So what are you suggesting Tone? Well, since we're in Capture One, we might just go and work with, we could brush it, just brush them on, just do a gentle brush through with the small brush. I probably would do more work with this one in Photoshop, and that's because it's kind of closer to its finish mark and I'd want to be a bit more specific, but I can, what Pete's doing here, he's brushed in the foreground, which has brought it forward. I still think we'd probably, in terms of lightness, we also need to add a bit of contrast to that foreground, because we're gonna lighten it. We just want to keep, here not too high, that's it. But it's really the trees is the part that I'd want to pop out. So you want to do those individually? Well, I think if we just create one mask and just brush up the edges, particularly on the light side. Or even you could brush the whole thing, and then just add a contrast curve, which will darken the dark side and lighten the other. You're just saying, like on that tree, for instance. Yeah. And then, just a little bit of exposure lightening up? Well that would be one way. The other would be just to add a little bit of contrast, because that will then darken the dark side and lighten the light side just a little bit more. Okay, yeah. And it just makes it glow a little bit more. So you can see that one separating from the one next to it. You could almost go down the right hand side of the tree as well with just a little, and then, this is rough and ready, but you get the idea. Yeah, I actually darkened those trunks. Well, I added more contrast to those trunks to try to help give that white more pop, taking into effect. We're just going a little bit higher, because I just find, if you turn it on and off, it just pops them out of the background a little bit more and notice how it holds the viewer's eye in the foreground longer. You've still got your blue lake, but because you didn't want to diminish the blue in terms of in the background, this allows us to look forward using contrast to hold the viewer's eye in the foreground rather than diminishing the saturation of blue in the background. So if we had set, we haven't done much and look. Even without doing that. I've got a question for you, Eric. Do you, do you, what we've done, if we look at what that change is worth, is that something you think works for your picture in the way that you wanted it to be told, or not? I think it could, yes. Yeah, I wouldn't argue at all with your points, no. It's just a matter of refining what we've done, so this is just broad brush adjustments, okay. Next time, give us an easier shot, would you?
Class Materials
Bonus Materials with Purchase
Ratings and Reviews
Esther Beaton
Two Aussie blokes just having fun. Peter and Tone did us proud by representing the spirit of Australia, which is: don’t take anything too seriously. They hit off each other well, in fact, they are the best twosome I’ve ever seen on Creative Live, each giving the other respectful space yet not being shy about taking the micky out of the other guy when appropriate. The whole dialogue was spirited, informative, casual and fun. They also perfectly proved the symbiotic relationship between red wine and beautiful photography.
Swapnil Nevgi
Loved the positive energy of this class. Just finished watching it and I would definitely recommend it to someone who wants to take their landscape photography to the next level. This course is not about learning camera or software skills, but learning how to develop conceptualizing and composing skills. How an award winning creatives mind works is a lot more important than how to use camera. This is exactly what I was looking for and very happy with my purchase. Also it was good to see some of their raw vs post processed files to learn how far the professionals like Tony and Peter go with post processing (Something I have always been concerned about). Knowledge about exhibiting was also priceless. Thank you, I have learnt a lot in this class and I am sure it will reflect in my work in future.
Debra
This class is fabulous! One of the best on Creative Live. Peter and Tony share so much of themselves and their great art that you can't help but want to pick up your camera and get out to shoot. It was like watching two close friends. Thanks very much for a very enjoyable 2 days of learning and viewing.