Lessons
Day 1
1Day 1 Pre-Show
06:32 2Why iPhone Photography?
30:03 3New Possibilities
29:25 4New iPhone 5S
26:14 5Gear and Accessories
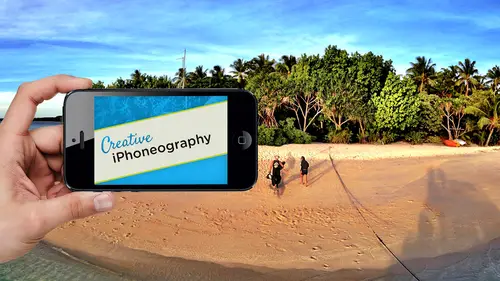
39:27 6Shoot: Panarama, Bracketting and Other Tools
28:34 7Syncing Photos
29:41Camera+ App
37:27 9KingCamera App
16:41 10Snapseed App
35:10 11Snapseed App Continued
42:01 12Day 1 Wrap-Up
04:43Day 2
13Day 2 Pre-Show
06:23 14Additional Gear Review
14:46 15Sharing and Syncing
19:32 16Embellishing Apps
49:40 17Retouching Apps
26:27 18Retouching: Panarama and HDR
32:46 19Printing Your iPhoneography
33:46 20Compositing and Graphic Design
38:13 21Thanks + Credits
01:46 22Painting Apps
34:12 23Video Editing
55:34 24Day 2 Wrap-Up
04:24Lesson Info
Shoot: Panarama, Bracketting and Other Tools
so I'm gonna start off with the, um, native camera app built into the IPhone. And with that, let's make sure that we are mirrored here so we can look at that. How awesome that is. So a couple of steps related to the on board camera built into the IPhone, And again, there will be some slight variations on this when we have our Iowa seven update, and especially with the photo, the IPhone five s a couple things to remember as a default. When you click, as you probably all know, you're setting both the focal point. I'm tapping around in this in the scene, So let's actually move to some of our really cool and we'll move that around in that cool these great still lives that were made up. So when you are clicking on it, you know that you're setting both exposure and focal point, and what we're gonna do is later on we'll use things like camera plus toe. Isolate out those or will you be using filmic pro when we get to video to separate out our exposure and focus points, as well as controlling a...
lot of stuff when it comes to video. But for now, that is the your basic concept. You can, you know, come up and, you know, set your exposure by what you're clicking on. What I'm going to recommend under, under any challenging lighting conditions is taking advantage of an apelike bracket mode to be able to shoot bracketed pairs as opposed to mucking about. In this scenario, I like bracket mode because in challenging light, I know I've got the shot. The other thing that you have built into the IPhone camera, if you click on options, is you have this little HDR option here. Now HDR on here actually takes two shots. They say 32 or three. I'm depending on who you talk to, and it's basically going to give you a little bit more dynamic range, especially in the highlights. The problem with an HDR in any situation. By lowering the contrast in the highlights, they could become muddy. I typically leave this off because the images, as a general rule, are a little bit muddier. But in challenging light, bright outdoor landscapes or architecture, I'll shoot it. You go into your preferences and make sure it's set up to shoot both save both the regular file and the HDR. That way you have the HDR as a backup to speak or your regular one is a backup. It's just gonna pull out a little bit more highlight detail. That's nice for things like clouds. Clouds don't get blown out, so it's, er I leave off as a default. It's only for challenging Light does an okay job what we saw this morning with the new software built into Iowa seven. And especially with five s, we're gonna get dramatically Creator Dynamic Range. And so that's cool. You obviously have your different flash options in the upper left. I always leave that off, so I only turn it on when I want it. I hate onboard Flash and pretty much every camera ever made. Maybe the new camera will change that. The thing that I'll mention here is this Panorama feature is actually fantastic, and this is the one that's gonna be upgraded Teoh multiple exposures on the fly and up to a 28 megapixel file size. The thing to remember about the built in Panorama camera and actually every single Panorama app. So here's a general tip on shooting panoramas. Any time that you're shooting panoramas is that you always want to rotate the camera, not around yourself. Okay, this is not how you shoot Panorama is in any camera because this vantage point and I'll try not to shoot over there. This vantage point right here is a completely different vantage point from here. And if I'm trying to get lines, let's say I've got wooden slats as we have here in the Florida lineup. For it to line up a completely different vantage point is gonna be very difficult for it. What you want to do is you want to rotate around what's known as the nodal point or the sensor, or, in this case, the lens, because they're also close together. So you rotate. And in the case of the IPhone, that's always gonna be just below the on off switch. So you rest your finger gently on the on off switch and rotate your camera this way. That way, it's the exact same focal point as you move around and will be much less distortion. Your seems like things on the floor will work better, so if you can do this, which also means that if you're going to use an app. Not this on board one, which only is going to shoot one row of photographs. But you're going to use something like, um 3 60 panorama or photo sent. You'll also because you can go up and down, rotate around your fingertip, so I'm gonna go like this. Okay, so we'll do that in a second. But remember, you want to rotate around basically the lens, and so you're gonna be able to get some amazing Panos by being ableto rotate up, down and do this. You're basically inside of a sphere. The center of the sphere is your finger in the lens, and you're basically pointing it inside this sphere completely different than going like this. Okay, yes, you probably. Okay, So for shooting a panorama, which will shoot a little pin room here, the great thing I love about the on board one is because it's doing these little teeny slices. It does a great job. It's not just individual images, and it actually can get much less distortion than a traditional one which shoots a shot, a shot, and it stitches those, um, it also takes the resolution up as high as you can go, which is 18 megapixels. So if I wanted to shoot a little shot here, and I'm gonna come up here and first off, I'm just gonna shoot one. So I do the start, and then I'm gonna come over here. Okay? So two things that I love about that situation right there is one. Not only did I get a nice wide angle, which I would have been able to get without a specialty lands, but to I just probably doubled the resolution of the file. Because if I wanted this field of view right here, you can see the field of view where I'm getting those two cameras. Okay, Let's just go ahead and say, done so by I'm shooting these two cameras right here. And that's my field of view. That's gonna be eight megapixel. If I turn on Pano, rotate the camera. Okay, now and come in closer. Go like this. That's an eight megapixel. That's eight megapixel. That's eight megapixel. That's okay. And so I just went from an 8 to 12 megapixel. I got the same field of view, basically, but I have more pixels because I rotated and now I'm doing landscapes and shooting more. So, um, you have more pixels. Don't wine about it being eight megapixel. You've just made a 12 megapixel, okay? And you can go up to 2070 degrees with a built in one. After 270 it stops. You may have also noticed something else about with what I did. I'm here. Well, I'm gonna turn my back to you, so we can We'll do this entire thing here. Is that as you're going with the Pano and you're getting the scene, I don't have to hit the dent done button, because, right, I'm gonna have to jiggle the camera to get the done button. And I'm wanting to keep my finger on that. If you rotate slightly, the gyroscope inside senses that automatically stops the panel. Okay, so you don't have to hit the done button. You can just go the opposite direction. Speaking about opposite direction, it sets the exposure based upon the first shot. So if I want this exposed the window shot correctly, as opposed to shooting here and then moving over here, point at whatever you want the exposure to be, um, set for. So if I wanted here and I can even click inside the scene. So if I like this right here, I'm gonna go shoot from left to right. So I'm gonna do another Pano here. There's a whole thing and stop it as opposed to If I start over here, I can tap on that little arrow. It switches the direction. So I'm starting on the right. It's setting the exposure on the right. And now when I come up here and click, it's gonna now shoot a panorama and you'll notice how I'm completely blown out by the time I get to those lights. So being able to shoot left to right or right to left is important because your exposure is locked in the 1st 1 This is where Photo synth, which I'll show you in a second, is nicer because it actually will shoot multiple exposures. And then it blends the explosions together. Okay, The other thing that's great about this app is you can rotate the camera into a landscape position, click and shoot a vertical Pano. And it's one of the best APS for doing that because you can go right up a giant redwood all the way up and you get one beautiful stripe as opposed. If you use a different pen ram app, it's going to do this. It's trying to compensate for a vanishing point. And you've seen these things with this giant mushroom photograph when you're left over. So vertical panoramas theon board camera is probably the best app for doing that. Higher resolution, left or right? Right or left up or down. It's great. It also is going to give you that increased resolution. Even if you're not going for a wide angle effect, let's go ahead and actually do a difference. So you can see a variation on this on. We're gonna use 60 Pano. Since you guys can't see what I'm doing, I'm gonna do this. So you know what I'm touching. Right? So that 3 60 Pano is what we're getting we're gonna do right now. That is its look. Um, give it a second. You can see that it's going through the scene. You can do a full three under week panel, including up and down. You're not limited to one stripe, So if I want to, I can set the exposure for whatever I want it to be okay and then I can click. I'm gonna do the exact same thing and you're gonna notice When it gets to a seam, it automatically takes the picture. So it's doing that and I can also go up. I'm gonna do that same trick that I was doing before, where I'm using my finger, resting it upon the on off switch and make sure I've got the scene painted and then done. So one, you're not limited to a single stripe. You are now have at your access the entire scene. Okay, so it is nice from that standpoint, up and down. And because you can go left and right with it, you can set my exposure. I said here and then I went left and right, the one that's built into the camera for the IPhone. Now you have to start on where you want to lock the exposure that is 3 60 pano. You'll also notice here we can also use the gyroscope so you can look around the scene by moving moving the camera. I'm not actually swiping it. The other thing is, um, what they call the gallery. You have all the things that you shot. So here is in our Bellagio from couple days ago in Vegas. So it keeps track of those all your high res files, Um, at your disposal. So including, you know, highly completely illegal shot inside the casinos. I didn't take that picture. Somebody stole the camera from me. And anyway, it's a great app. And because it goes up and down the other one, that kind of fits into that equation. Photo sent again. I think this is the best thing Microsoft ever did. Um, is Photosynth and what I'm gonna do is I'm gonna tap here, and it's going to set the exposure. I'm gonna start over here, actually, let's start over here. Because if you remember on the other one, when I started in the dark and started the exposure by the time I got to the light, it was completely blown out. So I'm gonna tap over here. This is asking a lot from it over here, but you can see that it's changing the exposure, right. And this one works a little bit different. When that little green dot in the center hits the edge, it takes the shot. So again, it's doing individual ones. I'm using that little finger trick here to be able to paint the entire scene. It does. This is one of the freaky things about a gyroscope. Remember, No camera had a gyroscope before this. So this sort of thing would be impossible to do prior to the addition of a gyroscope. There is the image, all those, the different exposures. And here I've got the exposures going, you know, all the way around. And it's maintaining and exposure. So photosynthesis is great for that. It used to be a much lower is a piece of software now saves at quite a high rez, and I like it. So that's Photosynth, and it also keeps track. So this is where I shot that shot of Gucci's over in Las Vegas that you saw this morning. Okay, you can actually maintains the image. You can see. It's recreating the image. It's actually doing the tiling on the fly. Okay. And there are, I think, even on this one, because it does keep all of them here is, um, back in Hawaii. You can join me in Hawaii because I'm still there. Here is that bay dimension, which really isn't a Bay, but it looks like a bay. So again that Photosynth and, uh, I love it. Okay, so that is a few Panorama asked. Few my favorites. Photo sent. 3 60 degree panel. There's DMG demand er, DMG And, um, as another nice one. There's a number of APS that are great in terms of that, my other go to app and you'll notice here on my home page that it's so important that I have it right there on my home page. Clear camp. Clear camp is awesome. Fantastic and wonderful. They're probably wonderful. Great people who are going you're adding what? To the camera? Shooting multiple shots and only saving the what that was up. Basically, what's gonna be in the new operating system? At least on the five s? What clear Cam does has two modes both quick and enhanced, as you can see here. So when we've got low light, we'll come over here to our flower setting right here, and we're gonna come up and we'll do something like this. We're going to cut out those. But we'll use is an example one you can tap on. It has a very small focal point on it so you can do very detailed focus if it's just on the the pistol in Steinman on the flower, I can dial in exactly what I want There. I hit the button and it just took four shots, analysed it at a pixel level and is only saving the sharp one. So it's the best low light app. All the other abs tend to do a stabilisation using the gyroscope where they're waiting for you to stop moving. Which is really frustrating because you say I'm still is. I'm going to get Dude, that's I'm tired. I'm not. It's going. I'm not going to shoot it until you're stable. That's just frustrating. So this is shoots four shots. That only saves a sharp when you move on. It's great as opposed the alternative, where you're shooting four shots and then go back home. And then you're analyzing meta pix 11. See what you're sharp but really cool in this one, which I like even more so And let's add our little macro to this one, because this will get kind of really creepy Cool. This is our olo clip. First off, this is the Olo clip. Let's get this scene here. Switch over to our little still life. Not a great little still life right here. So this is the field of view with the standard apple camera. So that is what it's doing. I can obviously back up and get everything that I want in the shot. But when I add the Ola clip, this is the wide angle, not the fish eye to it. It's now this is the field of view, so I can actually come in and get a wide angle. Why might I like that? Well, the closer you get with a wider angle, the more you're gonna be in inside the environment, right? As you get into it, it's a different flavor. Your field of view is actually changing the story that you're doing. That's why we use different lenses, not just to change the field of view, but also how we're looking at the scene. That's why will sometimes use a bit of a telephoto lens for shooting portrait's. We want to flatten it out. We don't want to have the nose seemed bigger, you know. We have limited space, and so using it slightly telephoto lens for a portrait could be really, really nice. Okay, so here we've got this. Were using the wide angle for it and what I'm gonna dio. Actually, that's not because network combining are different things. I want to show you the future that I want to share with you is going to be going to focus on the center here. Well, well, OK, we'll do that. Standard little. I'm gonna come over here and I'm gonna go into enhanced mode will compare the two. I'm gonna go on quick. You can see my shaking a little bit. Just too much caffeine. I'm gonna go enhance mode, and it's going to do this. It took six shots and it saves all six and puts it into a cash. What they call a raw cash. And now, when we come over here to our little teeny, um, folder over here, you see these air previous shots that I've done some flying in here shooting at, you know, all that wonderful volcanic peaks coming in. I can click on this image and you see in the upper right hand corner a line and it's gonna take all six of those shots and is actually at a pixel level going to align those cool, awesome, Great. It's now going to enhance those meaning. It's now going to do a pixel interpolation between those to up, raise the file to 18 megapixels and get rid of noise. It's doing a noise sampling between the files. So now what I've got is an image as you're going to see is going to be 18 not eight megapixels. Somewhere between 12 and eight. It seems like it has a variable nature. You see, it's generating tiles from this and lower noise, so it's great in low light. It's also the money shot. If it's the sunset, the clouds coming through, the angels are weeping. Everything's going switch over to enhance mode. Click. And now you've got an 18 megapixel version of it. Or what's another way to increase that resolution? Switch over to your panorama. Go like this? You just also got an 18 megapixel. Don't wine about. You don't have enough pixels. I got it. Don't need to do it. And this is that same image. I just shot, okay? And that I was moving a little tripod. It would be better, but that considering what we've got here, this is one of the only after you can actually see the individual pixels in the file. And then what you can do is here. Click on this and save to the camera roll. Okay, so that's clear, Cam. I think it's fantastic. It's It's awesome for low light, and it's also awesome for increasing the resolution. It does low light, just like the new apple is going to do by, um, taking multiple shots and only saving the sharp one. Or by combining the images into one new master file. Okay, um, speaking about, um Macro, let's go back. I'm gonna use that clear cam, I've not got the olo clip on. And this one will. Is this one here? I've actually got Jerry rigging it because this is on my IPhone five. This is the old clip for the IPhone four. So I want to using my little olo clip bag to let me to do it, and I'm going to remove the wide angle, which again I like doing using for video. But when you, um, take off the wide angle, you end up with the macro on it. Let me come up here and see where we can Hopefully, it's on a plane nicely. It is It's actually is an amazing macro, he says, which is not focusing on my IPhone five. Let's use the default camera and I have to switch over to got my IPhone. For this is the solo clip for the IPhone four, which normally with a wide angle, as we saw earlier. But the macro is not happy with the adjustment of the IPhone four olo clip on the IPhone five, but I'm not quite sure why. But that just simply means that I'm now gonna take advantage of the other thing that we really wanted to see because everybody wants to see how the two x telephoto works on the l A clip. So again, let's now go back to something like this. This is my whoa scary self portrait. So this is the field of view of the standard IPhone. Okay, click, take a picture. This is the fill of you with the two X converter on coming from the hello clip. And again I would use clear cam in any of these things. It's not really it's not the same thing. We're gonna be using it for a macro. That you certainly could. You probably using it toe, zoom up on something more like, you know, your proverbial birds or items or architectural stuff where you're doing street photography. When you can't get close enough to somebody, this would be great. The circular. At lunch, I'll do some with circular polarizer outside, but when we come up and look at the images in terms of our camera roll, the quality coming from the two acts is awesome. I think they did an awesome job in terms of the two x telephoto lens for the IPhone, and I think it is absolutely beautiful. So again, there's the field of view. Without it, there is the field of view with it, and I think that's definitely going to be one of the major things to do it. The last thing that will do before we do a break and we're hoping I was hoping to do one with a little bit more dramatic light. I'm gonna come over here and see if I can rest that because this idea of shooting bracketed pairs I mentioned that built into the Apple camera is a nature tr mode, Um, and as nice as it is, it's actually quite subtle, which is fine for most applications. Like I said, you want to maintain the detail in white puffy clouds. But when it comes to an extreme dynamic range image, which we really don't have here, that would be more of an outside scene where we're shooting. But I'm going to imitate that a little bit by taking advantage of, you know, maybe, Ah, my little mobile light unit here. Kind of like we'll just go ahead and do that here, I'll share in HDR pair. So what I'm gonna do for that? My favorite one is this app right here called bracket mode. Okay, Bracket mode and bracket mode is nice is when you launch it and come up here and you can set a timer so it will do a hesitancy before it. If you're working with a tripod, I would definitely use the self timer. So when you take the pears, it is stable. You're not touching it. But in this case, I don't mind it having none auto save. Yes, and I showed the grid lines just cause I'm composing. But the auto save means that when you click it, it automatically saves both shots to your camera when you move on. That the benefit of this If I wanted to shoot bracketed pairs of this scene here, and I can continue to, um, determine what I want in terms of that and so will go up here. So I'm gonna do that again. And I think I'll even so watch what happens when I press the shutter. Okay, so religion in one second it shoots exposing for my highlights and my shadows takes the two shots with drug and then combined later. If you want manual control over that, you go well. I want even more dynamic range or less clicking down in the lower left hand corner. Now what's done in my lower right hand corner? You notice that I've got two little grids coming up here, and it automatically is showing me it's choosing this highlight so I can say I want that to be the highlight. And I want this to be the shadow. Okay, so you can manually set your exposure point because you don't want necessarily the lightest light and the darkest darks. So you can find tune what you consider that dynamic range, and then we take a picture now that's really subtle. I wouldn't even have shot a pair on that with that kind of subtle range. But that is bracket mode and literally in one second and then you move on. Then you can combine those later on. The alternative is to shoot the bracket appears using something like you're pro HDR camera, and this you, almost by necessity, need to be using a tripod, and basically you tap the screen is it says to start. So there you're about 15 seconds, 10 to 15 seconds for it to do the same thing that automatically stitched it. So we have our image and click on it and look at it. So you've got a image with greater dynamic range. You can see the highlights are lit up. It's nice you can continue to find tune it so you can, you know, fine. Tune your brightness down. Contrast saturation you confined. Tune your warmth after the fact. You also have filters at your disposal, including things like you know, glamour and Orton and other things like that, and then you can save it. You can rerun it with different filters, so those are built in HDR apse, where they do everything at one fell swoop. The problem is that analysing process can be time consuming. So with the bracketed mode one I can come up here and I'll say, Done HDR and all the other issue our applications are going to allow you to do what they call actions HDR from library, this one says, First, choose your darker image. And so if I've got my darker says now, choose later and now it combines it and we're done. So doing it after the fact for me as much faster. I just shoot the pairs when I'm in the fair in the field, just like I would do with my SLR. I use bracket mode, shoot the shots when it's under challenging light, and then fine tune them in something like, um, the pro hdr. Another one is true. HDR is a real popular one that actually has some more subtlety to it.
Class Materials
bonus material with purchase
Ratings and Reviews
Phillip Ziegler
Jack is terrific and there's a lot I learned watching the videos. Of course this is a fast-changing field so some things are dated--some of the apps no longer exist--but I highly recommend this course to anyone wanting a wide and pretty in-depth orientation to the world of Iphone photo apps.
Student Work
Related Classes
Mobile Photography