Lessons
Course Introduction
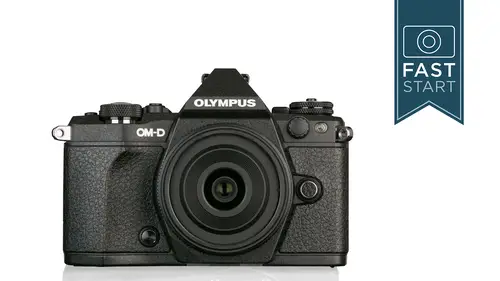
04:48 2Olympus History and Product Overview
12:56 3Photography Basics
09:46 4Basic Controls and Touch Screen Demo
04:26 5Mode Dial: Auto, Art, Scene
11:30 6Mode Dial: Movie Mode
05:06 7Mode Dial: Program, Aperture Priority, Manual
14:18 8Top Deck: Function Buttons, Microphones, Flash
11:51Electronic View Finder
12:31 10ISO and White Balance
06:28 11Auto Exposure Lock, Info and Playback Buttons
13:30 12Focusing Options
03:50 13Super Control Panel: Flash Options and Image Stabilizer
08:39 14Super Control Panel: Sequential Shooting and Quality
10:29 15Super Control Panel: Auto Focus, Metering, and Aspect Ratio
08:29 16Left, Right, Front and Bottom Sides
11:57 17Lens Options
17:37 18Shooting Menu 1
10:35 19Shooting Menu 2
12:06 20Playback Menu
06:01 21Custom Menu A: Autofocus/Manual Focus
14:30 22Custom Menu B: Button/Dial/Lever
06:09 23Custom Menu C: Release/Drive Mode
08:09 24Custom Menu D: Display Items
15:44 25Custom Menu E: Exposure/Metering/ISO
13:15 26Custom Menu F: Flash Sync
02:34 27Custom Menu G: Quality/Color/White Balance
05:43 28Custom Menu H: Record/Erase
06:57 29Custom Menu I: Movie Mode
09:46 30Custom Menu J: Built-In EVF
03:45 31Custom Menu K: General Utility
06:06 32Setup Menu
11:17 33Camera Operation
13:20Lesson Info
ISO and White Balance
Time to continue our tour on the back of the camera and the unique feature on these olympus cameras that I don't know of any other cameras have it's the lever on the back of the camera the normal position is one position and when it's in this position you have your center control in your appetite crawl control if you are in manual depending on other controls ifyou're in program they do vary from there but if you want to switch this down to the number two setting you khun then change your s o directly with the front dial on the camera and so just as a quick live demo let me do that just so that you could see what's going on get our camera powered up here and I'm going to throw it into the live you so that we can see what we're pointed out there there we go and so now we're going to flip the switch down to the number two setting and if I turn the nile it's not working why's it not working okay I am currently stumped on this one and so we'll do it we'll know when I'm normally stumped us w...
e'll just move on and so I'll figure it out it'll come back to me later in this I find that every once in a while when I get hit off speed with something it's like where do we change that? I'll know when I get to it okay so the isos lots of different isos thatyou can range from two hundred up to twenty five thousand there is a low setting that goes down the one as well and then of course there's auto which allows the camera to go in and automatically change isos according to the light levels in there and so I always like to throw my cameras through a little bit of a test on how good they are and the camera shoots very cleanly of course at the lower esos two hundred is the bass or native setting in this camera which means it's where the sensor is inherently at its best quality four hundred is great and I know sometimes you have a hard time seeing the screen so I will give you my verbal description of things is four hundred on ly the very slightest amount of noise in my opinion is visible at eight hundred so it's still very usable and I was actually using this camera in some very dark slot canyons in utah a few months ago and I was bumping it up to eight hundred all the time and was getting very fine image quality it's the sixteen hundred thirty two hundred sixty four hundred is where you're going to start noticing a fall off I think up a twelve thousand and twenty five thousand it's pretty unacceptable in in my opinion in quality and so you definitely want to keep it at sixty, four hundred and lower if you have fairly high standards it it's going to be in the eight hundred and lower but it is according to what your own standards are so you can do your own test but that's what I've seen and what I've determined from the sensor in different light shooting conditions next up is our white balance which could be changed by turning the back dial on the camera and here we have a number of different options so let's talk for just a moment about white balance the white balance is adjusting the sensor for the type of light that you were working in light can range anywhere from orangish in color to blue in color and we have three different settings for outdoor natural type lighting situations which have a little bit of variants the most likely unusual one that you're going to encounter is thie incandescent or tungsten bulbs these are the bulbs that we often have in our homes and they cause everything toe look orange because the light coming from them is very orange and so if you are shooting photos inside and your results are very orange like then you would want to set your camera to the tungsten setting and it would correct for that orange and whites would then be rendered white and so it keeps the color very very clean in that instance beyond these presets settings we do have a few other options we have a custom white balance which allows you to go in and set a particular number you want so for instance if you wanted shoot at fifty seven hundred you could set that particular number in your camera we have another option for capturing white balance information what you would need to do here is what you would do is you would photograph something that you knew was white for instance you could photograph a white sheet of paper and once the camera then recognizes that okay so if you're telling me this is why I will adjust the white balance to make this cheat white and so it will figure out what the problem is and correct for it and finally it has auto white balance and most of the time I used a camera I really prefer to be using it in a manual mode because then I can have direct control and tweak as much as I want but to be honest with you fussing with the white balance is a hassle I don't like doing and the auto white balance is something that I will use on most of my photos and the reason I do it is for two reasons number one auto white balance first off does a pretty good job and you're going to get pretty good results what it does is it looks at highlight information and it looks at the color in that and it assumes that highlight information should usually be pretty clean and white and so it does a good job on its own secondly, I'm shooting raw most of the time and in raw you can adjust white balance later on and so if you shoot raw exclusively don't even worry about white balance in some ways you can just adjust it later having said that I always like to try to get things as right as early in the process as possible so if I know that I'm shooting under tungsten light even with raw I will probably set it to tungsten partially so that I don't have to adjust it later second reason is so that it's correct for me in the viewfinder and one of the things that I love about mere lis cameras in this camera is that when you look through the viewfinder you get to see the white balance setting on your camera how it impacts the particular photograph that you're looking at one of the things I don't like about icons and cannons and sl ours is that when you're looking through the viewfinder you could have your white balance set to some crazy setting and you wouldn't know it till after the fact in this case it's a preview of what you're white balance will look like so you can adjust it right in the viewfinder so it improves the viewfinder 00:06:05.98 --> 00:06:08. control and images that you were going to see and 00:06:08.76 --> 00:06:12. so great system in here very easy to change just flipped 00:06:12.42 --> 00:06:15. the dialled down to two. And adjust the back dial 00:06:15.51 --> 00:06:19. on the camera. So very easy to switch and turn those 00:06:19.65 --> 00:06:19. on.
Class Materials
Bonus Materials with Purchase
Ratings and Reviews
a Creativelive Student
I had previously purchased the Fast Start for the earlier OM-D E-M5 model and found it invaluable. I was lucky to catch this E-M5 Mark II Fast Start when it was live and had my camera set up beautifully - until I updated the firmware recently and discovered how uncooperative the camera can be in the absence of the combination of settings recommended by John. So I bought the course, which enabled me to restore the camera to the optimal settings and gave me may "Aha" and light-bulb moments about things I'd forgotten or not understood the first time around. I am glad I now have this course so I can revisit it as needed. NOTE: There IS an option to save settings to the PC before updating firmware. I will be doing that in future!
a Creativelive Student
Excellent course. John's ability to patiently and throughly cover all elements of this detailed camera is impressive. He converts the stress level of learning a new camera to a fun level.
Susan Gutterman
I watched most of the live broadcast and just finished going through all of the modules with my camera. I learned so much!! My camera is customized to my preferences and I am now very comfortable shooting in M mode. My picture quality has already improved. John is an excellent instructor.
Student Work
Related Classes
Camera Guides