Lessons
Class Introduction
12:34 2Exploring Final Cut Pro X: Navigating the Interface
32:32 3Exploring Final Cut Pro X: Project Timeline
18:23 4Exploring Final Cut Pro X: Basic Editing
16:07 5Refining Your Edit Introduction
15:15 6Refining Your Edit: Trimming
37:06 7Refining Your Edit: J and L Cuts
09:00 8Refining Your Edit: Roll and Overwrite Edits
06:25Refining Your Edit: Slip and Slide Edits
03:51 10Refining Your Edit: Auditions
09:27 11Setting Up a Project From Scratch
17:03 12Setting Up a Project: Importing Media
35:52 13Setting Up a Project: Keywords and Smart Collections
21:07 14Working with Audio
13:56 15Working with Audio: Syncing
23:40 16Working with Audio: Mixing
21:28 17Working with Photos and Graphics
09:55 18Working with Photos and Graphics: Scaling and Positioning
14:05 19Working with Photos and Graphics: Ken Burns Effect
15:17 20Working with Photos and Graphics: Animating with Keyframes
15:51 21Filters and Transitions Introduction
03:04 22Filters and Transitions: Applying Transitions
18:13 23Filters and Transitions: Applying Filters
14:23 24Titles and Generators: Lower Thirds
11:43 25Titles and Generators: Titles
05:40 26Titles and Generators: Backgrounds
11:46 27Advanced Skills: Color Correction
38:35 28Advanced Skills: Speed Changes
15:48 29Advanced Skills: Stabilization
05:53 30Advanced Skills: Green Screen
13:11 31Multi Camera Editing
06:04 32Multi Camera Editing: Organizing Your Media
08:54 33Multi Camera Editing: Creating a Clip
07:12 34Multi Camera Editing: Audio
09:25 35Multi Camera Editing: Working with 4K Footage
06:56 36Finalizing, Exporting and Archiving: Final Checks and Tweaks
04:34 37Finalizing, Exporting and Archiving: Exporting Final Project
25:46 38Finalizing, Exporting and Archiving:Cleaning House and Archiving
15:22 39Bootcamp QnA
14:53Lesson Info
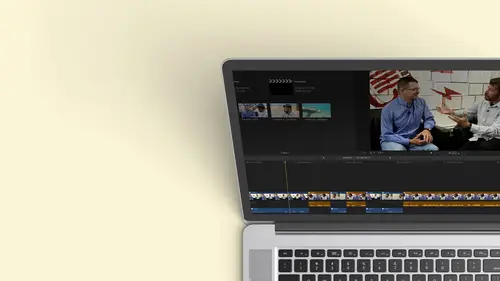
Working with Audio: Syncing
sinking audio that was recorded separately. And then the problem is that audio that was recorded separately is lousy. Anyway, so we're gonna have to fix it. It wasn't as lousy as theory journal audio, but it was really soft. This dancer, beautiful form, softest speaker I have ever met. I was like, So it was a real challenge getting getting good sound. So we're gonna fix it. So I'm gonna go over here, and I've actually grabbed two clips that I'd labeled with keywords for sink so I could find them very quickly. So this is the original clip of her being recorded. And I was just recording the audio directly from the camera that was away from her and little pinhole Mike. And this is what it sounds like. So you really hear more people in the background than her When she starts talking, see if you can actually hear a little bit, You can hear me. Great, because I'm standing next to the camera. No, Tell me a little bit about Well, she's She's pretty clear and loud there. I could try to fix this...
. Okay? And that's not a factor. I will, because we're gonna fix this and the other because I want to show you how much you can do with relatively quiet poor audio. So if I wanted to fix this, I could go ahead and there's a clip, and I'm gonna bring this into a new sequence of actually created new project that I can throw it into. I'll just go Command and New project will call it Fix Audio it. Okay, new brand new project. And I'm going to just drag this clip in. As a matter of fact, I'll probably end up trimming it to just where she's talking. So there it is. And since I'm working with audio, I want to change the way I view this. I want to be able to see that Audie away from a lot bigger and I don't think the whole thing bigger. So just like we could control. Sometimes when I go to hit play like what just happened there and this is many times in the class have said, Ah, but you've screwed up. Tell us what you did. So when we screw up, we can fix it. So I will. OK, Did you see? It got dim and if I hit play. Nothing's happening in this window here. Well, right about the space bar is the letter V, and if you have a clip selected and you hit V, it toggles the visibility of the clip on and off. Okay, and it's useful. Sometimes Maybe you want to turn visibility off because maybe you have two clips on top of each other. You want to see what's below it are you want to turn off a title. Or maybe you're just working with two pieces of sound. You don't want to open up roles, and you just want to turn off because you can turn off the visibility of the audio just like you can turn off the visibility of the video. It's just a way to remember that V for video. So that's what I did, and it immediately disappeared. So if it's something disappears, it's very likely you accidentally bumped the wiki when you were going for the space bar to hit play. So here we are. We did an audio analysis, and it when I brought it in and it came up with this problems, Detective. Okay, big warning sign. If it was red, it would have been even worse. And the problem was, it's there was noise and it's not loud enough. So my first approach would be okay. Let's go ahead and kick on loudness. That's gonna do its best. Guess for the fix. And let's go ahead and hit play and see if she's the loud enough. Yet we can hear now, right? And when working with audio, it's a good thing to keep in mind that you should look at a graph of the audio levels to see if it's loud enough. Easy to see, Right. Okay, so I was going to get off the loop. You've got some photographers here and you're gonna go now. You can't see it that way. It's there so you can find it. If you go ahead and you click on that, it'll give your big versions. And if we look at this, I believe I'm zoomed in a little bit. There we go. Um, I can see where it's speaking, and I want to make sure that it's loud enough to hear. And this is a graphical representation of the volume level, which goes up to zero and then you have plus six. Well, you never want to exceed zero. Anything above zero is too loud, and it distorts because it's digital audio. If any of you have come from an analog audio background used to play tapes, tapes, one of those and you could actually when you made a tape of an album, you could push it two plus three plus six TB because the whole idea was, Oh, I want to get that The signal the music as loud as possible. And the noise the tape hiss as low as possible. Well, that was great, then could tape could handle it. But now zero is your maxim. Anything above zero you're gonna hear clipping and noise. And on the plus side, digital audio has a really low noise floor. If you don't have a lot of noise in the room, so zero is your top. But when you're mixing, you really don't want ever hit zero. You're really pushing it to the edge. Generally, you want average around minus 12 with your peaks at around six. So that's something to keep in mind when you're mixing audio And then, of course, your ear is important when you're working with this, because you can't just use this graph because different sounds punk punch through differently. For instance, a siren at the same audio level as some really low bass rumble, the sirens going to punch through. That's why an ambulance could be heard from a distance, and that's why they have such a high frequency. So high frequency at the same visual volume level will be heard louder. So if you have a kind of music that has a lot of temp in a lot of, ah, horns, clarinets that's gonna punch through more than like base and timpani sounds so yes, used the graph, but also use your ear and dont get a real, super expensive pair of speakers because you'll hear nuances that your viewer will never here. Try to get a pair of speakers that is representative off the type of speakers you think your viewers going to be listening on, which is a real challenge these days because we have people listening on phones through airpods through big home surround systems. Do your best guess, but again, something good but middle of the road. If you are editing with headphones, that's fine. But when you read it in your final mix, unless your audience is gonna be listening through headphones, put it on a pair of speakers, things to keep in mind. So we need to go ahead and bring our audio level up to a default tone for voice. And then when we start bringing things like music and you know, music might have to be lower so you can hear the voice at least lower at points. So before loudness is on, I'm gonna go ahead and hit play. I want you look at that meter and that's the sound of her doing her shoes. As a matter fact, I got so excited, I forgot that I wanted to turn on bigger audio way forms. And we do that over here. This thing we saw this earlier little filmstrip change the appearance of the clip in the timeline, and I could go ahead and one I can make them taller and shorter. So it depends how many clips I'm looking at. And if I wanted to, I can even make it all audio way forms. When you're working with video, you could have smaller ones. So this is kind of a nice, happy medium. I can see where it gets louder. All lay odds. That's me talking. Because remember, this is the mike next to the camera. Yeah, you've heard enough of me already, but here she is talking. And if I play it, I can barely hear it even turn the volume. But I look at that. She's peeking at maybe minus 18 averaging minus 30. That's pretty quiet. Just to give you an idea. If you really want to be popular at parties and be a nerd about sound these things, they're considered DB minus three, minus six minus nine. It's like earthquakes. I don't know if that's a good analogy. Every three D B is one order of magnitude. So, uh, sound doubles every three D bay. So, you know, minus three is twice as loud as minus six, which is twice as loud as minus nine and twice so as you see, minus thirties pretty soft. Okay, so it's not just like a scale from 0 to 100. I kick on my loudness, I play it pretty much fixed it. So she is hitting at that average of about minus 12. May be peaking at minus six, but what else did it dio brought up the noise. Now I can try to fix that and I can kick on noise removal. And it gave me a warning that there's noise and I'll kick it on and it tries to clean it up is amazing secret technology. So got rid of the noise, but she still is really soft. I mean, she was like, like, nowhere near my level of voice so I can fix it. And by the way, this is an automatic setting. Our best guess you can tweet this. You can say you know something. I want her to be a little louder. Let's see if we push it a little louder for the work. Uniformity is the dynamic range. So some people will start talking like this, and then they get all excited loud, and then they bring it. And you know, you got this thing going all over the place. So a lot tons with voice. You want to bring down, uh, and want to be a little more uniform? There's also something called the compressor, a plug in that you can add a lot of different audio fixes. That also does very similar work. So I could bring this up a little bit, and I'm not gonna try to bring up the noise. Remove. You'll notice as soon as I made that change. The way form actually got bigger. Okay, so you have a visual, um, confirmation of what you've done and let's see how that sounds. She's actually starting to disorder. You also hear something that it sounds like she's a little bit underwater. That's because you're pushing the noise reduction too far, and so I would need to dial it back to get the best thing I could. And this is people walking behind. So this wasn't great audio. So ideally, I want use. I mean, Cameron was bad enough. Camera audio in the person whispers is a real challenge, but you can. There's also a button here for home removal. Sometimes when you record audio and there's like a not a good ground for the power you'll get like a buzz, and that's considered hum. It's at 60 cycles. It would sense that, and you could fix it, and you could also e que it e queuing allows you to actually take different frequencies and make them softer and louder. So assuming this was good audio, I could go in and I could say, You know what? I'm gonna do a little bit of e que If I click it, that's flat, but the drop down says, Oh, I want to enhance voice range. I want to enhance music. I want to bring up loudness and what it's really doing is if you look over to the right, there's another little like graphic. If I click on that, it actually brings up a graphical interface. Are you I user interface of my different equalizing these different frequency, the different levels that people speak, So she might be speaking somewhere around here on. Maybe I have a home and I want to bring that down so you can start playing with this. But my advice with audio when you're just starting, I've discovered the more people mess with audio at the beginning, the worst attends to sound so you can always luckily uncheck these and turn them off after you've you've messed them up. But I do want to point out that if I go like voice, enhance, do you see it actually is a preset for the frequencies were voices, However, realized men's voices are a different frequency than women's voices. And this is like a catch All. So these are just some examples. Want to boost trouble? Obviously, you can see it. So those are really nice Quick fixes. If you start with not too horrible audio, we have pretty horrible audio. So what I'm gonna do is I recorded separate audio, Uh, very inexpensively. I took an old IPhone. Any smartphone will work that I would have got bucks for if I turned it back in and I bought ah, plug in Laval Ear mic from an online retailer located in Seattle. And within the next day, for, like, bucks. I now had a portable recording device, and you can get on with six foot cords if you want to start it. Sometimes I've gotten with short cords put in the person's pocket clip on the Laval ear, and now if they're 20 feet away, I'm still getting good audio. The trick of thinking is I still need to get audio in my camera, because what final cuts going to do? It's gonna match the audio, the bad audio with the way form of the good audio, and it's going to substitute it. And that's exactly what we're gonna dio will substituted. We'll still need to go in and fix it, because if you listen to this audio, she still soft. OK, but if I go ahead and I kick in the loudness, do a little noise removal once again I'm talking. So it's a little clearer, and I would tweet that, but I'm gonna go ahead and we're gonna work with that sound. So what I want to do is I won't take my good sound and my good picture with my negligible sound. I'm gonna select him both, okay? And then I can right click, And one of the things I can do is synchronize clips, and it will magically merge them together. I'm gonna go ahead, hit synchronized clips. I'll get this dialog box. I want to give it a name, something that all remember. So this is was probably will call this good interview. Where do I want to put that? I can put it in any event, Gonna put it back in the interview event. I'm telling you, these audio for synchronization that's what you want because doing audio and this is really the thing that is very cool, and you'll want to make sure it's checked. Really? You don't want to change anything? Um, it will, actually, when it merges together, it remembers the old audio and it connects it. It doesn't get rid of it. It just turns it off. And I'll show you what that looks like. A soon as we make the connection. So it just brings them both together. Your hood. Okay, it's synchronizing the clip. Now, these clips when I It's looking at the Audie away from so polite and screw it up so much that they don't match normally happens just like that. Oh, there we go. And there it is. Good interview. It won't, by the way, be in the, um, my sink thing because it doesn't have a keyboard now associated with it. It's a new clip. Um, so but if I wanted to, I could go ahead and assigned keyword to it. So, Command K, I want to make sure it's in the interview that goes in the right place. And if I load this in and I looked this, I'm gonna go ahead and I'm going to drag this into my clean timeline. Get that bad one. Go ahead. We'll bring it and you'll notice that when I skim through it. Why does it go in black? I didn't break it. I didn't break the TV. I started the recorder a few minutes before she started talking. I stopped it a few minutes after, but I have a video was much shorter, so it still keeps the good audio. It doesn't truncated. So that's why if I go to earlier too late, it disappears. The audio is there from the phone, but she's not. So I'm gonna go ahead, find the area where she is when a market in point, let it play a little bit on a boy. Did I run this a long time out point? I want to see this in more detail. Let me go ahead and zoom in on. This is where you know, sometimes you want to be able to see them with detail. I zoomed in by the way, Command plus command minus. I try to remember giving you the keyboard shortcuts. But that's that whole stretching thing. And just give us a little more space here. So zoomed in too much. There we go. There will mark that is the end point. Looking at the bear Me a lot of me talking. I'll go ahead. I'm going to just drag this down to the timeline. Wow, Look at that. Should have been Trillo Quist. I did something horrible here. So I make these mistakes for you. For you. I make these. I wonder why was it was probably figuring out what the problem was, and it didn't have any idea. So let me go back and see if I grab the right one of the wrong one sink. Um and we have this audio. Oh, yeah. I grabbed the wrong audio. I should believe it's 26. Let me take a quick listen here. So this is the audio before we fixed it. Let's go ahead. Open up our inspector selector. Audio automatically go Loudness ago. Noise removal Republican Hear what she's saying now. And let's cross our fingers. That command Select that one right click Synchronize clips call. Give it the right name. We'll call it lucky because we hope it will be. Cross your fingers. What might pick the same clip again? The net is gone. The floor is opening up. Moment of truth is coming worked. Life is good. Okay, so let's get rid of the one that we, uh, didn't need for this. Go ahead. Put in here. Here we go is a beginning, and I could just bring a chunk in. Works so much better now. Always love when actually do something that works. And they're My microphone was running. I actually was running. Multiple cameras will use that in the multi cam, but now we have our audio. It's sync up and minus 12. It's hitting. I might want to make it a little bit louder. OK, so I could go in here, and with it selected, I could just turn on the loudness and talk about it going to be one not clear, actually, something that's pretty usable and it speaking really nicely. And I'm good to go here if I wanted to and work with audio and I want to play other audio filters. We haven't talked anything about filters yet. There's video filters. There's audio filters. There's ways to enhance the look of a show in the way to enhance the audio of the sound of the show. Bad form for me to talk when she's talking, it's really killing the people up in the in the booth, which will ultimately hurt me. But they're great. Um, so if I wanted to, I could go over here and I just want to show you how deep the audio controls go. So over here are effects. We're audio and video effects are and also our transitions. So I'm going to click on that effects. And I see this plethora of effects for video and also all these audio effects. And if I look at this closely, I could change voices and sounds. Yes, I could make her cartoon animal. Maybe we'll do it for fun, But I can also fix things like, um, change the pitch. If I floated down, I want to make the voice higher. I can, uh, put in compressors to dynamically compress the sound so that, you know, if you have a person is getting really loud and really soft, she's just stays that at soft. So that's not necessarily what I want to do. But these air some great fixes and to apply an audio effect, I can test it out before even apply it. So if I'm playing, um, and I go over here and we're gonna have fun because I'm a little crazy. That cartoon thing is actually really kind of kind of fun. That's at the top. And if I can't find a we go cartoon and if it's playing, if I hover over it, it will should show me what it sounds like. But she's too sweet for me to do that to, um so you can see it's very easy to do different modifications and you don't have to apply it. All you do is you put the cursor over it and you can hit play, and it will apply the effect so you contest it and then if you like it, you can go ahead and just drag it on, and it will apply that and all of these have controls that you can treat them so they're not like a one trick pony worth honor off once you put something on. So if I go ahead and I want to go do some e que I can say yes, I want to e que We're going to go here and we're going to apply Ah, low pass filter. Ah, low pass filter will Actually, um, it's like a cut off. There's high pass and low pass through a low pass. Let's low stuff by low frequencies by and high pass lets the higher frequencies by. The effect is if I put on a low pass filter, I could cut out everything at a certain frequency. Maybe there's, Ah, high whistle or buzz in the room, and I just want to cut everything off above a certain frequency. And that's where if I throw it on, I can go here. There's presets in some cases which Aiken save. But I can go here if I double click on that little icon where we got the other. Um, I mean, we got the equalizer. Graphic Equaliser. Same thing. So what this is doing is anything above 12, Hertz? It's cutting off, and it's letting the low stuff in low pass and high pass or actually, opposites of each other. But I could control, except you know what? That frequency is over here at 6000 kilohertz, so I'll just grab it and move it over, and I can control that. So all this control is there, and that's one of the things you'll be doing with audio, uh, in final cut. So now we understand how toe fix some audio and how to sink some audio. Now, we did analyze this audio when we brought it in, but had we not done that if we had a clip that we hadn't analyzed the audio. So I'm gonna just go to a random interview clip here. If it hasn't been analyzed, I can simply go to this little magic one drop down and I could say auto, enhance the audio, and it's gonna look at that. It's gonna analyze it. It's gonna fix any problems that it sees and remember. So it thought there was noise and it still needs to be louder, but it automatically will fix that.
Class Materials
Bonus Materials with Purchase
Ratings and Reviews
a Creativelive Student
Wonderful. This is the first time I've seen any of Abba's classes, and he's a great teacher. I've been watching the live sessions for the past few days and have picked up a ton of great tips that will indeed speed up my workflow in FCPX. He's a great teacher, and does a wonderful job of setting people at ease, ie. where he says things like, 'there's no trick questions', and times where he will click on something wrong, then he'll go back and show his mistake (pointing out his minor mistakes are actually a beneficial lesson). In all, wonderful wonderful wonderful. Thank you!
Lara
Fantastic teacher. I enjoyed every video, super worth it. I've been reluctant to jump into FCP X since it got upgraded from FCP. Now I feel confident to work with it again. Seems pretty self explanatory, but I am glad I watched the course. Abba covers pretty much everything you need to know. I also loved his personality, made me want to learn more each day.
Alan Pole
Absolutely brilliant. Abba gets to the point, is clear, organized and articulate, and lays it all out in a manner that quickly brings your confidence level from zero to hero. Highly recommend this to any photographer who wants to blog, build ads, or include video in their offering. I feel like an amazing new world has been provided to me. Thank you!