Lessons
Day 1
1Introduction
15:18 2Post-Production Workflow
26:52 3Troubleshooting
12:20 4Setting Up Hardware
29:32 5Create A Rough Cut in Prelude
43:29 611:30 am - Introduction to the Adobe® Premiere® Interface
31:56 7Configure Preference Settings
22:47The Media Browser
10:03 9Capture and Import Media
37:09 10Reviewing a Clip
29:17 11Create an Edit
24:18 12General Q&A
14:18Day 2
13Editing Review
18:24 14Editing in the Timeline
35:10 15Trimming
36:13 16Organizing the Timeline
31:19 17Labels and Markers
14:18 18Transitions
24:57 19Introduction to Audio
31:26 20Audio Editing
45:36 21Mixing in Audition
26:51 22Audio Effects
37:41Day 3
23Normalizing and Syncing Audio
24:54 24Text Effects
38:12 25Blend Modes
14:48 26Motion Effects
43:07 27Filter Effects
34:28 28Chroma-Key and Lumetri Looks
19:56 29Color Correction
57:31 30Editing a Mini-Doc
41:09 31General Q&A
26:54Lesson Info
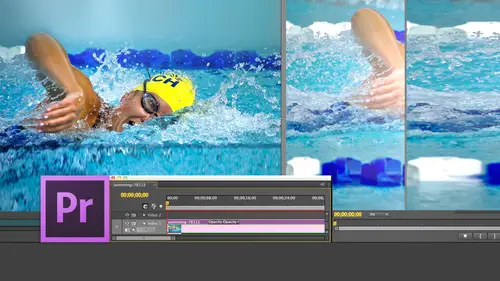
Reviewing a Clip
I'm going to what we want to do. I'm going to create a now Remember here just to be really clear. I'm working with standard def when I say Devi ntsc I'm working with standard F just cause it's small image sizes and because it's easy to work with, you would pick the side the Kodak that represents your camera. I'm trying to sight if I really believe that or not, and we'll say Yes, I believe that and we'll click. OK, so I should give it a name down here at the bottom space SP Dash, we'll call it review. Hit the return key. There is the icon for a new sequence. We see it in list to you over here. We see it in icon view there for right now, I'm going to switch this to list you cause I got no icons toe Look at so first thing I want to do is I want to import a couple clips that I can use for review. Let's go to the media browser and I'm gonna press the tilde key. That's the one right above the tab key that allows us to see footage I've got source media Let's see what I want to look at today. ...
That's too. That's Oh, I could do that. Let's do it's summer, isn't it? What do we think of most in summer? Right. Staying cool. So we're gonna look at some snowboard footage. And this footage, by the way, is a courtesy of a Lake Tahoe firm called Standard Films. They make exactly one film every year. It's extreme snowboarding. Think of the pressure on the editor. The entire company rests on their ability to edit exactly one film per year. It's a job that I do not want. Eso we're going Teoh. Let's just select it all and selected all when the right mouse click Say important Press the tilde key and we're back down and we load a clip that switchback Teoh Project file Switch back to thumbnails. Weaken, scroll down and see all of our thumbnails. DoubleClick A clip. Notice that I simply double clicked a clip toe. Load it from the project tab into source monitor. Okay, let's see. I haven't called on Janice for a while, so grab the hot mike Now. Have you seen the source monitor before? You know, this is your first time So here you are looking at the source monitor. What key do you think you would press to play the clip space by now? You're asking Why doesn't play? I have no idea. Oh, it's cause it's PNG, that's why Hang on a second. There we go. So much for a dramatic moment. Here we go. Watch this space bar to play. How would I stop the clip space by in mid air? He stops and to play it again. Space by how about to go backwards? J Yep. How about to go forward Shell, You pop out to stop. Okay. Look at this. Someone who has never seen the source monitor before And already you're navigating. It gets back to what Susan was saying earlier. Once you understand how it works in one window, it works exactly the same in all windows. There's a consistency in the interface. So how do we load a clip into the source monitor? You double click it. Be useful if I went OK now the source monitor actually has a lot of cool stuff in it, but it's hidden in the CS 55 version of Premier. The monitor had so much user interface associated with you couldn't even see the picture. It was just totally cluttered. They cleaned it up with CS six release and they cleaned it up again with the CC release. So I want to show you a few things here. First is if we click these buttons down here, this allows us to set a marker. Talk about that tomorrow. This allows us to set in keyboard shortcut. Asai allows us to set the out keyboard shortcut iso and remember, I'm in. I'm in a modified version of the final cut seven setting. So let's go back to Premier Pro Default Click. OK, and now the end is still I The out is still low. If I said and in keyboard short, let's find the spot here. Where are bold? Hero is about to snowboard off a cliff right there. Type the letter. I he snow boards off the cliff and we'll set it out right there. Type the letter o shift. I takes you to the end shift. Oh, takes you to the out. She could jump back and forth between them if you want to change the end or change the out. Grabbed the out on dragon or grab the in and dragon the in or the out When you use keyboard shortcuts are always, always, always said at the position of the play head. That's this yellow thing. This right here. Up until the CS six release, Adobe called this the C T I, which stands for current time indicator. Nobody could pronounce C t. I. So starting with seat the CS six release, they called it the play head. Whether you call it the C T I, or whether you call it the play head you're in and you're out is always set at the position of the play head. We can also click this button to set the end, and we can click this button to set the out. One of things you'll discover as we get into editing is there's multiple, different ways to do exactly the same thing. I hadn't tend to be keyboard driven, but a lot of people are mouse driven, and it works Either way. It is frame accurate. Either way, we can jump to the end. By clicking this button, we can jump to the out by clicking this button. I can back up one frame at a time by clicking this Go forward one frame at a time, clicking that I never used these. The left arrow goes left one frame. The right arrow goes right. One frame shift left arrow goes back. Five frames at a time shift right. Arrow goes forward five frames at a time. Shift I to the end shift. Oh, to the out. And when in doubt, hover your mouse over something and it pops up a yellow tool tip that tells you exactly what the keyboard shortcut happens to be cool so far. Now, you should feel, Megan, that you can set Thean on that you can set the out and that you can play the clip if you can set the in and you can set the out and you can play the clip, you are golden. Now, these air editing buttons right down here, we're gonna talk about those in just a few minutes, we're gonna skip these three. These machine controls here we care about, but see this plus button here when you click plus button, it opens what's called the button editor. I know that because it says button editor right at the top, and this allows you to configure the buttons. So if I don't want this here, I just simply just highlight it and click and it's gone. And if I want to drag this button down, just grab the button you want and drag it down. And if you don't want it there, then click it and it's gone. Drag it out of there when you're happy, click OK and you've redone your layup. If you want to reset back to factory defaults, click reset layouts in your back to factory defaults. One of the problems we had before in the CS 55 and six releases that they had so many buttons. They had two layers of buttons. Buttons were doing laps, and there were so many things to click on you couldn't even see the picture. So here they've streamlined it down to its barest essentials. And if you want to make it even streamline ear, which is a really word, then you can do that by simply dragging buttons out. Okay, next notice that we can't see any time code numbers up in here. Why not? Well, Adobe made them disappear to give ourselves less clutter, but we can turn them on. In fact, we can configure a lot of stuff. So let me go through the rest of the settings inside the source window because you will discover it's exactly inside the same inside the program window. Except we haven't learned how to get it from the source window down to the timeline. Yet this shows us the time code of the position of the play head as the play head moves that timecode moves as we look. A time code timecode intimidates a lot of folks, so let me just break it down for you. Timecode is always four pairs of numbers. It's always hours, minutes, seconds and frames as I move with the left arrow key. Notice that I'm moving one frame to the left, meaning earlier, one frame to the right, meaning later. So this position of the timecode. Jim, I'm about to ask you a math question. So tune in. Uh, this time code says that it's one hour, one minute, 30 seconds and 17 frames. Here's the trick question. I'm about to ask Jim, Is there any relationship between riel time, time of day and the time code recorded on a clip? You know, I didn't hear. No, sir, you are correct. There is no necessary relationship. Sometimes time of day and time. Code match, but not always. Time code provides a unique identifier for every frame of video, and it's identified by hours, minutes, seconds and frames. But notice this clip doesn't start at our zero. It starts at our one. Just a. Your house has an address. 123 Main Street that is a unique identifier that identifies your house and Onley your house. There's only one house at Main Street, but that doesn't necessarily mean that there's Ah, house at 1 to 2 Main Street or 1 to Main Street. It's a unique identifying Excuse me because time coat is expressed as time we can start to make calculations of duration based upon the time code. My starting time code here, for instance, is 31 18. If my ending time code here is 32 18 I can say that I've got one second and one frame duration. Notice it. It automatically calculates the duration out of here. Don't confuse time of day with real time or timecode. There's no there could be a relationship but it doesn't necessarily be a relationship Now. I'm trying to decide, Jim, if I should tell this story or not, and I'm not sure you're old enough for its I'm a time if they have forgotten. I was so busy thinking about whether Jim was an appropriate audits. By the way, click your mouse over here. This is a standard adobe trick. If you put your mouse over any numeric value and put the mouse button down and drag left and right, you can quickly move the play head. That's very cool, except I never do what I just grabbed the play head and drag it back and forth. We're talking timecode. Oh, yes, I was afraid that I had for gotten Why does video in America go at 30 frames a second? Because that's as close to actual, rials, real speed that people move. I didn't answer that correctly. It was a good try, Jim. It was a good guess. It's totally wrong, but it's a really good guess. Okay. Television was invented back in the 19 thirties, and in those days, television all we had to work with transistors weren't invented until the 19 sixties, and chips were invented even later. So in the 19 thirties, all we had to work with for clocks was tubes. Remember, those kind of things were about 1/2 inch around about that high and glowed red. Well, we could use the tubes for lots and lots of different things, but we couldn't use them to set up a timing clock, and they needed to have the same clock at the television transmitter as we had at the television receiver. They needed t be in sync with each other. And what could we use is a timing pulse that would be nationwide and the exact same clock and not very. And it was only one thing we could use, which was a sea power. A sea power in those days was 60 cycles. And what because we were shooting two fields, all the even numbered fields. First in all, the odd number field. Second, we shot one field on the 1st 60 cycle pulse the second field on the second cycle pulse, so we would then be able to have a single frame every 60 divide by 2 30 times a second. We had frames a second. Now Jim is about to ask Larry. That makes perfect sense 60 frames to make a 6 30 frames based on 60 cycle current. But why does the rest of the world have 25 frames? And the answer is what we discovered when power was being after had been invented by by Edison and others, and they were starting to stretch long, high power lines across the country. They discovered that cycle current radiated electricity off the wires and essentially evaporated. Because when you're sending high voltage of 60 cycles a second, it starts toe. Lose power just radiates evaporates. If they slow the cycle rate down to 50 cycles per second, it radiates less power. Less power evaporates off power lines. They can send more power, longer distances with less line loss. Well, by the time they realize this, it was way too late for us to change the power grid in United States. But in Europe, World War Two intervened, and in World War Two, with all the bombing that went on, all the infrastructure of Europe was totally destroyed. So when they rebuilt, they rebuilt. Knowing that cycle current would be better than 60 cycle current, so all of Europe went with 50 cycle current because they could transmit more power more efficiently over long distances and 50 Divide by two gave us 25 frames, cause PAL shoots interlaced video the same as NTSC shoots interlaced video. The rest of the world as it developed power, would adopt the European standard except for Japan, which is rebuilt by the U. S to US standards after the war. So North America and Japan are 60 cycle current and the rest of the world is 50 cycle current, and the clock timing cycle was half the current because both PAL and NTSC were interlaced, so that got us to 30 frames a second. But NTS video doesn't NTSC video doesn't actually run at 30 frames a second runs a 29.97 So what happened? It's not that we couldn't add. It's that in 19. In the 19 thirties and 19 forties and fifties, television was black and white. Witness I Love Lucy and Milton Berle. So color David Sarnoff, who ran NBC, which is that he was actually the head of R. C a r. C. A owned NBC. David Sarnoff. Faster, guys that invented television. How long would it take to invent color television? They said Opera for food. Piece of cake. 10 months, $1.5 million. Son son off green lighted. It didn't take 10 months. It took 10 years, didn't take 1.5 minute, took million, which is close to like $800 billion in today's dollars. There's a huge chunk cash. Imagine, if you will. 30 Rockefeller Plaza Penthouse suite. There, in a corner, is a eight foot long, three foot deep, 3.5 foot high, something covered with a cloth. Every executive of the NBC network is there. All the engineers and white lab coats are running around, and they're at the appropriate Martin. More moment, Sarnoff says. Ladies and gentlemen, I present to you color television. People had never seen color TV. It was eight feet long. It had a 13 inch screen on it, and there, in the middle of that 13 inch screen was color television. Oh my goodness, There wasn't a dry eye in the house, Sarnoff says to the chief engineer. This is incredible. The NBC network has to broadcast all color, which is where the peacock logo came from. It was the first all color network and it went with the peacock logo because it represented every color in the rainbow said. We have to be all color all the time. What do we have to do to broadcast all color? And the lead engineer said That's easy. You build a second transmitter, one for color and one for black and white, as the engineer was then being dangled up the window by sound off, saying we cannot do two transmitters, one for color and one for black and white. Give me Plan B and the engineer says, Well, we have a slight problem because every television set in America is a black and white set, So we have to invent a format of video format that supports both black and white and color. Now, the obvious thing for us to do is to transmit RGB. But if you transmit RGB, a black and white television doesn't know how to extract black and white from RGB. So we invented why you ve why you ve why trend and will talk about this in color correction On Day three, the Y value is the black and white value which the black and white set grabs onto and the U and V are overlays. On top of that, which give color information well. There was a second problem on the second problem that made this even more necessary is this. In the 19 fifties, they were making the shift over the color television credit cards did not exist. It was because of this problem that credit cards were invented. So in the 19 fifties, it took. The only thing you could buy on credit was a mortgage. Everything else she had to pay cash for there was no such thing as consumer loans. Didn't exist, was cash or get a loan to buy a house. A television set took the average American family two years, two years to save for the black. And that was a black and white TV took two years of saving to pay cash for a color. TV took eight years. So for someone to say I want to buy color would require them to save. For eight years, NBC was forced to create a scheme of broadcasting color television that allowed the black and white owner toe watch black and white TV until they could save the money to afford color, which took eight years to say for. And so NBC is transmitting color simply as a marketing ploy to get people to buy color TV sets because it's owned by R C. A. And it's because nobody could afford to buy TV sets for cash. The credit cards were invented in the late fifties and early sixties to allow people to buy on credit products that they could not afford in cash, so just sort of giving the derivation. But the reason this is all relevant is when we went from black and white to color. It took 31 hundreds of a second to transmit the color information so that we had to drop the frame rate from 30 frames a second to 29.97 frames a second to allow the 31 hundreds of a second necessary to transmit color. And that's why we're working with 29.97 frames per second. It's based on the 60 cycle power curve to do fields at 30 frames a second less 31 hundreds of a second transmit color, and we're living with that today. There's even HD formats that are working with 59 94 which is the high end version of 29 97 Now there's another problem. That 31 hundreds of a second means that time code. And you thought I forgot about time. Code means the time code when it's laid out across an hour program isn't an hour non drop frame timecode. Where every frame gets a unique number, means that at the end of an hour program the our program actually wants one hour, four seconds and 20 frames too long. So we had to figure out a way to compensate for that four second in 20 frame difference caused by the fact that it's 31 hundreds of a second to transmit color. So we invented a new form of time code called drop frame time code, which is indicated by a semi colon. See that semi colon right there? Drop frame Time code means that every minute we drop two time code numbers numbers, not frames. We dropped to time code numbers except on the 10th minute, and on the 10th minute we leave all the time code to go through, and it just so happens that dropping to time code numbers every minute except on the 10th minute means that you are getting an accurate timing of your program over the course of an hour, which is all the networks care about. They want to make sure that when a program says it runs an hour and timecode, it runs actually an hour. So the derivation of timecode drop frame time code is simply caused by the fact that we invented black and white television first, and we needed to compensate for the differences in color. Is that not a cool story? Really cool before commenting, People are commenting online and edit, Me said. And that's where commercials come from, actually, actually, no. There's two places that don't use drop frame Timecode commercials don't because they run one minute or less, and drop frame Timecode does not come into play until something runs more than a minute. Drop frame Timecode is not used in animation because animation wants to count every frame and drop from time. Code is not used in film because film cares, the total running time is the total running time. They don't care about dropped from. So in this particular case, drop frame. Timecode is critically important. Everything but drop frame is only important for something that runs more than a minute. And commercials generally don't qualify. Well, edit me Had a smiley face after that comment. So I think that they were just joking. Not sure, but Okay, but someone in the in the chat room did say this is the most interesting thing I've heard all week. Well played. And it's mostly true. What more can you ask of life than something which is mostly true. Good, sorry. Yeah, very good story. Um, Okay, So what we've seen is timecode is a unique identifier. For every frame of video we've seen that we can click the plus key, which allows us to configure the control button at the bottom of the source monitor. And it works exactly the same as this. Plus key over here at the bottom of the program monitor works exactly the same. But we're also seeing that there's some other controls here that I want to touch base on quickly. And then we're gonna shift gears into editing. See this fit window. This allows us to zoom the image inside the frame. Now, for those of you that understand what's going on in terms of picture and picture. I am not scaling the image. I'm not changing its actual size. I'm simply changing how it is displayed in the monitor. So this allows me to zoom in, which is really useful for some effects work that we'll see in a couple days. But it also allows me to zoom out so I can see the area outside the image. We also use that for effects work. The best way to run this is fit the window, which fits the image into whatever available space you have. Remember, pressing the tilde key blows the image up and allows us to see it in more detail. Fact. As long as we're here, this again effects just the zoom level, not the actual scaling of the picture. This window over here allows us to change screen resolution. Full resolution means that we're seeing every pixel half resolution means we're seeing one of every two pixels and we can decrease the resolution from there. This is useful. If you've got a really slow computer or a really slow ah hard disk, you can decrease the strain most of the time setting this to full or half is appropriate, and this only affects playback. Inside Premiere, it always exports at the highest possible quality. So this is a playback function on Lee, and you can use this. Set that to whichever choice you prefer the wrench like, Let's see, this shows us the time code of the play head. This shows us the duration. The wrench allows us to configure the actual source and program monitors. I'm not going to go through all of these yet. We're gonna cover the scopes, Which is this on Wednesday, Wednesday afternoon, we talked. Color correction. This allows us to display interlacing display. Both fields will provide horizontal lines that run off moving objects. This was shot on film, so it doesn't display interlacing, but most of time you want to see a single field, not both fields. Playback resolution is the exact same thing in this menu as it is from this menu. But let's see, 02 things that you do want to know about the default. The drop frame indicator down here. Remember, I said that dropped frames are caused by hard disks that are too slow or see. Pews are having a hard time keeping up. When you show the drop frame indicator this little green light lights up down here, this is actually a really good thing. What it does is if you are dropping frames because your computer can't keep up, this light goes yellow. And if you see the lights go yellow, it says, Hey, there's a problem here. If the light's green, it means all systems ago and you're working great. This is an indicator that says you have a potential problem. I like this, and I like having it on my recommendation. That should be on by default, but Adobe hasn't said it that way. The second is safe margins. Final cut calls this action safe. Title safe. What safe margins does is it draws two boxes around your frame. This one's called action safe. It's 5% in from every edge. This is called title safe. It's 10% in from every edge, and this hash mark indicates the exact middle of the frame horizontally. And this is the exact middle of the frame vertically. When you're editing, you don't care about action safe entitle safe at all when you're creating effects and adding titles you care about title safe in action. Safe? Ah, lot. So I'm simply indicating today that U turn safe margins on and off from the wrench icon. But we're not going to deal with safe margins till we get to effects on day three. So the plus button allows us to configure the control panel toolbar thingy down here, and the wrench allows us to configure the displays inside our monitors. Okay, Still with me now it's just press the tilde key to zoom back down again. Susan, we are about done with reviewing clips. So here's the quiz You're sitting down, okay. To play a clip. What key would you press to play a clip space box? Now you want to set in in tow a clip which represents the shot that you want where you want the shot to start in the timeline, What key would you type to set the in I And what key would you type to set the out? Oh, you now know everything you need to know, but a more loving one more thing. You double click, you double click a clip toe loaded from the project panel. The project contains all the clips that you've imported you have access to for scaring me. You double click it to load it into the source monitor. You put the play head where you want the shot. Oh, see that? See those those lines I'm dragging back and forth that that's interlacing. That's the interlaced artifact I was talking about. That's why we don't like interlacing. Those thin horizontal lines are caused by shooting an interlaced format. So you put the play head where you want the shot to start and type for the end. I and you go to the out in your type where you want the shot to end by sending me out and typing. Oh, you're gonna do this 500 times. Double click I o edit down to the timeline DoubleClick. I owe at it down to the timeline. It becomes a very mechanical great. And because this is the mechanical process, we want to do everything we can to speed it up. So anything that we could do to make this faster will make it faster. What we can do is if I go down to say, um, this clip right here em see you to camera. If I said. And in a letter, I if I said it out, the letter o I can set my in and out in the project panel without even going to the source monitor. Now, For those of you that have worked with final Cut, this is heresy. Final cut doesn't allow this at all, but Premier does so I can actually edit directly from the project panel. Think of it as the final cut browser without ever at loading the clip into the source monitor.
Class Materials
bonus material with purchase
Ratings and Reviews
Jfraz
I love this class. It is highly technically, but there is an awesome wealth of information to be had, even if you are a beginner. I've been struggling for a while, trying to look at YouTube videos and whatnot, but this class helped me make better sense of what I needed to do in all of my video editing. You get such a great foundation that's going to help you go further.
Valentine
I recommend Larry Jordan's course there is a lot of in-depth information that will help the beginner as well as the advance premiere editor. The only thing is that his humor is a big corky for my taste but if you look beyond that you get a lot from his teachings. He genuinely wants his students to succeed and get paid well in this field which its nice.
a Creativelive Student
This is one of my favorite courses on Creative Live. Larry Jordan teaches in a way that I can follow and is easy to stay focused on. He has a crazy amount of knowledge about this topic as do all the Creative Live teachers. I love this site so much, has done more for my business than all the other sites I have used combined. Keep it up CL!!