Lessons
Class Introduction
17:26 2Welcome to Photography
13:08 3Camera Types Overview
02:00 4Viewing Systems
28:43 5Viewing Systems Q&A
08:45 6Lens Systems
32:06 7Shutter Systems
13:17 8Shutter Speeds
10:47Choosing a Shutter Speed
31:30 10Shutter Speeds for Handholding
08:36 11Shutter Speed Pop Quiz
09:06 12Camera Settings
25:35 13General Camera Q&A
14:38 14Sensor Sizes: The Basics
15:33 15Sensor Sizes: Compared
19:10 16Pixels
20:13 17ISO
21:13 18Sensor Q&A
13:34 19Focal Length: Overview
11:09 20Focal Length: Angle of View
15:09 21Wide Angle Lenses
08:48 22Telephoto Lenses
25:23 23Angle of View Q&A
09:29 24Fish Eye Lenses
10:39 25Tilt & Shift Lenses
23:42 26Subject Zone
17:19 27Lens Speed
09:56 28Aperture Basics
08:46 29Depth of Field
21:49 30Aperture Pop Quiz
13:23 31Lens Quality
18:30 32Photo Equipment Life Cycle
03:57 33Light Meter Basics
09:25 34Histogram
15:25 35Histogram Pop Quiz and Q&A
10:58 36Dynamic Range
06:03 37Exposure Modes
15:58 38Manual Exposure
09:38 39Sunny 16 Rule
05:54 40Exposure Bracketing
10:18 41Exposure Values
27:21 42Exposure Pop Quiz
26:43 43Focus Overview
16:15 44Focusing Systems
05:15 45Autofocus Controls
11:56 46Focus Points
07:35 47Autofocusing on Subjects
20:19 48Manual Focus
07:52 49Digital Focusing Assistance
03:40 50Focus Options: DSLR and Mirrorless
04:58 51Shutter Speeds for Sharpness and DoF
05:20 52Depth of Field Pop Quiz
12:14 53Depth of Field Camera Features
04:54 54Lens Sharpness
09:58 55Camera Movement
05:20 56Handheld and Tripod Focusing
04:32 57Advanced Techniques
07:12 58Hyperfocal Distance
06:50 59Hyperfocal Quiz and Focusing Formula
04:36 60Micro adjust and AF Fine Tune
05:34 61Focus Stacking and Post Sharpening
06:00 62Focus Problem Pop Quiz
18:07 63The Gadget Bag: Camera Accessories
25:30 64The Gadget Bag: Lens Accessories
12:46 65The Gadget Bag: Neutral Density Filter
20:43 66The Gadget Bag: Lens Hood and Teleconverters
08:55 67The Gadget Bag: Lens Adapters
05:43 68The Gadget Bag: Lens Cleaning Supplies
04:34 69The Gadget Bag: Macro Lenses and Accessories
15:57 70The Gadget Bag: Flash and Lighting
05:08 71The Gadget Bag: Tripods and Accessories
18:50 72The Gadget Bag: Custom Cases
11:20 7310 Thoughts on Being a Photographer
07:37 74Direct Sunlight
25:04 75Indirect Sunlight
18:49 76Sunrise and Sunset
18:39 77Cloud Light
14:48 78Golden Hour
09:50 79Light Pop Quiz
07:53 80Light Management
14:00 81Artificial Light
13:56 82Speedlights
16:02 83Off-Camera Flash
27:38 84Advanced Flash Techniques
09:49 85Editing Overview
08:24 86Editing Set-up
08:06 87Importing Images
16:45 88Best Use of Files and Folders
20:54 89Culling
20:56 90Develop: Fixing in Lightroom
18:13 91Develop: Treating Your Images
10:53 92Develop: Optimizing in Lightroom
14:51 93Art of Editing Q&A
06:01 94Composition Overview
06:53 95Photographic Intrusions
10:10 96Mystery and Working the Scene
16:18 97Point of View
09:11 98Better Backgrounds
16:02 99Unique Perspective
11:02 100Angle of View
15:06 101Subject Placement
41:14 102Subject Placement Q&A
05:18 103Panorama
07:39 104Multishot Techniques
13:57 105Timelapse
16:13 106Human Vision vs The Camera
20:07 107Visual Perception
08:35 108Visual Balance Test
22:56 109Visual Drama
12:25 110Elements of Design
28:57 111The Photographic Process
12:28 112Working the Shot
27:38 113The Moment
04:42 114One Hour Photo - Colby Brown
1:04:32 115One Hour Photo - John Keatley
1:03:05 116One Hour Photo - Art Wolfe
59:01 117One Hour Photo - Rocco Ancora
1:01:20 118One Hour Photo - Mike Hagen
1:01:20 119One Hour Photo - Lisa Carney
1:00:52 120One Hour Photo - Ian Shive
1:08:00 121One Hour Photo - Sandra Coan
1:10:29 122One Hour Photo - Daniel Gregory
1:06:07 123One Hour Photo - Scott Robert Lim
1:05:41Lesson Info
Develop: Fixing in Lightroom
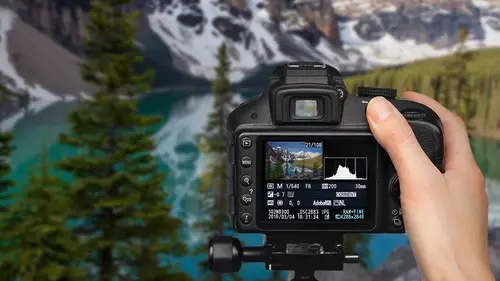
So we're gonna be talking about developing our photos. And this goes by a number of different names. It can be processing our images, adjusting them, tweaking them. And this is what do we do after we have taken the photo? Because there is only so much we can do in camera. There's a little bit that is left to be done afterwards. And so that's the idea on this whole section. Now, I, in my mind, kinda break things into two different parts: One is fixing a specific problem in an image and optimizing it. And a lot of times, these involve exactly the same tools and I'm not necessarily doing one and then the other but in my mind, there is kind of a different process of oh, this is wrong, I somehow got this wrong in the camera or something went wrong and I need to fix it versus trying to get an image to its optimum state. They are both part of the same spectrum, you might say. So, things that we're gonna potentially fix are things that are gonna deal with exposure, color, dust, for instance, o...
n the sensor, cropping an image, or other sorts of lens corrections that might happen that we will talk about. Optimizing a typical image. A lot of times, people who are new to photography, they take photos and they're kind of at that point of well, what do I need to do now? Do I have to do something? Do I have to do a lot of things? And so, adjusting the contrast, a little bit of dodge and burn for lightening and darkening and then the saturation and sharpening are usually things that you'll need to do especially if you shoot with RAW images because you tend to get back a little bit of a bland image when you shoot RAW. It's not kind of tweaked up the way most images are. And so there's a little bit of work to be done so let's go through about the different steps in this process. Now, within Lightroom, and this is kind of particular to Lightroom, you can adjust your images in the library module or in the develop module. And if you go in the develop module, there'll be much more fine-tuned controls in there. So, generally, if you want to adjust an image, you're gonna want to go into the develop section. And so if your program is a little something different, check to see if your program has this type of concept where there is a special area for developing a photograph. Within Lightroom's develop section, you'll have that highlighted up there, there's a lot of tools we can use to fix certain problems. So, we're gonna talk about a lot of these tools and when and where we would use them. So, fixing certain problems like color, exposure, and so forth. There's a lot of things we can use in here to fix them. So let's work our way through the list. So, first off, color issues. Look at your image, see if there's an overall color problem with the image. And that's where we're gonna use either the temperature or the tint slider or the ink dropper. And what we can use is use the ink dropper and sample an area that is neutral in color and that will neutralize the color of the entire image. And this is usually a quick way to get a neutral color cast over the entire image. We'll have the temperature slider which works on a yellow to blue spectrum and then a tint slider which works on a green to magenta spectrum. RAW is going to be better because it allows you with more versatility and with less damage to fix a final product. With a JPEG image, you'll be given kind of a zero indicator and you can go plus or minus on the zero. With RAW, you'll be able to enter an actual color temperature. If you knew what the color temperature was later, on, or you just wanted to enter a very specific number. You can be more exact when you have a RAW image. So, for instance, this is what I got out of camera and it was taken in the early hours. There was a very heavy blue cast because the sun hadn't quite risen up and it was the blue sky that was illuminating the scene. And so, it didn't seem quite natural to me so I adjusted and slid that slider away from the blue slide, added a bit more yellow to it, to where I thought was a more natural look. And so, the sliders in Lightroom, you can see the color temperature that was set. Now, I just use the slider to adjust it to what looked good to my eyes. But, as I said, if you wanted to adjust it to a particular number, you could, of course, do that. When you're actually working in Lightroom, one of the ways I generally work is I just take one slider and I go back and forth until it looks as good as it can within that range. And then I go down to the second slider and I adjust that until that range again. And sometimes, I will slide it far enough to where I say "Ew, that looks terrible" and I'll notice the number. And then I'll slide it to the other side, and I see where that looks terrible and probably the place in between those is where it should be set. And that's probably one of the first adjustments that you want to get right on your images. There are different orders that you can work on your images but getting the color right in the overall sense is one of the first good steps to take. The next step that I usually go for is working with the exposure. One of the things here is I'll look at the histogram to see how good of exposure I have. And if it's way over to the right, that's gonna be a warning sign. And I might click on the clipping symbol which Lightroom has up in the right-hand corner which will show me areas in the image that I have overexposed. If the image is on the dark side, I might use the clipping on the dark side to see which part of the image has gone too dark. So here's a sample image that has both areas of great brightness and great darkness. If I turn on the clipping highlights, it will show me in red and in blue what areas are perfectly dark. Now, I can choose to do something or not. In this photo, it's perfectly natural that there are areas that are blown out and some that are very dark because of the type of scene that I have. So, these are things that you can keep turned on or turned off depending on how much it interferes with your viewing of the image. Normally, I leave them turned off and I'll just kind of turn them on as necessary in some situations. So, in this situation, I have a very low contrast scene. You can look at the histogram and you can see that it does not extend very close to the edges at all. And so, in this case, I'm gonna increase the contrast a little bit and so I'm gonna get a histogram that is spread just a little bit further apart, gets a little bit closer to the edges, and you can see that the image on the left has a little bit more contrast, a little bit more punch to it, a little bit more color to it, as well. So, I think that's a good improvement on many types of photographs. Working with the overall exposure, there's gonna be one, or a number of, sliders or tools that you can work with. The overall exposure slider is generally gonna make it brighter and darker and then we have the contrast which will kind of separate the histogram and push the highlights brighter and the darks darker. There are some more specific sliders, at least in Lightroom, for controlling the white and black areas. The highlights and the shadowed areas. And these can be very helpful for many types of photos cause it's only going after certain types of pixels and changing them. And so, for working with the shadows, or, excuse me, working with the highlights, we have highlights and the whites. And they have these in an order that they think it would be logical to work with which may or may not match up with your workflow. And so be aware that sometimes you'll be working out of order according to what they think. One of the things that's very important in a lot of photos is having a good black point where there is something that is good and solid and some black pixel that kind of represents the darkest area in that photograph. It's one of the ways that we judge sharpness. So, this is a photo straight out of the camera and it just seemed a little bland and a little bit dark. And maybe I missed the exposure out there but what I did is I raised the shadows up a bit. I didn't want the highlights getting much brighter. And so, in this case, I went down to the shadows and I raised it a plus 40. I don't know what plus 40 is but it looked good. It's a little bit on the slider. So you're always trying to look at what is wrong with a particular image or how can it be made better. The cropping tool. Ideally, you try to get things right in camera. But there's a couple of issues with cropping. But, you do have to crop later on. And so it's a tool that I do use but I try to use as infrequently as possible. And so, there's multiple reasons why you might want to crop. You have space, you didn't compose it right, things were moving very quickly, you didn't have a chance to really frame it up correctly. One of the other ones is aspect ratio. The camera that you have has one aspect ratio, and your sensor, I should say, has one aspect ratio. Your camera may allow you to shoot with a different aspect ratio. But, if you're trying to capture as much information as possible, there's one ratio of your sensor but the end result of your photograph, you might be needing something else. And so, let's talk about the aspect ratio in the cameras. So, all cameras have a single sensor inside of them and it's gonna have a particular aspect ratio. The one in full-frame cameras in 1.5 crop and 1.6 crop is an aspect ratio of one to one and a half. For the Micro 4/3 system, it is a four by three aspect ratio. As well as many of the compact point and shoot cameras, as well as many of the phones, are shooting in a four to three aspect ratio. And these are not the same height/width dimensions. They are a little bit different. The four to three is just a little bit boxier in its shape. And so, depending on what you want from your final image, you need to realize what you are shooting with and what camera. So, here's your three by two and your four by three so they are very common camera settings right here but the way we print photographs, the way we look at photographs can be very different. Sometimes, you want a square image. Four by five is a very common setting. A five by seven is a very traditional print size at least here in the United States. Sixteen by nine is the aspect ratio of this TV right here that I'm looking at, that you're probably looking at, unless you're looking at a computer that has a square monitor. If you're looking at a TV, it varies from device to device, and so you have to be thinking about what is my camera and what is the final use of my picture, what do I want it to be? And where this becomes very important is if you frame up something really tightly and you get it right in the camera. You get as many pixels on your subject that is possible, but then you realize that you need to use this in a 16 by nine frame, what are you going to fill up this extra space with here? And so, in some cases, you need to shoot your subject a little bit looser with a little bit of space around it so that you can have room to crop in to adjust for different aspect ratios. And so, perhaps you want a little bit wider look, sometimes you can crop in, and so in this case, I wanted to crop a little bit of the extra space on the bottom and the top and just a tiny bit off the edges. Verticals can be very difficult because I, and many photographers, believe that the three by two aspect ratio, which is what is in most of your, or all of your full-frame cameras and most of your crop-frame cameras, is a little too skinny for shooting verticals. And a lot of photographers prefer something more in the five by seven range or even the five by four aspect ratio. And so, if you're doing that, you're gonna have to allow for a little bit of extra space because if you shoot it too tight, you're not gonna have room to crop in on your image. And so, shooting a little loose for some situations makes sense. Sometimes after getting an image back, I'll look at it and I realize you know what? I don't need a bunch of this image and I will crop it later. And so, I think this makes a really nice, square image. We have a lot of dead space here. And so, in this case, I'm just gonna crop in on everything because it would have been better if I would have got the shot two seconds later when the planes were a little bit closer to me but this is when I got the best shot and they had the right separation between them and so I'm gonna throw in a little crop. I'm throwing away some pixels but there's nothing I can do at this point. I'm just trying to make due with the best images that I got in the field. And so, I would really like to say that this is how I framed the shot when I actually took the photo. And it is a little deceiving because I've shown you some photos that I've gone in and cropped a little bit. Now, I'll reveal the secrets here. This is what the photograph actually looked like. All right? I wasn't as close as I wanted and I had the camera tipped slightly. All right. And so, I figured, you know what's a good image is right there and I only need that many pixels so I can handle just using that many pixels and I can handle that crop. I wish that I had been a little bit closer. I wish that bird had landed in the water a little bit closer to me but I don't exactly have control of that. In this case, thought I had a little too much sky in that shot. Might be nice if I needed a headline up there but for what I'm doing, I don't, so I'm gonna crop that out a little bit later. So dead, unnecessary space I don't need. So, this looked right to me in the camera. Seemed like I got it right but then when I got back, I seemed to notice a lot of the other distractions going on. And so I felt it needed a little bit of a tighter crop. And so it depends on how you're gonna be using your photographs in their final aspect ratio. For instance, the aspect ratio of this photograph is unusual. I don't know what it is. But it's a very wide format. In fact, it's wider than the sixteen by nine aspect ratio of this screen here. And so, some photographers, in some uses, they don't want awkward crops. They don't want anything different from what you get out of the camera. And it's a matter of personal opinion and how you are using the photograph as to what you are doing. I am projecting a lot of my images digitally here and I can kind of go whatever aspect ratio I need. If you're working for a greeting card company, they might have a very specific sized photo that they need on the cover. And you have to have it cropped for that. So, the more you are aware of the final use, the better you'll be able to shoot for that use. In this case here, I felt there was a little bit of brightness over on the right-hand side that was a little bit more than I liked. And so I'm just gonna crop off a little bit of that edge and a little bit of that top to get rid of some of that brightness. Because I thought that was drawing your attention farther out of the frame than I wanted. And so, looking at this, I ended up with just a little bit of dead space down at the bottom that I didn't really need. And that seemed a little bit too long and skinny so I cropped it just a little bit on the left. Just so that the balance feels right. In this case, I shot it wide because I knew that I would be using this in many different types of crops and formats. And I wasn't a big fan of that edge of the store over on that far left-hand side. So I'm gonna crop that out. Crop a little bit off to the right so that I get a really nice, clean pattern of the shoes. The wall on the right-hand side is just different than the rest of the coloring of everything else. And so, I wasn't real happy with it so I decided to crop that out and there's one little element up on top that I thought was a little distracting kind of just hanging in from the top. And so, cropping off just a little bit. And I don't think I saw that when I was actually shooting the photo. There were so many other things that I was concerned with at that time. I will sometimes be terrible with my horizons. I need a bubble level on my camera. I need the cameras that have the level and so every once in awhile, I'll need to correct for an image afterwards and in many of the programs like Lightroom, they'll allow you to level it either automatically or manually so that you can get it perfectly straight. And then of course you'll need to reframe it slightly because it throws off all the edges of the frame so that you have nice, straight lines all around. And so, I wanted to shoot this a little bit wide so that you could see the environment that they're in. But, then I realized that you know, they actually had some really nice facial expressions in this and in order to see that, we need to get in a little bit closer. And so I'll crop this, get in a little bit closer, but the downside of this whole cropping thing is that you are throwing pixels away. And so, this original image, which was about 22 megapixels, is now been reduced down to 12 megapixels. Cause I'm throwing away a whole lot of pixels in this crop system. The original image I could have enlarged to 19 by 13 roughly, now I can only enlarge it 14 by 10. So, it depends on the uses as to whether you can handle throwing those images away. Maybe you're, if you're using your photos online, chances are you have the ability to crop quite a bit. But if you're trying to make a print, you want to crop as little as possible because you need that data if you want to enlarge it. And so, there is a price to be paid for cropping and you're trying to avoid it as much of the time as possible. But sometimes, you just don't realize something until after you see it on your computer and it's all done with. And so, some reasons for cropping: Aspect ratio, dead space, things that just don't look right in the photograph. Feel free to crop as necessary but just be aware, try not to crop if you can get away with it. Cause you're throwing away good pixels.
Class Materials
Free Download
Bonus Materials with Purchase
Ratings and Reviews
a Creativelive Student
Love love all John Greengo classes! Wish to have had him decades ago with this info, but no internet then!! John is the greatest photography teacher I have seen out there, and I watch a lot of Creative Live classes and folks on YouTube too. John is so detailed and there are a ton of ah ha moments for me and I know lots of others. I think I own 4 John Greengo classes so far and want to add this one and Travel Photography!! I just drop everything to watch John on Creative Live. I wish sometime soon he would teach a Lightroom class and his knowledge on photography post editing.!!! That would probably take a LOT OF TIME but I know John would explain it soooooo good, like he does all his Photography classes!! Thank you Creative Live for having such a wonderful instructor with John Greengo!! Make more classes John, for just love them and soak it up! There is soooo much to learn and sometimes just so overwhelming. Is there anyway you might do a Motivation class!!?? Like do this button for this day, and try this technique for a week, or post this subject for this week, etc. Motivation and inspiration, and playing around with what you teach, needed so much and would be so fun.!! Just saying??? Awaiting gadgets class now, while waiting for lunch break to be over. All the filters and gadgets, oh my. Thank you thank you for all you teach John, You are truly a wonderful wonderful instructor and I would highly recommend folks listening and buying your classes.
Eve
I don't think that adjectives like beautiful, fantastic or excellent can describe the course and classes with John Greengo well enough. I've just bought my first camera and I am a total amateur but I fell in love with photography while watching the classes with John. It is fun, clear, understandable, entertaining, informative and and and. He is not only a fabulous photographer but a great teacher as well. Easy to follow, clear explanations and fantastic visuals. The only disadvantage I can list here that he is sooooo good that keeps me from going out to shoot as I am just glued to the screen. :-) Don't miss it and well worth the money invested! Thank you John!
Vlad Chiriacescu
Wow! John is THE best teacher I have ever had the pleasure of learning from, and this is the most comprehensive, eloquent and fun course I have ever taken (online or off). If you're even / / interested in photography, take this course as soon as possible! You might find out that taking great photos requires much more work than you're willing to invest, or you might get so excited learning from John that you'll start taking your camera with you EVERYWHERE. At the very least, you'll learn the fundamental inner workings and techniques that WILL help you get a better photo. Worried about the cost? Well, I've taken courses that are twice as expensive that offer less than maybe a tenth of the value. You'll be much better off investing in this course than a new camera or a new lens. I cannot reccomend John and this course enough!