Lessons
Class Introduction
17:26 2Welcome to Photography
13:08 3Camera Types Overview
02:00 4Viewing Systems
28:43 5Viewing Systems Q&A
08:45 6Lens Systems
32:06 7Shutter Systems
13:17 8Shutter Speeds
10:47Choosing a Shutter Speed
31:30 10Shutter Speeds for Handholding
08:36 11Shutter Speed Pop Quiz
09:06 12Camera Settings
25:35 13General Camera Q&A
14:38 14Sensor Sizes: The Basics
15:33 15Sensor Sizes: Compared
19:10 16Pixels
20:13 17ISO
21:13 18Sensor Q&A
13:34 19Focal Length: Overview
11:09 20Focal Length: Angle of View
15:09 21Wide Angle Lenses
08:48 22Telephoto Lenses
25:23 23Angle of View Q&A
09:29 24Fish Eye Lenses
10:39 25Tilt & Shift Lenses
23:42 26Subject Zone
17:19 27Lens Speed
09:56 28Aperture Basics
08:46 29Depth of Field
21:49 30Aperture Pop Quiz
13:23 31Lens Quality
18:30 32Photo Equipment Life Cycle
03:57 33Light Meter Basics
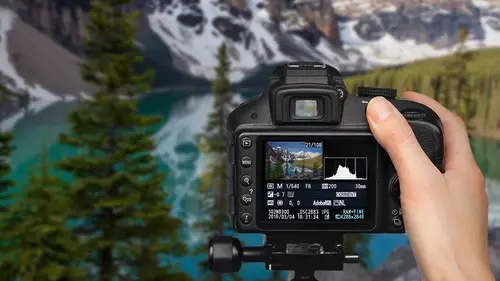
09:25 34Histogram
15:25 35Histogram Pop Quiz and Q&A
10:58 36Dynamic Range
06:03 37Exposure Modes
15:58 38Manual Exposure
09:38 39Sunny 16 Rule
05:54 40Exposure Bracketing
10:18 41Exposure Values
27:21 42Exposure Pop Quiz
26:43 43Focus Overview
16:15 44Focusing Systems
05:15 45Autofocus Controls
11:56 46Focus Points
07:35 47Autofocusing on Subjects
20:19 48Manual Focus
07:52 49Digital Focusing Assistance
03:40 50Focus Options: DSLR and Mirrorless
04:58 51Shutter Speeds for Sharpness and DoF
05:20 52Depth of Field Pop Quiz
12:14 53Depth of Field Camera Features
04:54 54Lens Sharpness
09:58 55Camera Movement
05:20 56Handheld and Tripod Focusing
04:32 57Advanced Techniques
07:12 58Hyperfocal Distance
06:50 59Hyperfocal Quiz and Focusing Formula
04:36 60Micro adjust and AF Fine Tune
05:34 61Focus Stacking and Post Sharpening
06:00 62Focus Problem Pop Quiz
18:07 63The Gadget Bag: Camera Accessories
25:30 64The Gadget Bag: Lens Accessories
12:46 65The Gadget Bag: Neutral Density Filter
20:43 66The Gadget Bag: Lens Hood and Teleconverters
08:55 67The Gadget Bag: Lens Adapters
05:43 68The Gadget Bag: Lens Cleaning Supplies
04:34 69The Gadget Bag: Macro Lenses and Accessories
15:57 70The Gadget Bag: Flash and Lighting
05:08 71The Gadget Bag: Tripods and Accessories
18:50 72The Gadget Bag: Custom Cases
11:20 7310 Thoughts on Being a Photographer
07:37 74Direct Sunlight
25:04 75Indirect Sunlight
18:49 76Sunrise and Sunset
18:39 77Cloud Light
14:48 78Golden Hour
09:50 79Light Pop Quiz
07:53 80Light Management
14:00 81Artificial Light
13:56 82Speedlights
16:02 83Off-Camera Flash
27:38 84Advanced Flash Techniques
09:49 85Editing Overview
08:24 86Editing Set-up
08:06 87Importing Images
16:45 88Best Use of Files and Folders
20:54 89Culling
20:56 90Develop: Fixing in Lightroom
18:13 91Develop: Treating Your Images
10:53 92Develop: Optimizing in Lightroom
14:51 93Art of Editing Q&A
06:01 94Composition Overview
06:53 95Photographic Intrusions
10:10 96Mystery and Working the Scene
16:18 97Point of View
09:11 98Better Backgrounds
16:02 99Unique Perspective
11:02 100Angle of View
15:06 101Subject Placement
41:14 102Subject Placement Q&A
05:18 103Panorama
07:39 104Multishot Techniques
13:57 105Timelapse
16:13 106Human Vision vs The Camera
20:07 107Visual Perception
08:35 108Visual Balance Test
22:56 109Visual Drama
12:25 110Elements of Design
28:57 111The Photographic Process
12:28 112Working the Shot
27:38 113The Moment
04:42 114One Hour Photo - Colby Brown
1:04:32 115One Hour Photo - John Keatley
1:03:05 116One Hour Photo - Art Wolfe
59:01 117One Hour Photo - Rocco Ancora
1:01:20 118One Hour Photo - Mike Hagen
1:01:20 119One Hour Photo - Lisa Carney
1:00:52 120One Hour Photo - Ian Shive
1:08:00 121One Hour Photo - Sandra Coan
1:10:29 122One Hour Photo - Daniel Gregory
1:06:07 123One Hour Photo - Scott Robert Lim
1:05:41Lesson Info
Sunrise and Sunset
Alright, you guys ready for a brand new section? A lot of this is from other classes. So this is Sunrise & Sunset section, this is a rather long section. This came, this came up after, five days being in Rome, I was going out early in the morning to photograph and I ended up having a hotel room that was kind of near the Colosseum and I wanted to go out shoot five o'clock in the morning but to be honest with you there's not a lot of things that are open that photographers can go in and photograph at five o'clock in the morning so you're kind of regulated to things on the street and sidewalk. So I ended up going back to the Colosseum for several days in a row and I kind of found myself wandering around and I kind of saw a pattern developing of what I was shooting and where I was shooting and I started breaking down the whole sunrise, sunset because I gotta be honest with you, most of the time I just go out at sunrise going "Alright, this is a good time of day, I don't know what I'm g...
oing to shoot. Is it good over here? Is it good over here? Is it good over here? Oh, it's good over hear, okay, that's what I'm going to do." I would just kind of wander around, whatever looked good to me is what I would go to. Now that I've broken it down, I go out with more of a plan. "This is what I'm looking for, okay?" "Did I get this? okay, good." "Now this is what I'm looking for, now I'm going to go "over here, is it over here? Wait." "Now it's time to go back over here." And that's the important thing because if you're out just wandering aimlessly around, you're going to be going potentially at the wrong place and wrong time and you'll end up with nothing. But if you have a good plan, you can get several different types of shots if you have a plan. And so, you gotta know what you're looking for and what you can do. So, Sunrise and Sunset has always been talked about for a long time as being so great because we do have intense colors, we have this great light that's dramatically changing and it's different all the time, you know? Every sunrise and sunset always seems to be a little bit different. Even if there's no clouds and the sun's going down at the same speed, there's just something different about the atmosphere that's a little bit different. And so we always have that level of excitement. Now, these are hard to work with. There's a lot of people who are not morning people and at getting up cause you gotta get up real early if you wanna photograph sunrises, especially in the summer time. This is during dinner time, people don't want to be out there then. It could be good, it could be terrible. So, you just have to be able to, it's like buying a lottery ticket. You're probably not going to win but you might. That's why you go out there. This is a good time to be having those tripods because it's hard to do hand held photography out here and it is surprising at how fast it goes. When it comes down to it, there is about a couple of minutes where it's really good. That's really what you're going for, a couple of minutes of when it's really, really good. There might be some okay times in there, as well. So, first off, being aware of what exactly is the sunrise time, whereabouts is the sun coming up? So, if you have a GPS or directional that tells you where it's coming up, that's going to be really good. If you have a chance to go to that location ahead of time, which is very, very helpful. So, when I was in Rome, I had five days. I was there five mornings in a row. I knew exactly where the sun was coming up, I knew exactly when it hit this particular window so if you are planning or wanting to get good shots in a particular location, don't just plan one night there or just one morning there cause then, you're really, that's just not buying enough lottery tickets. OK, so we're going to use some graphs here. Just another way of understanding this information. We're having time and sunrise and sunset, I always kind of wondered, is one better than the other? And I think sunrises are better than sunsets. Now, part of it's just because most people don't like to wake up early in the morning and you're more likely to be out there by yourself at sunrise. So, it tends to be just a little bit more special. I think when you're standing there on the edge and you got this beautiful sunrise and you just don't see anyone around. It's like a very special, personal moment that I think is fantastic and you get it all to yourself. The other thing that's a little bit more factual is that the whole environment, whatever it's in, the city or out in nature, has kind of had eight hours to relax, collect due, have the wind blow and blow footprints away off of the snow or the sand, it's just kind of having a chance to rest and reset. So, it's in general, though, the lighting can be the same either direction. So, if it's sunset, just reverse it and go the other direction so we'll be mostly talking about sunrise. Alright, so it's dark, OK? That's how we start off. As the sun gets closer, we're going to get something called the Blue Zone and then we're going to enter a little bit of a dead zone, and then we'll have something called Cloud Light and then it sometimes, not always, sometimes gets worse and we actually get First Light. So these are the three peak moments of a potential sunrise. Now, you don't necessarily get three if you don't have clouds, you don't get this cloud light. So as the sun is illuminating the blue sky, we get this first little Blue Zone which is good for certain types of photography in certain directions. If you have clouds and they're in the right position and there's right gaps, you get this nice cloud light, there's often a little bit of a gap before the sun actually rises and then we get what's often called the golden hour or the magic hour which we actually get true sunlight on our particular subject. So if I was to diagram this, this is the Earth, this is the sky, there's our star and here you are over on the right hand side ready to shoot photos in the morning of our beautiful mountain here. OK, if you want to shoot nighttime stuff, that's good time to be out there but as the sun starts getting closer to the horizon, it starts illuminating the sky with blue and the starts start disappearing so at a certain point, you're gonna be able to look straight ahead, you're gonna see a little bit of blue in the horizon even though it's black still above you. This is a good time to be on location and be ready to start shooting. As that sun starts getting closer and closer to the horizon, that sky gets lighter and lighter and blue. There's going to be a certain point where the Sun is illuminating the sky right above where your subject is or right behind your subject and this is going be a, what I call, the Blue Zone, and I've seen a number of people call it the Blue Hour and that's completely misleading. It does not last one hour. It's just not even close. You might see blue for one hour, but that's not when you're going to be shooting photos. You have 15 minutes, depending on where you are on planet Earth, it's going to be longer at higher and lower latitudes but in most cases, it's a very, very short period of time where it's really at just the perfect level of blue. So, there's going to be a nice little Blue Zone and then the problem is that as the Sun gets a little bit higher, not quite over the horizon yet, the sky is going to be too bright and it's not going to be a very good time to shoot. Now this is the time that you want to have clouds. So at this point, what we're looking for is, we're looking for the Sun, we still can't see the Sun, the Sun is below the horizon but it's illuminating the bottom side of our clouds so it's a very tricky situation. You want clouds but not too many. It's like you're giving the weather Gods some very specific request. "I would like some clouds if they could be this shape, in this location but not over there, then I will be happy." And so this doesn't happen very often. Alright, so that's a great time to shoot with what I call Cloud Light. Eventually, the Sun will get over the horizon and will be illuminating the subject that you're trying to shoot and that'll be another different but good time to be shooting as well. So if you go out early in the morning, or the tail end of sunset, the very back end of sunset, twilight is the general time when the Sun is below the horizon. The Blue Zone. I consider twilight the larger time span in the Blue Zone is really when it's at its very best when you want to be shooting. That's when you get this very nice color and tonality of blue. So there's a lot of things that make it great for shooting a lot of different types of subjects but in general, you're going to have terrible light in the front side of your subjects. So if you want to see this baobob tree right here, it looks terrible, but if you want to see the shape of the baobob tree, it's fantastic. So think about things with shape. This is a terrible time to do people photography. You could have someone standing up on a hillside with their arms up, you're gonna have to have them hold steady because it's going to be a long exposure and so we're looking for things that can make nice silhouettes in some cases. Now, the other side is for doing more city photography. If you have sometime with light, this twilight time is very important because there's a balance between the light that you see here, the artificial lights and the blue sky, this is something that I'm going to diagram for you here in just a moment. So you have to work very careful about where this is. It happens very, very quickly as I mentioned. So looking for subjects with distinctive shapes or lights on them and depends on where you are but about 15 to 60 minutes before sunrise or after sunset is when you're likely to see it. You're probably going to need to underexpose, if you look at that image, it is mostly dark and this is often the best time for doing your city shots. Take a look at a National Geographic that does a story on a city. It does a story on some old city, chances are they're going to have photographs of that city in this Blue Zone time. That's when cities look really sexy and good. So out in nature, we're looking for things that have nice silhouettes to them. In Morocco, it's a silhouette time. In the city, we're looking for something that has nice lights to it. So having that blue sky just adds a lot to it compared to just a completely black sky. You can shoot this at this time of the year, you can have 12 hours in which to get a black sky behind you but if you want this blue sky, you have maybe five minutes in the morning and five minutes in the evening and that is the time of day that you will not catch me eating dinner if there's a good photographic possibility anywhere around me, I am out trying to get that in a photograph. Alright, so, nighttime. Let's do a time lapse in this case. On the bottom, we're going to be going towards sunset and, actually, this is sunrise, I'm sorry. Light's getting brighter, we've entered the Blue Zone and then it gets kind of dark and it's not as good cause the sky's a little too bright here. Now in this case, we have a lot of clouds rolling in, it's just ugly down here. And we're waiting for sunrise, sunrise has officially happened but we haven't seen the Sun because it officially needs to come up through the clouds here. So we have a couple different peaks here. The first one is when the sun starts getting up a little bit and illuminating that blue sky in the background. Then we have this dead period of time and time to sit down. Now I was actually out, at Garret Park again, this was a Saturday or Sunday so a lot of people had the day off so there's a lot of photographers coming in and you could just hear the clicks of the shutter. This is the sound of the shutters, okay? this is a sound wave of the shutters. It got up here and people, like "Hey, this looks good, click, click, click." and then it would just kind of naturally tail off and I'm not sure how many people were consciously aware of exactly what's going on with the lighting but then as the Sun rise starts coming up again you start hearing more "Click, click, click, click, click" because that's when the lighting gets a little better. There's a little dip here just because it was going in and out of the clouds. So I got a couple of a little time lapses, thinking about this. But this just kind of helps me categorize going, "When do I want to concentrate shooting?" and "When do I want to take my little breaks?" This is a nice twilight time, this is a good example of having the city lights on but still being able to see a little bit of color in that sky and the color in that sky really adds a lot more than just having a perfectly black sky. Also getting this reflected light on Mt. Rainier in the background. So let's diagram what's going on here. We're going towards sunset on this. Now on the top, we have pure sunlight, it's getting a little bit darker, some of the city lights are turned on, some of the city lights are turned off. As the sun is going after sunset, it gets just darker and darker and darker, let's hold here for a moment. So we have three different things going on. We have the sun getting darker, we have the lights that are currently on. They don't change in brightness, right? Once you turn a light on, I mean, the fluorescent lights take a little while to heat up but for the most part, they're steady. So those are on and then down here, we have lights that are turned off. Now for a lot of these buildings, for a lot of government situations, there is a point where they're supposed to turn their lights on. There's a certain light level that lights are supposed to go on. And so when those lights go on, that is usually a very good time to start shooting. Because what's going to happen, is we get here, this intersection right here, that's the Blue Zone, right there when the ambient light is matching the artificial light and then what happens is it just gets darker and darker and darker and you can start doing your nighttime stuff down here. But what this Blue Zone right here, you're going to get this really nice balance between the artificial lights in the building and the blue lights in the background. You can shoot here for 10 or 15 minutes but chances are you're going to find a particular color in tonality that you really like and it's going to last about 15 seconds and you're going to get one shot where things are perfect. And what's very difficult is a lot of times, the shots that I'm shooting in here are 15 second exposures. So, you're like "Maybe I can get three good shots off in this time." And it's still going to be pretty good five and 10 minutes before and after but there is kind of a moment where you're going to say this is the best lighting possible. So it comes and goes very quickly. So I think this is a very nice balance, I shot several photos, but this is one where I really like the balance of the blue sky versus the city. Now you'll notice this beautiful light on Mount Rainier. What's illuminating that? Well, I pointed the camera over to the horizon where the sun had set, this is my reflector. This is the light that is illuminating a little bit of the buildings and illuminating Mount Rainier. That's what the sky looks like over on the right hand side as I turn the camera. In Istanbul, Turkey, I got up early in the morning and I was photographing, and I was doing a series of shots. I kind of lucked out because as a teacher, it's a perfect example. You want to see what it looked like two seconds later? Can it really be that much different two seconds later? They turned off the lights. As soon as they turned off the lights, let me go back, look at the difference between turning the lights on and off. Look at this folks, I can turn the lights on this building on and off! See, there's a switch right here, I just switch it on. It makes a huge difference whether those lights are turned on or turned off. I know that I've had had other situations where I'm photographing in the morning and as soon as they turn the lights on, it's like "Okay, goodbye, I'm done for the day, it's over." I know when Ken and I were in Cuba, we're shooting the cars coming down the street and it's sunset and we're kind of waiting for the lights to come on. We're doing this streaked blur shots of the cars coming down the street. We'll just get some practice in now, it's just not that important. As soon as these cars turn their lights on, that's when things get good. But you only have about 15 minutes because then it's going to get too dark. So we need this area right when the lights are being turned on or right when they're being turned off. That's usually that between time and also, one of the other concepts that I've talked about in other parts of the class is having something ina photograph that we don't see with our own eyes very much in the time. This is something that only happens for a few minutes a day. So having this captured in a photograph gives people something to look at that that they don't see on a regular basis all the time. And so, up on the top of the space needle, I bought a yearly pass if the day was particularly good and I thought that I could get good shots that one day and so I went down there so that I could be here at this two minute period of time and so in someways, I invested a year so I could be in the right place at the right time. And them some yahoo with an iPhone comes up next to me says "Wow, this looks pretty good! "Hey, that's a nice shot. "Alright, I'm pretty good!" You know that's why some people do get lucky and they're in the right place at the right time. But recognizing it is part of the battle. And so here I am in Rome once I've kind of nailed exactly where I want to be, these lights get turned off at a certain point and you lose, it's got this very artificial orange light but there's also a very nice play between orange and blue in it. So that's a another element we'll talk about when we get to the color sections. But this can only happen at a certain place for a very short period of time. And if you're on the other side of the Colosseum and you start realizing this, by the time you work your way around here which can take you five minutes to get over here, it's gone. That's why having a couple a day to kind of really suss out the situation and find out where the lighting is and where you want to be during those very peak moments.
Class Materials
Free Download
Bonus Materials with Purchase
Ratings and Reviews
a Creativelive Student
Love love all John Greengo classes! Wish to have had him decades ago with this info, but no internet then!! John is the greatest photography teacher I have seen out there, and I watch a lot of Creative Live classes and folks on YouTube too. John is so detailed and there are a ton of ah ha moments for me and I know lots of others. I think I own 4 John Greengo classes so far and want to add this one and Travel Photography!! I just drop everything to watch John on Creative Live. I wish sometime soon he would teach a Lightroom class and his knowledge on photography post editing.!!! That would probably take a LOT OF TIME but I know John would explain it soooooo good, like he does all his Photography classes!! Thank you Creative Live for having such a wonderful instructor with John Greengo!! Make more classes John, for just love them and soak it up! There is soooo much to learn and sometimes just so overwhelming. Is there anyway you might do a Motivation class!!?? Like do this button for this day, and try this technique for a week, or post this subject for this week, etc. Motivation and inspiration, and playing around with what you teach, needed so much and would be so fun.!! Just saying??? Awaiting gadgets class now, while waiting for lunch break to be over. All the filters and gadgets, oh my. Thank you thank you for all you teach John, You are truly a wonderful wonderful instructor and I would highly recommend folks listening and buying your classes.
Eve
I don't think that adjectives like beautiful, fantastic or excellent can describe the course and classes with John Greengo well enough. I've just bought my first camera and I am a total amateur but I fell in love with photography while watching the classes with John. It is fun, clear, understandable, entertaining, informative and and and. He is not only a fabulous photographer but a great teacher as well. Easy to follow, clear explanations and fantastic visuals. The only disadvantage I can list here that he is sooooo good that keeps me from going out to shoot as I am just glued to the screen. :-) Don't miss it and well worth the money invested! Thank you John!
Vlad Chiriacescu
Wow! John is THE best teacher I have ever had the pleasure of learning from, and this is the most comprehensive, eloquent and fun course I have ever taken (online or off). If you're even / / interested in photography, take this course as soon as possible! You might find out that taking great photos requires much more work than you're willing to invest, or you might get so excited learning from John that you'll start taking your camera with you EVERYWHERE. At the very least, you'll learn the fundamental inner workings and techniques that WILL help you get a better photo. Worried about the cost? Well, I've taken courses that are twice as expensive that offer less than maybe a tenth of the value. You'll be much better off investing in this course than a new camera or a new lens. I cannot reccomend John and this course enough!